What Is Normal Mapping and How It Powers Real-Time 3D
At a UK production studio, the first conversation about a new asset is often not about how pretty the sculpt looks, it is about whether that detail can survive the target frame budget. A hero prop may start life in ZBrush or Blender with crisp bevels, panel seams, and surface wear, then end up on a Unity build, a headset, or a browser viewer that cannot afford all that geometry. Normal mapping exists for that exact gap between sculpted detail and real-time delivery. The technique has a long production history. Jim Blinn formalised the modern form in 1978, and later work at SIGGRAPH 1996 and SIGGRAPH 1998 pushed the method toward high-to-low polygon detail transfer, which became a core part of game and film workflows (Normal mapping history). As programmable shaders became standard, it moved from a specialised graphics idea into everyday production practice, and by the mid-2000s it was widely used in PC and video games once shaders were common enough to rely on (Normal mapping became broad production practice).
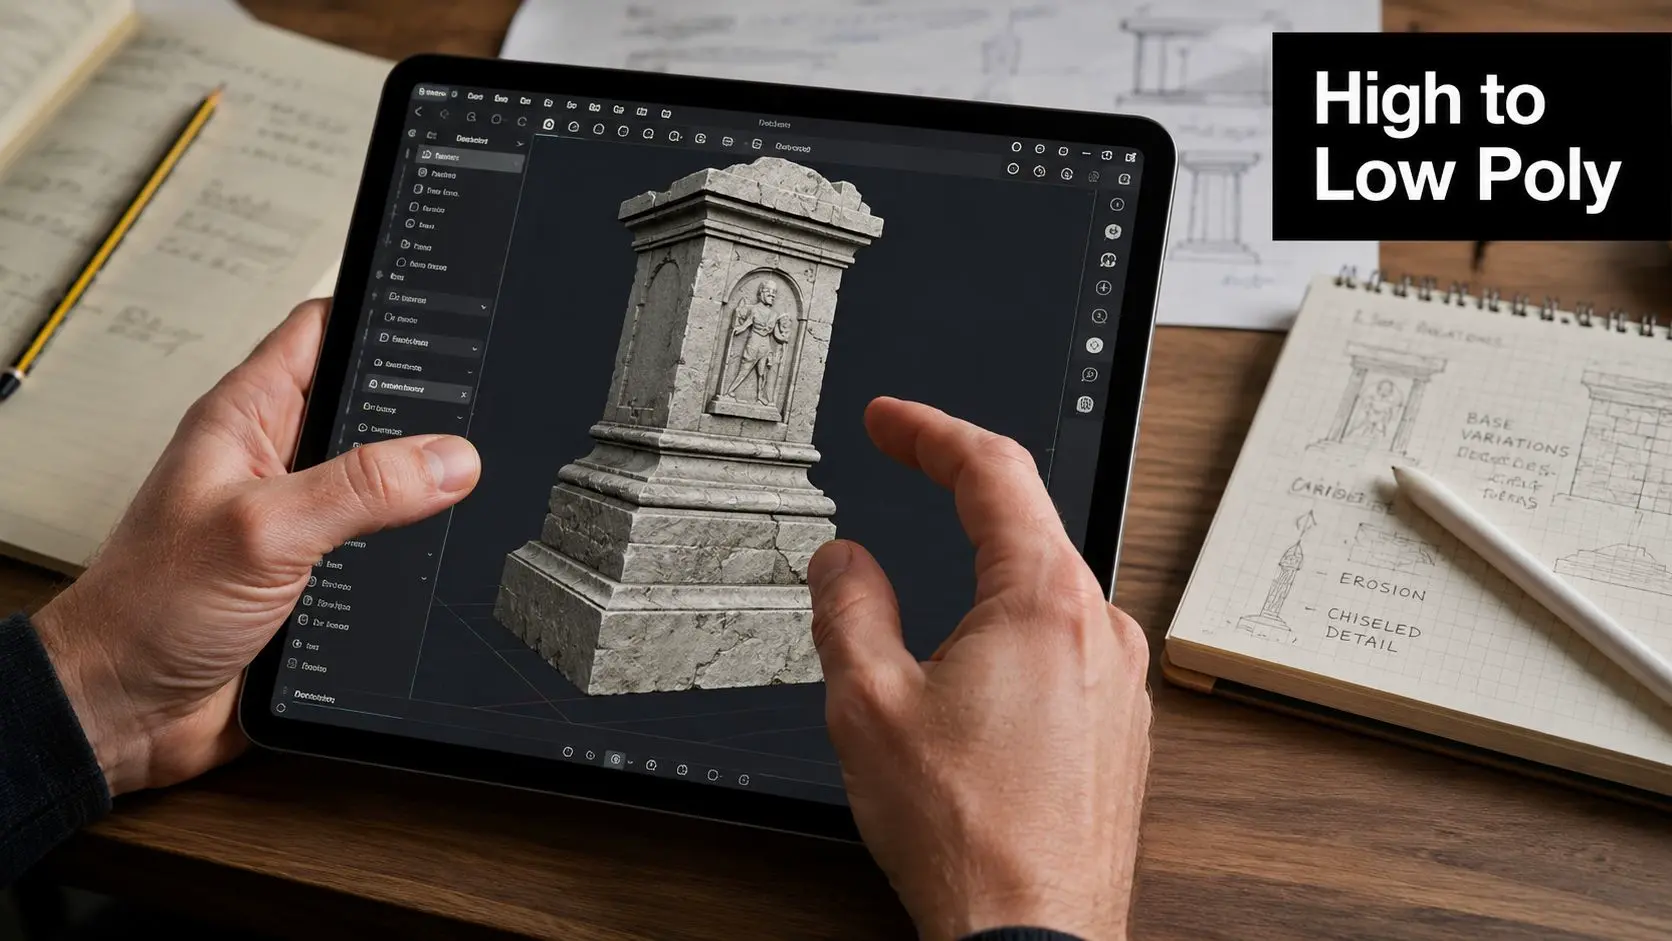
For UK teams, that history matters because the pressure is usually practical rather than purely artistic. One build may need to hold up across console, mobile, VR, and web targets, and each one brings different limits on memory, shader cost, and asset complexity. A normal map lets the studio preserve the read of a high-detail surface without paying for every bump in geometry, which is why it fits so naturally into modern PBR pipelines and cross-platform work. A useful production context comes from realistic 3D rendering for UK studios, where the same balance between visual fidelity and delivery constraints shows up again and again. Bridge Global's note on the influence of gaming on tech evolution points to the wider pattern too, because normal mapping is one of the techniques that moved from graphics research into everyday studio decisions. Once you start using it on real assets, it stops reading like a texture trick and starts reading like a production choice.
Why Normal Mapping Matters in Modern 3D Production
A junior artist usually meets normal mapping at the same painful point every senior artist does. The sculpt looks rich, the retopo is clean, then the target platform says no to all that geometry. On a mobile game, a VR headset, or a browser-based scene, the model needs to look expensive without being expensive. A UK studio has to make that call early, because the same asset may need to survive across console, mobile, VR, and web delivery. Each target puts different pressure on memory, shader cost, and asset complexity. A normal map lets the team keep the read of a high-detail surface without paying for every bump in geometry, which is why it sits so naturally inside modern PBR workflows and cross-platform production.
The Core Function of Normal Maps
Normal maps separate appearance from topology. A hard-surface asset can keep a simple silhouette while the map carries the small bevels and surface noise that sell the material. A creature face can keep the underlying rig light while skin folds and pores live in the texture layer.
Practical rule: if the detail changes how the object feels under light, but not how it deforms in space, normal mapping is usually the first tool to reach for.
That is why the technique became part of everyday real-time rendering in games, XR, and animation. It lets teams keep polygon counts low enough for interactive delivery while still pushing visual detail far beyond what the base mesh would suggest, as described in Normal mapping history and workflow. In a production meeting, that means fewer arguments about whether to remodel every screw head and more focus on what changes the shot. The workflow mindset matters too. A studio might model the hero version of an asset at high resolution, then bake its surface language down for the runtime version. The result is a model that looks dense in motion, but still behaves like a game asset. That same logic supports modern PBR material stacks, where normal detail sits beside albedo, roughness, and metallic rather than trying to do every job alone. Unity's notes on normal map setup in the engine reflect that production split between authored detail and runtime cost. Bridge Global's note on the influence of gaming on tech evolution points to the wider pattern too. Normal mapping is one of the techniques that moved from graphics research into day-to-day studio decisions. Once it is used on real assets, it stops feeling like a texture trick and starts reading like a production choice.
How Normal Maps Work Under the Hood
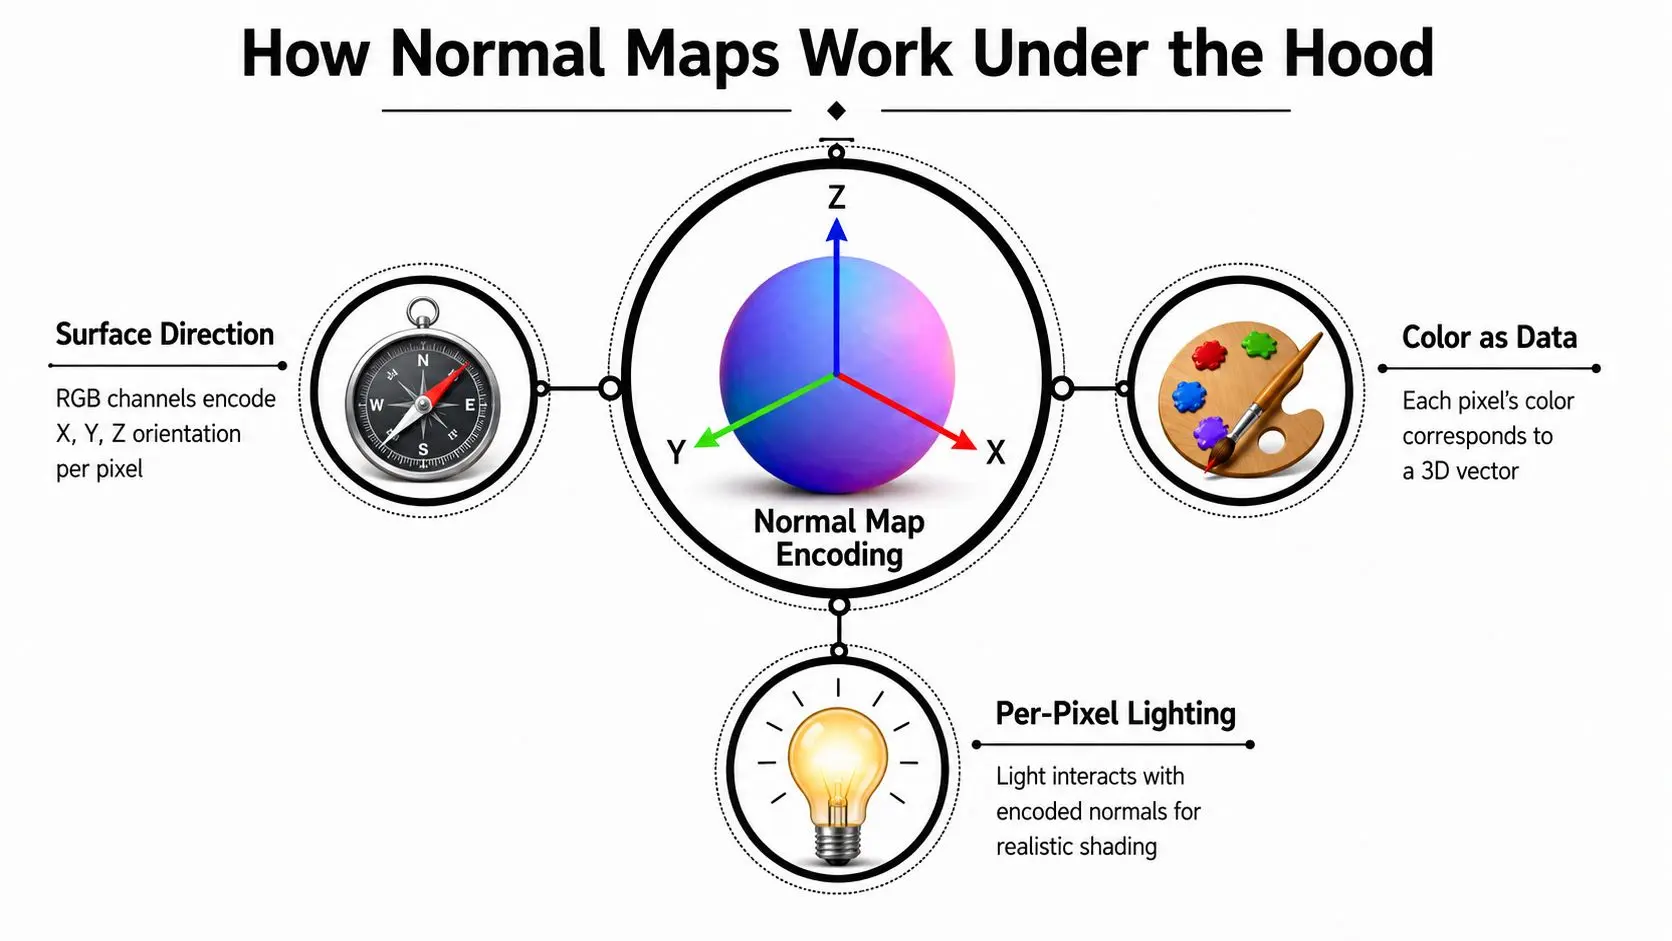
A normal map looks blue-purple because it is not storing colour in the usual sense. It stores direction data. Each texel tells the shader which way the surface should face at that point, and the lighting code turns that encoded direction back into shading.
Reading the texture as a vector
The texture works like a tiny field of surface arrows. Red, green, and blue each carry one axis of a 3D vector, so the pixel colour stands for a normal direction rather than paint. The renderer samples that value and uses the vector to decide how bright or dark that point should look under the current lighting. In production, this is usually handled in tangent space. Tangent-space normal mapping measures the detail relative to the surface's local orientation, not the world around it, so the same map keeps behaving correctly when the object moves, animates, or gets reused in another scene. That local reference frame is why studio assets can travel cleanly between shots, levels, and engine builds without the detail drifting off the mesh.
Why tangent space matters
Tangent space is what keeps a character's arm usable after rigging, or a prop consistent after rotation. The renderer compares light against that local frame per pixel, so the bumps stay attached to the surface instead of floating in world space. For UK-facing real-time and XR work, that makes the technique practical across projects that need to share assets between different cameras, targets, and performance budgets. The shader is not drawing bumps. It is changing how every pixel responds to light. That is the mental shift to keep in mind. A normal map does not alter the mesh, it alters the lighting calculation. The surface keeps the same topology, but the shading gives your eye the impression of extra shape and fine detail.
Normal Mapping Versus Displacement and Bump Maps
Choosing between normal mapping, bump mapping, displacement, and extra geometry comes down to what kind of detail you need and when the detail has to exist. If the asset only needs to look detailed under lighting, normal mapping is usually the cleanest option. If the silhouette itself has to change, you need geometry or displacement.
Comparing the options
| Technique | Performance Cost | Visual Fidelity | Best Use Cases |
|---|---|---|---|
| Normal mapping | Low compared with added geometry | Strong surface detail, no silhouette change | Game assets, VR props, animated characters, reusable materials |
| Bump mapping | Low | Good for subtle shading changes, less convincing than normals | Legacy pipelines, simple material variation |
| Displacement | Higher because it changes actual surface position | Very high when the renderer supports it well | Cinematic close-ups, offline renders, hero assets |
| Extra geometry | Highest in most runtime contexts | Highest for silhouette and deformation | Close-shot props, assets that must physically change outline |
The main difference is where the illusion happens. Bump maps perturb shading more roughly, while normal maps encode a full surface direction and usually read much better in motion. Displacement changes the mesh itself, so it can create true contour change, but that costs more and needs a pipeline that can support it. Extra geometry is the blunt instrument. It's reliable, but it's rarely the right answer for a real-time scene unless the silhouette is doing critical work. For a game character, normal maps often win because they preserve rig performance and keep the asset flexible. For a VR environment prop, they're still the first choice if the player won't touch or inspect the object from extreme angles. For architectural visualisation, you might use them alongside higher-detail methods depending on camera distance. For cinematic renders, you can afford to push further, but normal maps still help trim unnecessary mesh density. The right decision is less about which method is “best” in abstract terms and more about which one keeps the shot believable at the target cost. That's the production question.
Creating and Baking Normal Maps for Production
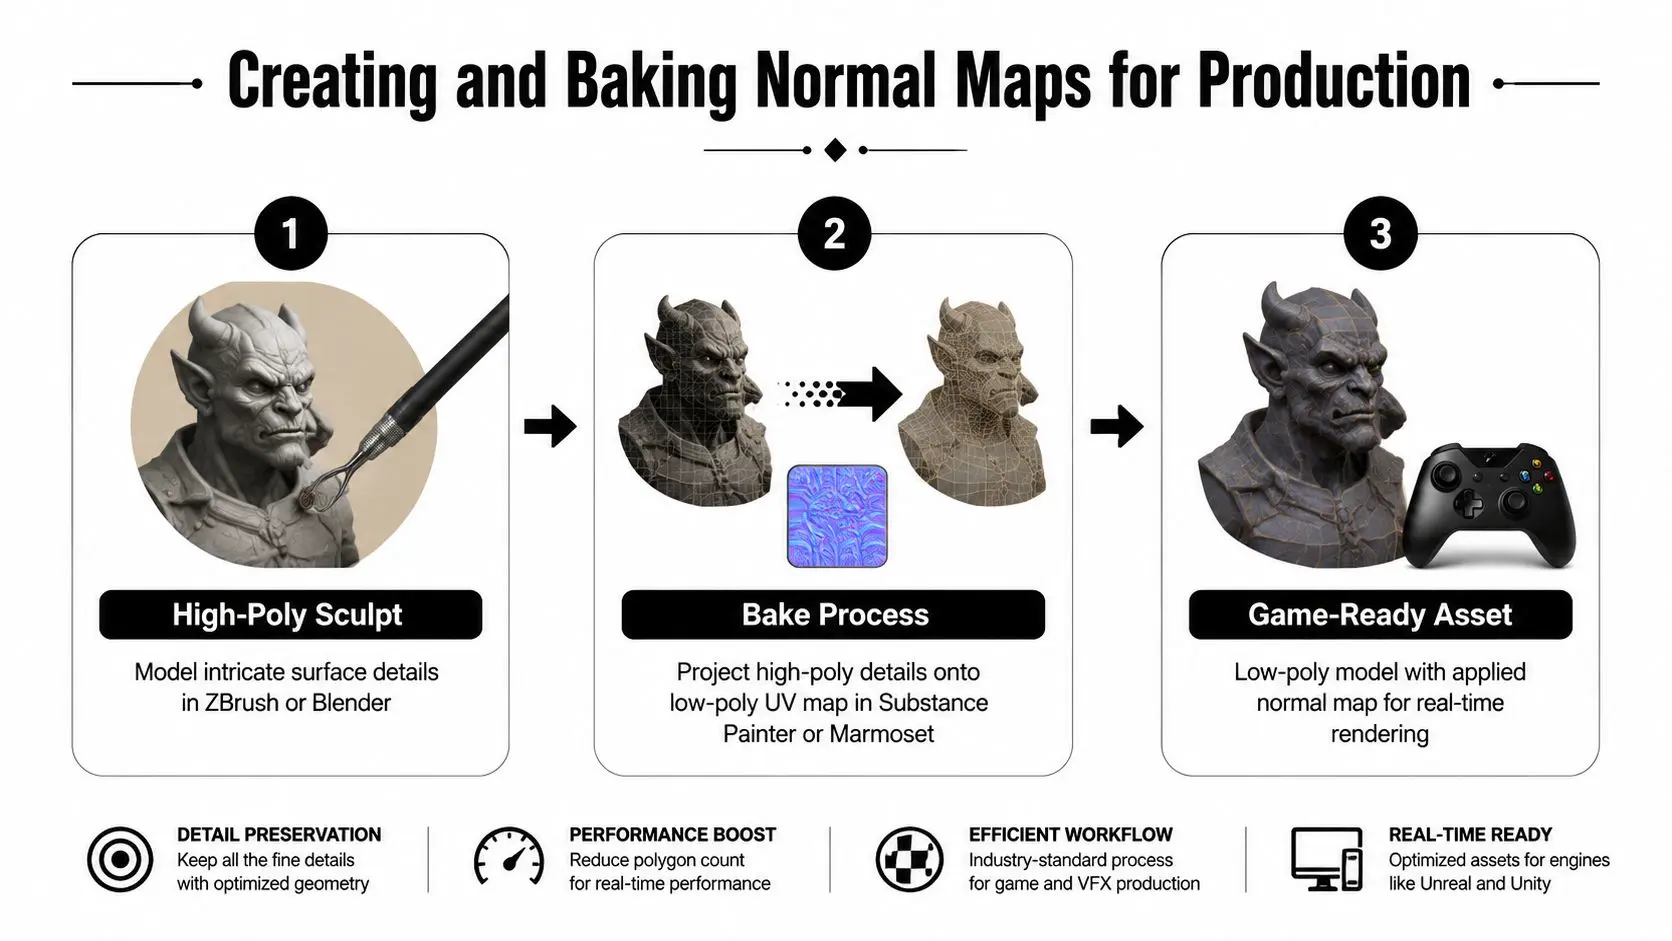
The most dependable normal maps usually come from a high-poly source, not from painting detail by hand. A sculptor builds the dense version, the modeller creates the game-ready mesh, then the bake transfers the surface information across. That handoff is where most of the quality issues show up.
Getting a clean bake
The bake has to respect the relationship between the two meshes. Cage settings, ray distance, UV layout, and smoothing groups all affect whether the detail lands cleanly or throws artefacts. If the cage is too tight, rays miss the sculpt. If it's too loose, they can hit the wrong surface and project bad information. Common problems are usually predictable. Seams appear when UV islands or tangents don't line up. Stretching shows up when the UVs are uneven. Projection errors happen when the ray cast hits the wrong part of the source mesh. None of those are mysterious once you know what the baker is trying to do, it's just a transfer problem with a lot of small ways to go wrong.
Practical rule: bake late enough that the topology is stable, but early enough that you still have time to fix UVs, cages, and naming before the asset ships.
Engine considerations that matter
In Unity, the normal map has to be treated as normal data, not as a regular colour texture. In Unreal Engine, the same principle applies, but the import and material setup need to match the engine's expected normal format and compression path. If the texture is compressed or interpreted incorrectly, the lighting will look muddy, inverted, or oddly faceted. That's why the production workflow should treat the normal map as part of the full PBR set, not as a loose texture thrown in at the end. It belongs with the roughness and base colour maps, and it should be named, previewed, and validated the same way. A useful starting point for studio-level implementation details is this guide to Blender 3D add-ons for studios, especially if you're streamlining bake-heavy workflows.
Performance Optimisation and Platform Constraints
Normal mapping is an optimisation technique, but it isn't free. Each texture sample has a cost, and each extra layer in the material stack adds work for the renderer. If you're building for a powerful PC, that cost may be easy to absorb. If you're building for mobile or standalone VR, it can become a real constraint. The first trade-off is texture memory. A high-resolution normal map can carry beautiful detail, but it also consumes more memory and bandwidth than a leaner version. The second trade-off is sampling cost. The shader still has to read the map and apply the lighting math, so the more layered the material becomes, the more careful you need to be.
Where quality slips first
The most common mistakes are usually practical, not theoretical. A texture can be too large for the target device, the compression can soften the micro-detail, or the map can fight with other channels in the same material. If the asset also uses detail normals, masks, and layered roughness, the budget adds up fast.
Compression is where a lot of “mysterious” normal map problems really start.
That's especially true in web and mobile pipelines, where the available formats and engine support can differ. The research notes that real-world web 3D work often has to choose normal-map formats carefully, because some pipelines default to one format on desktop and another on mobile. It also notes that getting higher quality can require extra encoding work, which isn't always worth it if the project needs a clean, predictable trade-off between quality and speed (Normal map compression discussion).
Practical optimisation moves
- •Use the lowest resolution that still holds the silhouette of the detail in motion. Tiny surface noise can disappear once the camera pulls back.
- •Prefer one strong bake over several redundant layers. Every extra map adds complexity.
- •Test on the actual target hardware. What looks fine in a desktop viewport can fall apart on a headset or phone.
- •Treat the map as part of the material budget, not a decorative add-on. That keeps decisions honest.
Normal maps are there to save geometry, but they can still waste memory if the asset is over-authored. The right choice is the one that keeps the scene believable without letting the texture stack dominate the build.
Normal Mapping in Modern Real-Time Pipelines
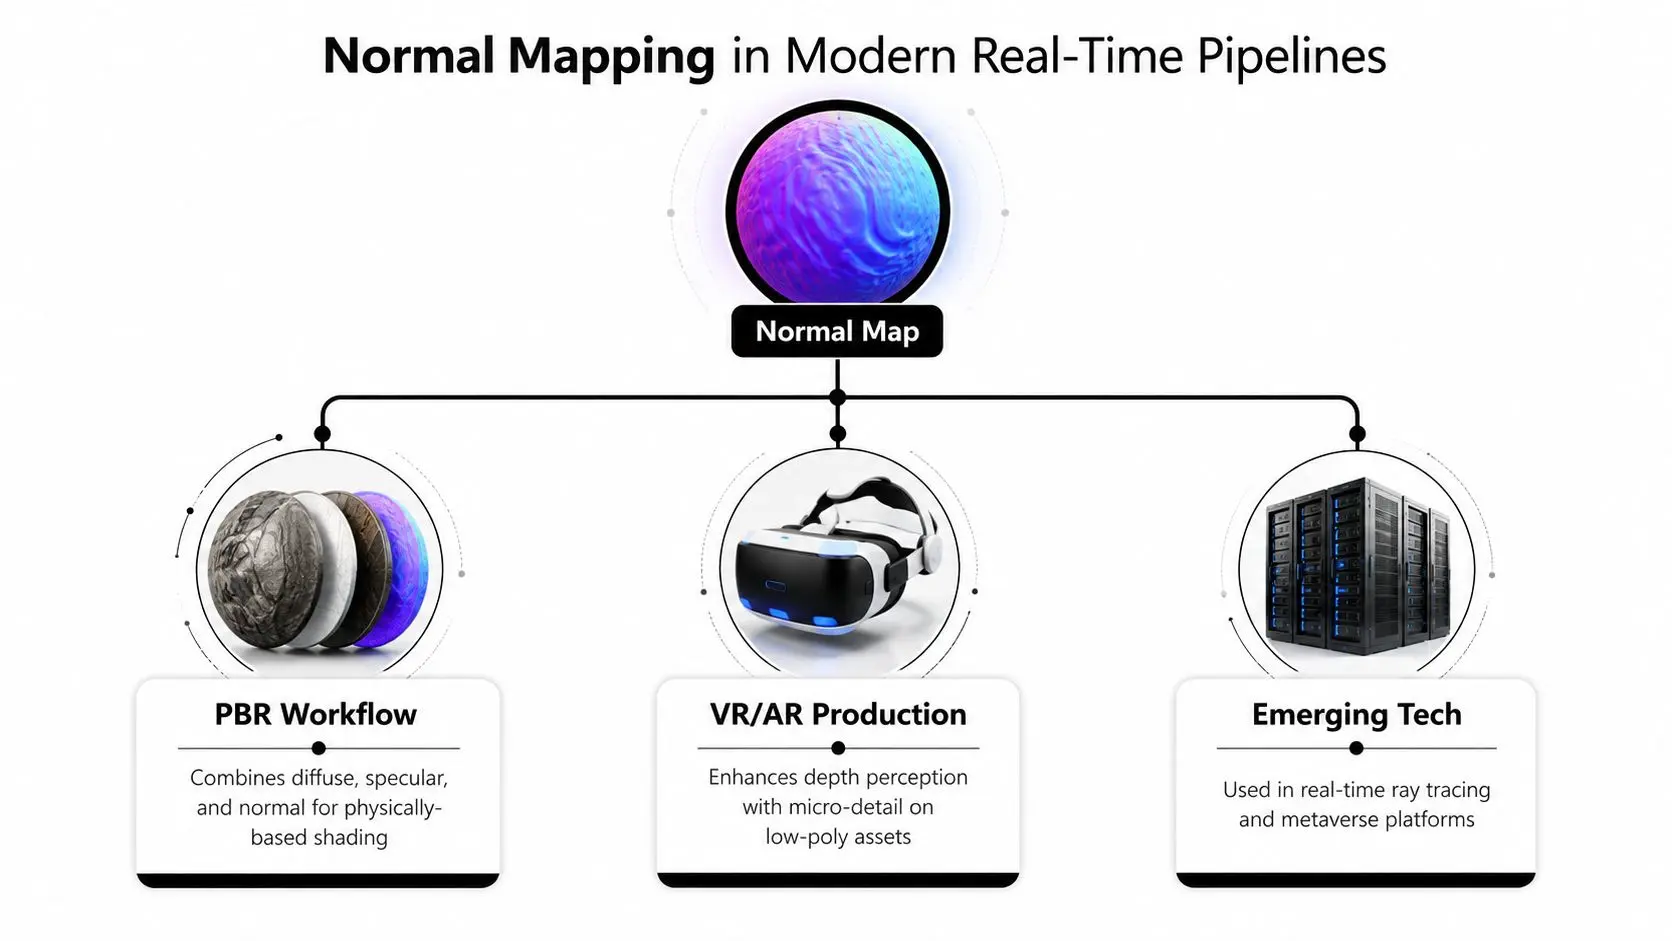
Normal mapping still matters because modern pipelines haven't replaced it, they've absorbed it. In a typical PBR material, it sits beside albedo, roughness, metallic, and ambient occlusion, each map doing one specific job instead of forcing a single texture to fake everything. That division of labour is what keeps materials readable and reusable across different projects.
Where it fits now
In real-time engines, the normal map still gives the fastest route to fine surface detail on a light mesh. In VR and AR, it helps improve depth perception on assets that can't afford dense topology. In newer workflows, it also sits alongside technologies that push more geometric detail into the renderer, which changes the balance but doesn't remove the need for a good normal map. That's why a key production question in 2025 isn't “should we use normal maps at all?” It's “which assets need them, where does displacement make more sense, and where is the mesh itself worth the extra cost?” The right answer depends on camera distance, interaction, device class, and whether the asset has to survive across multiple delivery targets.
A pipeline mindset that holds up
For UK studios, the issue is consistency. Assets often have to move from one engine or output path to another, and the normal map has to stay trustworthy through all of it. The map needs to survive baking, compression, import, and shader interpretation without changing the look of the asset in a way that breaks the art direction. The best teams treat normal mapping as one part of a broader content strategy, not a last-minute polish pass. That means deciding early whether the asset needs surface illusion, true geometry, or a combination of both. A production-led comparison of real-time workflows like Unreal versus Unity for real-time animation can help frame those decisions in the engine itself. If you're planning a 3D, XR, or animation project and want a team that can advise on normal mapping, real-time rendering, and delivery constraints from the start, visit Studio Liddell and book a conversation. They can help you map the visual target to the right production path, so you're not overbuilding geometry where a cleaner bake will do the job.