How to Make Animated Videos: From Script to Delivery
A 60-second product explainer can lose three weeks before a single finished frame exists if the team starts modelling before it agrees the script. That delay isn't a failure of animation software. It's a production decision made in the wrong order, followed by approvals and rework. Knowing how to make animated videos means managing the decisions as carefully as the pictures. Settle the message, approve the timing, then build a style and production plan that fit the audience, budget and delivery platforms.
The Full Production Pipeline from Idea to Delivery
The production chain starts with an idea and script, then moves through a storyboard and animatic, style choice, asset creation, rigging, animation, lighting and rendering, compositing and visual effects, sound design, review, and delivery. Each stage should produce something the producer and client can sign off: an approved script, timed animatic, model sheets, animation pass, sound mix or final master. In 3D, some work overlaps, but later decisions still rely on earlier approvals.
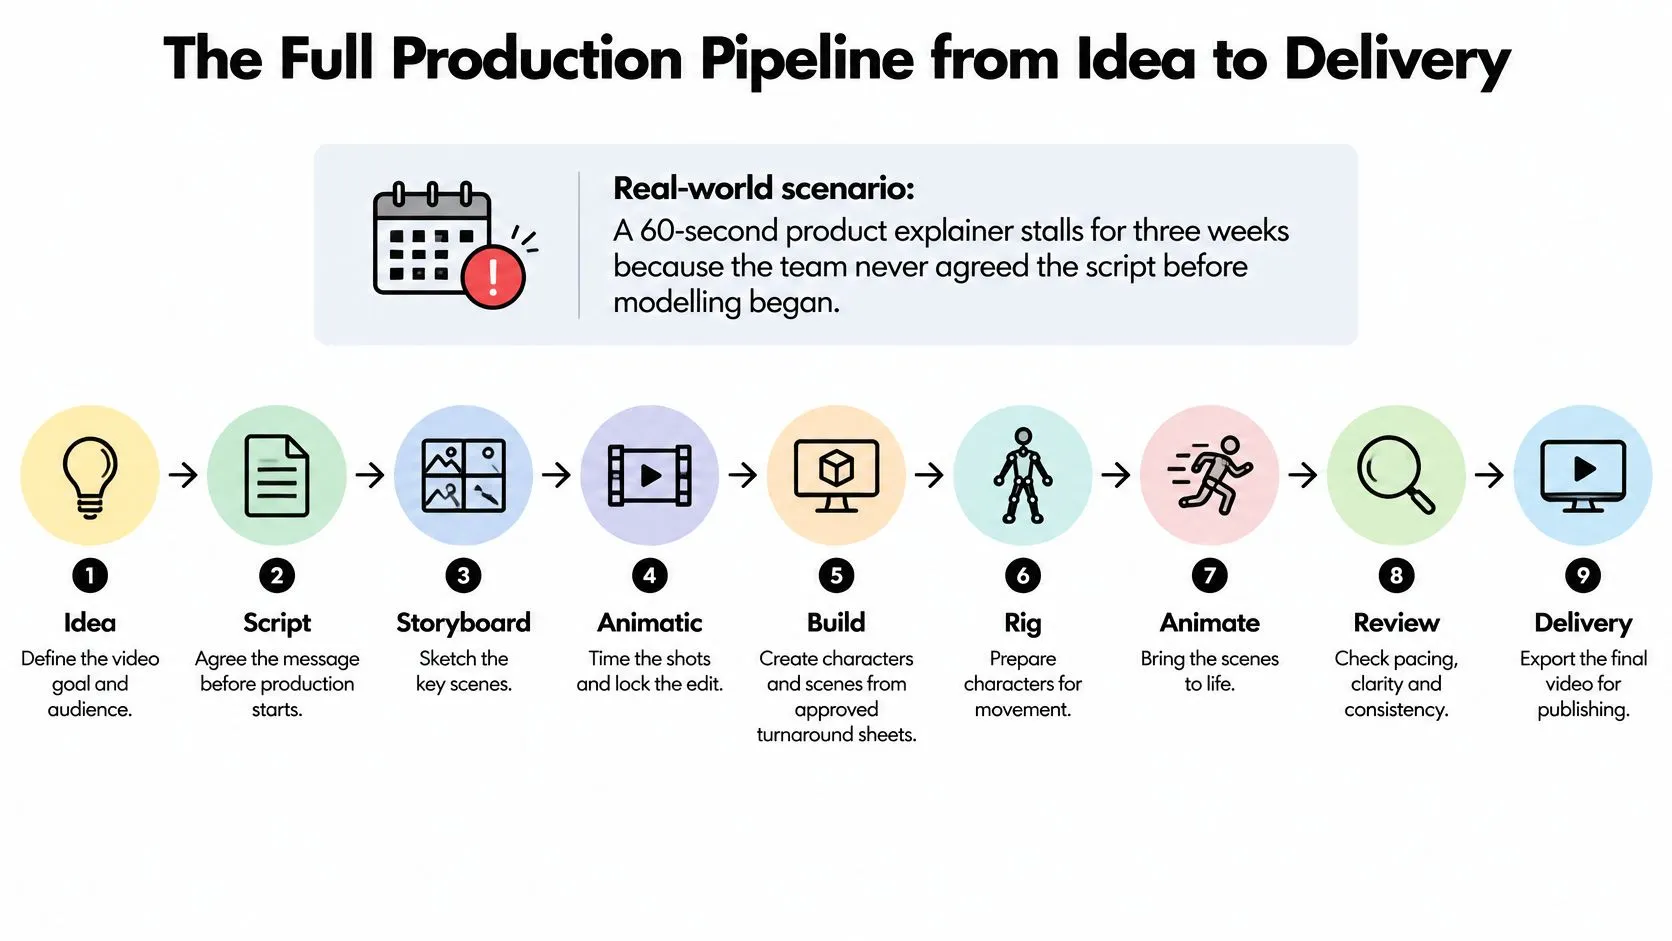
A review loop belongs between most stages, not just at the end. If a stakeholder changes the product message after character modelling, the team may need to revise the script, storyboard, assets and animation. That's why approvals and rework often take more effort to manage than making the pictures. You can draft a premise, write a first script and sketch storyboards with a word processor, presentation software or paper. Free or low-cost editing tools can help you assemble a rough animatic. Character modelling, rigging, animation, rendering and sound mixing usually need specialist skills when the finish has to meet a professional brief. For an accessible overview of generative workflows, this AI video guide for creators is useful background, but AI tools don't replace sign-off or production planning. Treat the stages below as a working checklist. At each handover, ask what has been approved, what remains open and who has authority to approve the next step.
Plan the Script and Storyboard Before Any Animation
A finished animation can't be clearer than its approved script. Settle the message before anyone starts modelling or building scenes. A useful storyboarding guide for UK productions can help you turn that message into shots and timings.
- Write a one-sentence premise. Name the viewer and one action you want them to take, such as booking a demo or remembering a product name. If the sentence contains several different goals, decide which one matters most. The usual mistake is trying to explain every feature in the same short video.
- Draft the narration and read it aloud. At about 140 words per minute, a 90-second video needs roughly 210 words of narration. Reading aloud reveals sentences that are awkward to say or too dense to follow. Don't rely on a word count alone; pauses, product names and on-screen action affect timing.
- Break the script into shots. Use index cards or a spreadsheet, with one row per shot. Note the narration, action, on-screen text and any logo placement. One message per shot makes the story easier to understand and easier to revise.
- Draw the storyboard. Each panel should show camera framing, the main action and any dialogue or narration cue. Sketches don't need to be polished. They do need to make the action and transitions clear enough for someone else to follow.
- Build the animatic. Time the panels against a rough voice-over so every shot has a duration. This catches pacing problems before detailed animation starts, when changes are cheaper.
- Test it with fresh eyes. Show the animatic to three people who haven't seen it and ask them to restate the message in their own words. If they miss the central point, revise the script or sequence rather than adding more detail.
Approval rule: Lock the shot timings and get written approval before modelling begins. Budget for a second round of script changes, but don't leave the first approval open-ended.The plan is ready when you can explain the video in one sentence and assign a time to every shot.
Choose Between 2D, 3D, Motion Graphics and Stop-Motion
Choose the simplest style that carries the message, then check that it fits the budget and production window. A character who needs to carry emotion points towards 2D or 3D character animation. A diagram, data point or product feature often suits motion graphics, while a tactile, handmade brand story may be a good fit for stop-motion.| Style | Best for | Main production stages | Relative cost | Relative lead time |
|---|---|---|---|---|
| 2D character animation | Storytelling, children's content, recurring characters | Character design, layout, keyframe animation, colour, compositing | Medium | Medium |
| 3D CGI | Product visuals, realistic environments, broadcast series | Modelling, texturing, rigging, animation, lighting, rendering | High | High |
| Motion graphics | Explainers, logo stings, social cut-downs, data | Design system, keyframing, typography, sound design | Low to medium | Low |
| Stop-motion | Tactile, handmade brand stories, craft products | Model making, frame-by-frame photography, compositing | High | High |
Build, Rig and Animate Characters and Scenes
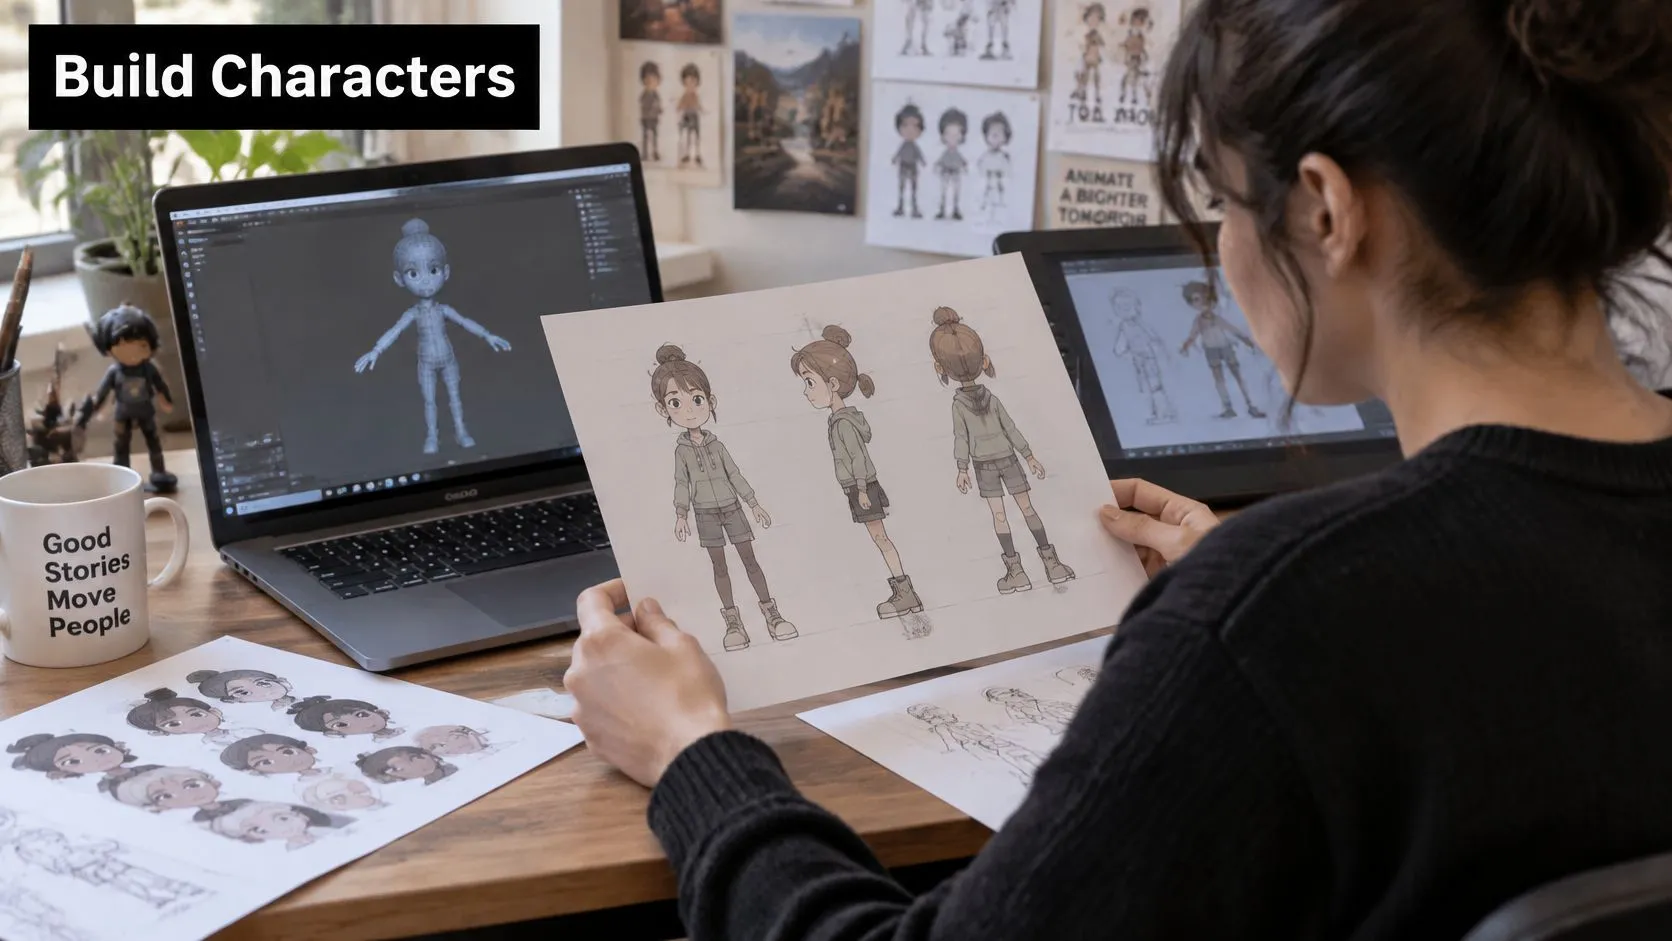
Once the animatic is locked, build the assets to serve the shots, not to display detail no one will see. Keep a reference pack beside the animatic so artists can check proportions, colours and screen size as they work.- Approve a turnaround sheet. Draw or design the character from the front, side and back before modelling. This gives the team a shared reference and helps catch design disagreements before they become expensive revisions.
- Build the assets. Model 3D characters and environments, or draw 2D elements, at a level of detail that suits the final framing. A small background prop doesn't need the same work as a character shown in close-up.
- Rig for the performance. Add controls for the body, hands and face, then test them against the poses in the storyboard. A rig should make the required actions practical to animate. Freeze approved rig versions so later adjustments don't break shots that are already complete.
- Block the key poses. Place the main poses against the animatic timings. Check that the action reads before adding in-betweens, facial nuance or secondary movement. If the main pose doesn't communicate the moment, extra motion won't fix it.
- Refine and check each shot. Adjust spacing and easing so movement feels intentional. Compare every shot with the animatic to catch timing drift and confirm that the action still supports the message.
Light, Render, Composite and Mix the Sound
Finishing works best as a set of linked jobs. Set the lighting, test it cheaply, render flexible passes, composite the image and mix the soundtrack. Reversing that order creates avoidable work: a full-quality render is wasted if the shot or lighting still changes. Start each scene with a lighting plan. A key light establishes the main direction, a fill light controls shadow detail, and a rim light can separate a character from the background. Decide what mood each choice supports, then run low-resolution tests to catch colour and exposure problems before committing to final renders. Render in passes where the software allows it. A beauty pass contains the main image; separate shadow, depth and effects passes let the compositor adjust individual elements without asking for a complete re-render. Keep a shot list of render settings so changes stay organised across the sequence. In compositing, combine the passes, add effects such as particles or light flares, and grade the shots so the colour feels consistent. Then build the soundtrack in three layers: narration, sound effects and music. Keep the narration intelligible above the music, and check the balance on both headphones and a phone speaker. A guide to licensing sound effects for animated videos can help you plan the rights side of the sound edit.Rendering at full quality before the shot is approved turns a small change into an expensive wait.Mix to the delivery specification rather than guessing at a level. UK broadcast uses EBU R128 at -23 LUFS; check the broadcaster's delivery requirements before mastering. Online platforms may call for a different target, so keep the master and platform exports organised as distinct deliverables. The final master should play cleanly with sound off, and the story should still make sense without its music. If the narration carries information the image doesn't, provide captions and check the mix again on a small speaker.
Make the Video Accessible for UK Viewers
Accessibility belongs in the production plan, not in a last-minute pass after the picture is locked. Clear pacing, captions and strong visual hierarchy can help audiences follow the story, including young viewers and children with additional needs. Parliamentary evidence on accessible content recommends visual clarity and slower pacing for young audiences, including autistic viewers, in its written evidence on children and accessibility.- Pacing. Hold a shot long enough for viewers to understand the action and read the captions. Remove movement that doesn't help the story. Quick cuts aren't automatically engaging if they make the message harder to follow.
- Captions and transcript. Write captions during authoring and time them against the animatic. Check every line against the narration, then supply a transcript as a companion file. Adding captions only after animation is finished can force costly timing changes.
- Audio description. If a story point depends on something visible but not spoken, write a concise description track. Place it in a gap between dialogue so it doesn't compete with essential speech.
- Colour and contrast. Check text and important characters against their backgrounds with a contrast checker. Don't use colour alone to signal a choice, status or change; pair it with shape, words or another clear cue.
- Sensory load. Limit flashing, rapid cuts and sudden loud effects. Where the project calls for it, prepare a calmer version that reduces intense movement and sound without removing information.
Review, Test and Deliver Platform-Ready Versions
Late changes cost more than early ones. A revised line in the script stage takes minutes. The same change after rendering can mean re-animation, re-lighting, re-rendering and a new mix. I recommend three bounded review rounds to contain that risk. Round one covers story and timing. Round two covers animation and visuals. Round three is polish only. Collect every note in one document with timecodes and mark what is out of scope. After round two, freeze the edit. Build every platform export from one approved master. Television and phones punish different weaknesses, so check framing, captions and sound on both. A composition that reads well on a large screen often loses its subject on a phone, and small type that looks crisp in HD can turn to blur in a vertical crop.| Platform | Aspect ratio | Typical length | Captions | Export note |
|---|---|---|---|---|
| YouTube and websites | 16:9 | 30 seconds to 3 minutes | Sidecar subtitle file | Export a high-quality master and upload a sidecar caption file |
| Vertical social (TikTok, Reels, Shorts) | 9:16 | Short-form cut-down | Burned-in captions | Keep text inside the central safe area |
| Square feed posts | 1:1 | Short-form cut-down | Burned-in captions | Crop from the master and check the edges |
| UK broadcast | 16:9 | As the broadcaster specifies | Subtitle file to broadcaster spec | HD master delivered to the broadcaster's file spec |
- •Play the master on a phone with the sound low. The action and message should stay clear without headphones.
- •Check captions and typography at small size. Confirm text stays inside safe areas when the frame is cropped.
- •Watch the opening cold. If the premise is not clear in the first three seconds, tighten the first shot or line.
- •Test thumbnails at small size, where fine detail disappears and faces and bold shapes survive.
- •Export each platform version from the master. Verify each crop, caption file and sound mix separately, because one approved master does not guarantee every derivative is correct.
Fix faults at the source. If captions clip in vertical, reset the safe areas before export. If levels differ between versions, correct the mix. For scheduling approved cuts across channels, a social media scheduler can help organise publishing without changing the production master. UK projects intended for broadcast, including online streaming, may qualify for Animation Tax Relief if they pass the Animation Cultural Test or qualify as an official co-production. Animation Tax Relief has its own eligibility conditions, including expenditure thresholds, so check eligibility with a qualified adviser before relying on relief in a budget. The final test stays practical. A viewer on a phone should understand the video without sound.
Set Your Budget and Choose Your Production Team
A producer quoted £8,000 for a 90 second explainer while another quoted £28,000 for the same length. The difference was not the pictures. One quote covered a single character, two revision rounds and one 16:9 master. The other allowed for three characters, full rigging, supervised AI assistance in backgrounds, plus vertical and captioned versions.
| Budget band | Typical scope | Typical timeline | Likely team |
|---|---|---|---|
| Under £2,000 | Short motion graphics piece or simple 2D explainer | 1 to 3 weeks | Freelance motion designer |
| £10,000 to £50,000 | Broadcast-quality 2D or 3D film with several scenes and a full sound mix | 6 to 12 weeks | Studio team across modelling, rigging, lighting and compositing |
| Over £50,000 | Series, multi-episode or interactive production | 4 months or longer | Studio with production management and specialist roles |
Treat these bands as planning ranges. I recommend asking for costs by stage, script development, asset creation, animation, finishing and platform versions, so you can see where approvals sit. Rework in storyboard costs hours. Rework after render costs days. This guide to animated video production costs for UK budgets shows which questions to ask before you compare quotes. For eligible UK animation, tax relief can change how you record and allocate spend across previz, asset development, animation, lighting, rendering and compositing. Rules cover cultural qualification, broadcast intent and where production spend falls. Check current eligibility with a qualified adviser before you lock the budget, then set up your cost tracking to match production stages.
Choose a team that can explain its pipeline
Shortlist three to five producers whose reels match the style you need. Ask who handles rigging and lighting. Confirm in writing how many revision rounds are included and what counts as a change. Agree delivery formats before production begins, because multi-platform delivery affects the schedule from the start. In-house animators can keep a team closely connected to its production pipeline, a studio-managed freelance team can add specialist skills to a project. Studio Liddell's team includes skilled animators who produce its animated video work, and we also work with freelance animators on client projects. We are based in the UK and work with clients around the world. This week, send the approved storyboard, budget band and delivery date to two or three producers and ask for an itemised quote within a week. The more clearly you define scope, the easier it is to compare like with like. --- Studio Liddell produces 2D and 3D animation, motion graphics and animated explainers, from early planning through delivery. If you're ready to scope a project, share your script or storyboard and visit Studio Liddell to start a production conversation.