How to Create Augmented Reality That Works in Production
Most guides on how to create augmented reality start in the wrong place. They open with Unity, ARKit, ARCore, or WebAR, then act as if the stack choice will rescue a vague brief. In production, the opposite is true, the brief decides whether the AR experience lives or dies, because the device test on a noisy floor, in poor light, is where work begins. A usable AR build starts with a clear answer to a simple question, what should the person holding the phone see, do, and trust in the first few seconds? If you want a practical reference for that kind of outcome thinking in a shopping context, the guide to trying clothes online is useful because it frames visual confidence as part of the experience, not an afterthought.
Start With the Outcome, Not the Engine
The first mistake teams make is choosing a platform before they know what success looks like on launch day. A product visualiser for retail and an exhibition stand demo can both use the same AR approach, yet they need different outcomes, different interfaces, and different tolerance for friction. One brief may care about convincing a shopper to trust a finish or scale, the other may care about keeping visitors moving and interested.
Write the outcome in one paragraph
The simplest useful exercise is to write a one-paragraph outcome statement before anyone opens a build file. Name who is holding the phone, where they are, what should happen after they point the camera, and how you'll know it worked. For premium retail in the UK, that question matters more than ever, because 72% of UK luxury fashion consumers now demand AR in shopping, which makes visual confidence part of the expectation rather than a novelty Skillademia.
Practical rule: if you can't say what the user should do in under 15 seconds, you don't have a build brief yet, you have an idea.
That outcome statement also tells you what not to build. If the experience needs a lot of explanation, the interface is too clever. If it only works in a perfect studio setup, it won't survive a client office, a trade-show stand, or a busy retail floor. The best AR projects are usually the ones that reduce decisions for the user, not the ones that show off every available feature. A good production brief usually looks less like a feature list and more like an operational note. Who's using it, what context they're in, and what proof of success matters on the day. That framing keeps the team honest when the scope starts to drift.
Choosing Between Native, Engine, and WebAR Builds
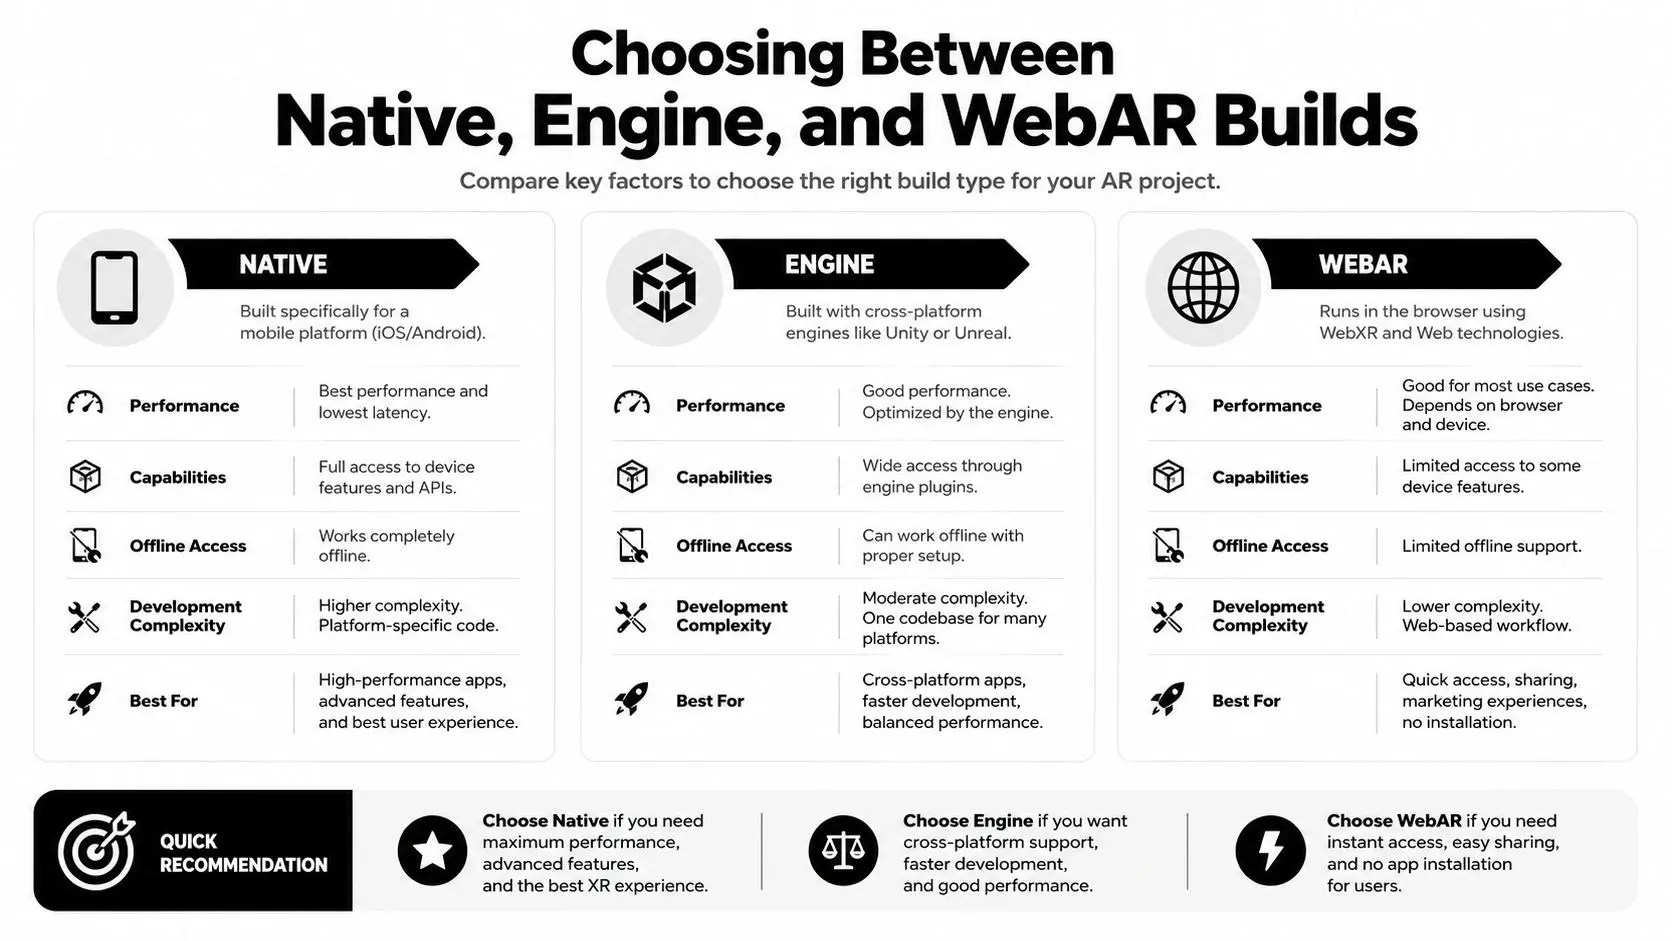
There isn't one correct build path for augmented reality. There are three practical ones, and each makes a different compromise between fidelity, reach, and maintenance. The right answer depends on whether you're optimising for raw device performance, cross-platform reuse, or the lowest-friction launch.
Native wins where trust and performance matter
Device-native AR, usually built around ARKit or ARCore, gives you the most direct access to platform features and usually the tightest performance. It's the right choice when the app is already installed, the environment is controlled, or the experience depends on platform-specific capabilities. The hidden cost is the QA matrix, because every device family, OS version, and sensor combination adds testing time.
Engines give you reuse, but they ask for discipline
An engine-based pipeline, most often Unity with AR Foundation or Unreal, is the common middle ground. It lets a team build once and target iOS and Android with a shared scene structure, which is why it's often the right choice for longer-lived products or branded experiences. The trade-off is build complexity, because you're still dealing with platform plugins, device-specific quirks, and the need to keep assets lean.
WebAR removes install friction, but budgets the whole scene differently
WebAR tools such as 8thWall, Zappar, or WebXR can be a strong fit when one experience needs to be shared across many stakeholders without asking them to install an app. That's especially relevant for public-facing use cases, and it lines up well with e-commerce try-on flows like virtual outfit try-on workflows for e-commerce, where the user's patience is short and the journey has to stay light. The downside is that camera latency, lighting, and asset size become tighter constraints than they are in native or engine builds. One UK-facing guide on web augmented reality for UK businesses makes the same point in practical terms, low-friction access is usually the reason to pick the browser route in the first place.
Native if the app is already there. WebAR if access has to be effortless. Engine if the experience has to live for a while and travel between devices.
A useful rule is simple. If trust and performance are the priority, go native. If many people need the same experience quickly, go WebAR. If you expect to extend the experience, re-skin it, or reuse it across campaigns, an engine pipeline is usually the safer investment.
Building and Optimising 3D Assets for AR
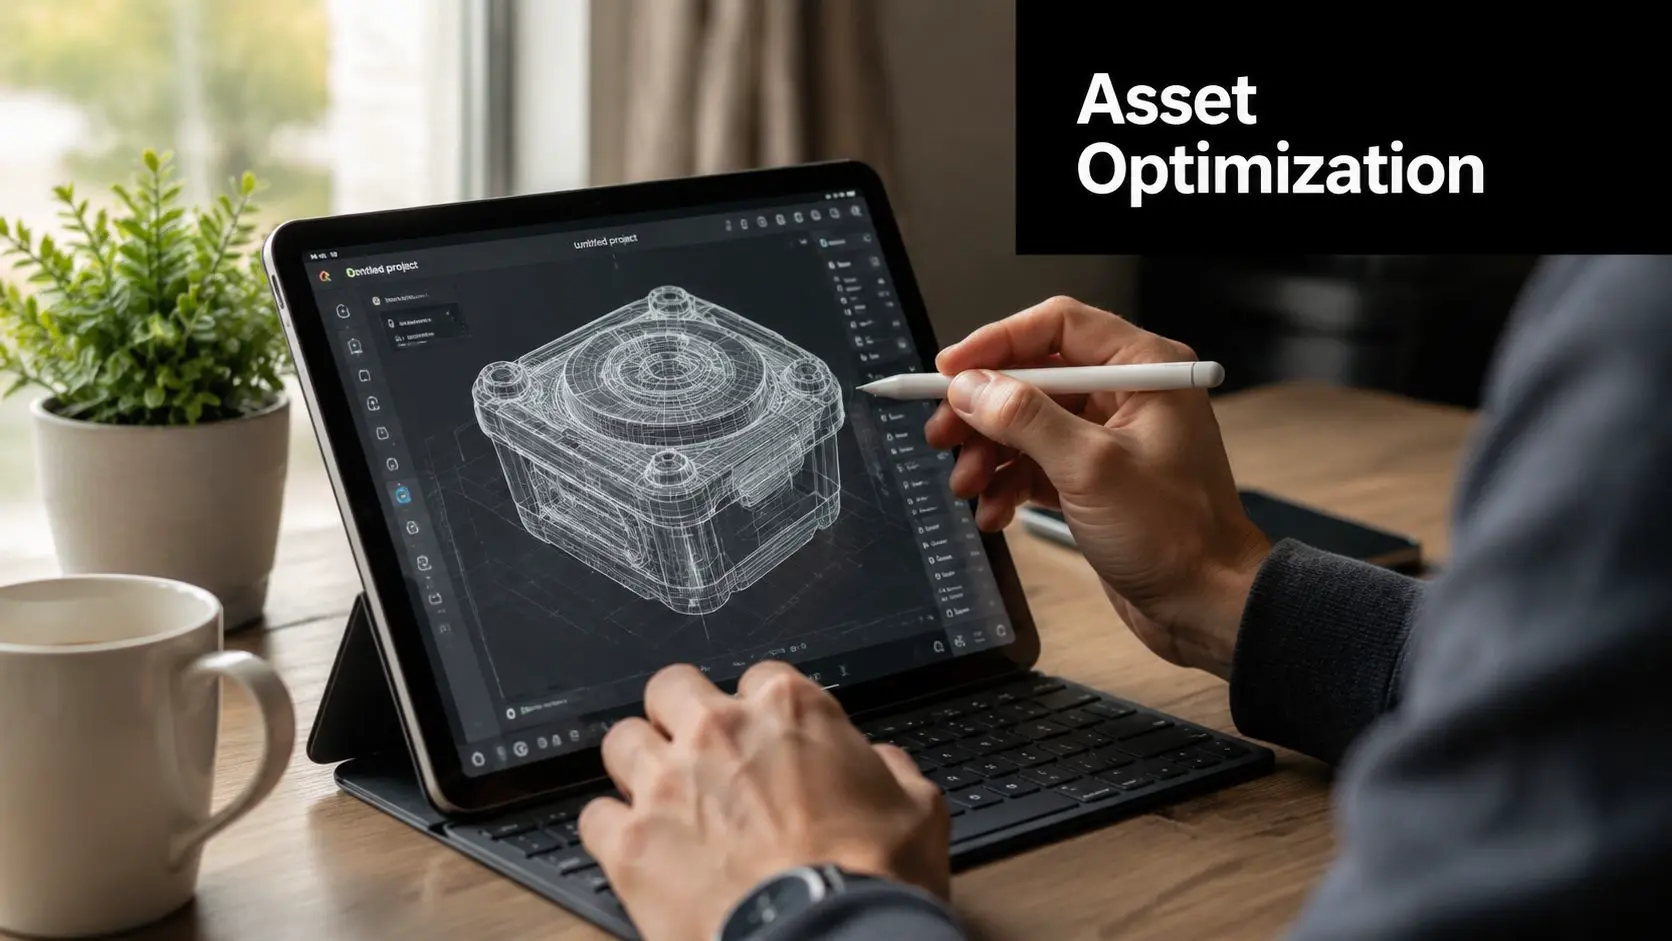
A render-ready asset is rarely a device-ready asset. That gap is where most timelines slip, because teams spend time polishing geometry that looks great in a viewport and then falls apart on a phone in a client meeting. If you want AR to behave, the asset pipeline needs the same discipline as the code pipeline.
Keep the model light before you make it pretty
For a practical mobile target, a 30k to 60k triangle range per hero asset is a sensible working zone on a mid-range phone. That doesn't mean every object must sit there, but it gives the team a budget to work against. Texture sizing usually follows the same logic, 1K is enough for most props, while 2K should be reserved for hero objects that really need the detail. You'll also want to be strict about draw calls, LODs, and atlas sheets. If an asset is built from many separate materials and tiny texture fragments, performance usually suffers long before the visuals improve. The cleaner route is to collapse where you can, simplify where you should, and keep the hierarchy readable for whoever inherits the scene next.
Use the pipeline that exports cleanly
For AR delivery, glTF is often the better day-to-day format because it tends to travel more cleanly through real-time pipelines. FBX still has its place, especially in studio workflows that already depend on it, but it can become awkward when you're pushing assets into a browser or a mobile AR scene. Where the workflow allows it, Draco compression on glTF payloads is usually worth the extra export step because it keeps asset transfer more manageable. If you're comparing software before production starts, Studio Liddell's own best free 3D modeling software roundup is a decent reminder that tool choice matters less than whether the export is predictable. The same applies if you're looking at an AI film production studio as a benchmark for workflow speed, because AR assets still need to hold up on-device, not just in a previs reel. Animations need the same restraint. Idle loops should be short, bone counts should stay under control, and anything longer than a few seconds often works better as a triggered action than a constant loop. A model that loads fast and animates cleanly will outlast a fancier build that makes users wait.
Pin this near the build station: optimise geometry first, texture second, animation last, then test on the weakest phone in scope.
Picking the Right Tracking Method
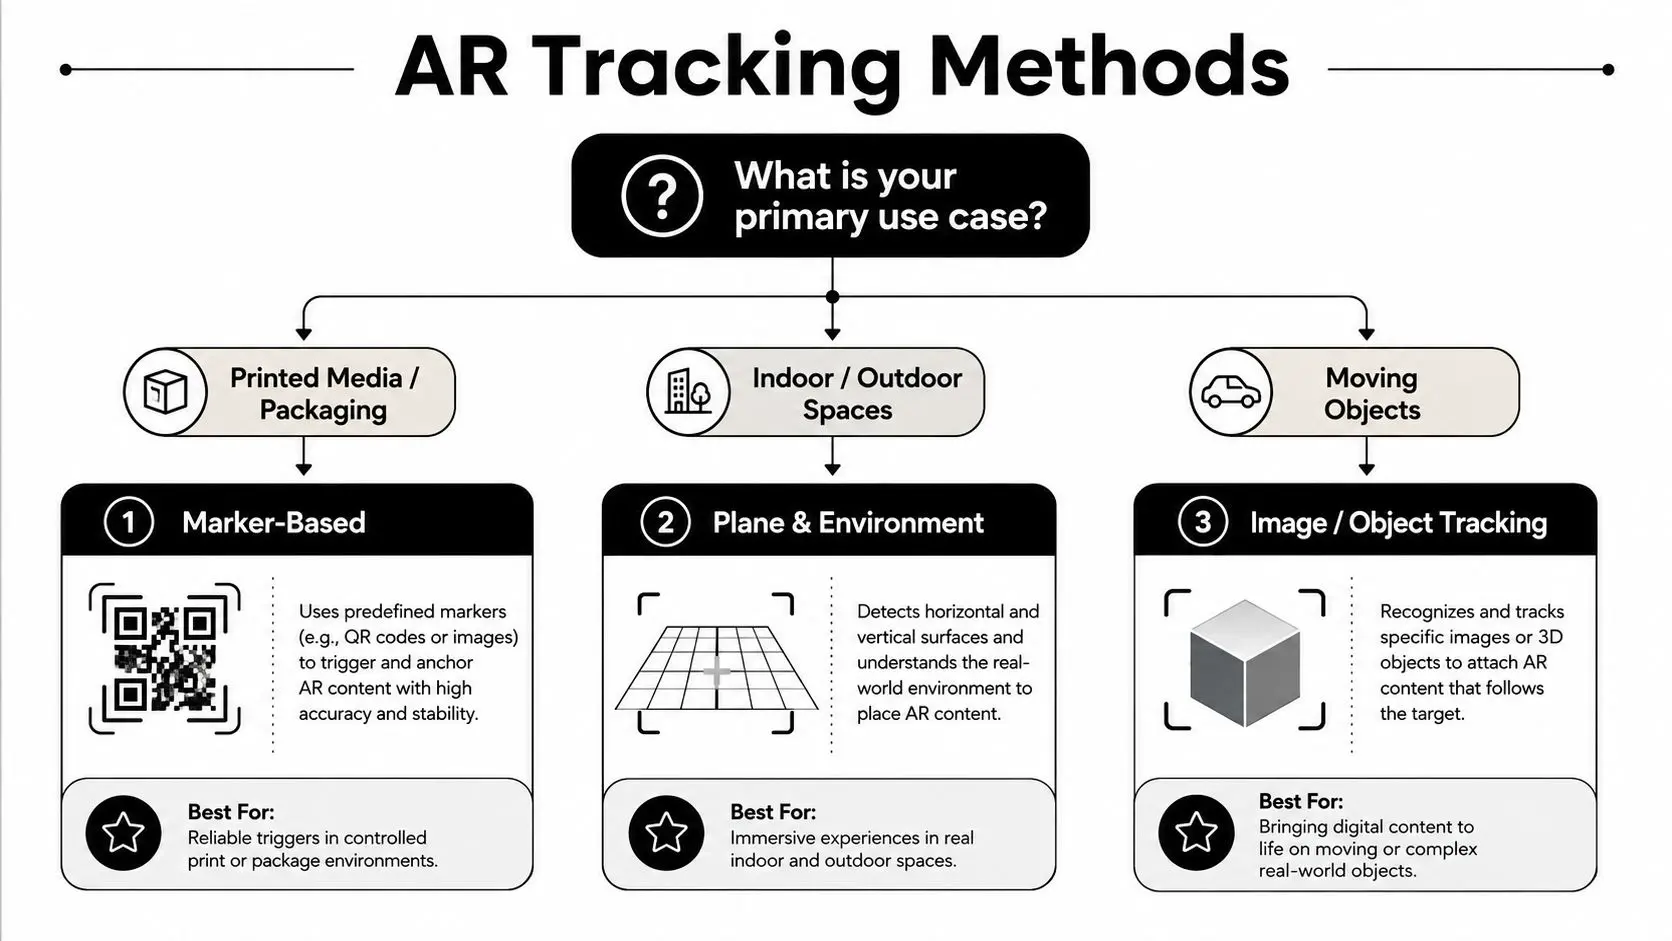
Tracking is where reality pushes back. A build can look polished in the editor and still fail in the room because the trigger, the surface, or the light isn't good enough. The right choice isn't the most advanced-sounding one, it's the one that survives the worst environment you expect to launch into.
Marker tracking still earns its place
Marker-based AR works well when the trigger image is already part of the design, which makes it a strong fit for packaging, signage, catalogues, and printed collateral. It's usually the most controlled option because the team can design around a known image target. That control is the whole point, it reduces ambiguity and gives the user a clear place to begin.
Markerless tracking is the everyday workhorse
Plane tracking and general environment tracking are the more flexible options for product demos on a table, room-scale placements, and lightweight walkthroughs. They're useful because they don't depend on a printed marker, but they need the user to help the system a little. Good light, texture in the room, and a flat surface all make a noticeable difference.
SLAM and object tracking cost more compute
For more ambitious placements, such as life-size product previews or doorway portals, SLAM-based world tracking and object tracking offer more reach. They also ask more from the device. That's where the build starts to depend on sensor quality, device capability, and careful setup rather than visual ambition alone. Google's AR documentation is a useful reminder that AR features depend on supported devices and sensor capability, not on a universal promise that every handset can do the same thing Google AR. In practice, that means the cheapest-looking trigger can be the most reliable one if it fits the physical environment better than the flashier option.
Choose the simplest tracking method that still works in the dimmest, messiest corner of the real venue. The studio test is not the launch test.
For product teams, that rule saves time. It keeps the deployment honest, and it stops the brief from drifting towards a feature that only behaves well under ideal conditions.
Interaction Design That Users Actually Tolerate
People don't give AR much patience. They'll hold the phone awkwardly, they'll be standing in glare, and they'll expect the experience to work after a single glance at the screen. If the interaction layer feels like a puzzle, they'll back out before the object is even placed.
Keep the gesture set small
The most usable AR interactions are usually the least surprising ones, tap, drag, pinch, and two-finger rotate. Those gestures are already familiar from normal mobile behaviour, which means users can understand them without a tutorial. Custom gestures can look clever in pitch decks and still fail badly in the field because they ask for too much attention. Visible reticles, placement hints, and ground-plane shadows help users trust what's happening. A shadow tells them the object is anchored. A reticle tells them the system has found a surface. That small amount of visual reassurance matters more than decorative UI ever will.
Design for failure, not just success
A good AR interface has a reset path, because tracking drifts and users move their hands through the frame. If something goes wrong, they need to recover without guessing. That's especially important in public-facing installations, where a crowded space, reflections, or noisy surroundings can make a simple placement feel unstable. Accessibility isn't optional either. Large-text modes, strong contrast, and audio cues help public installations and mobile demos stay usable for more people. A floating widget that looks elegant on a mock-up can still be unreadable on a bright day if the contrast is weak.
| Gesture | Best For | Watch Out For |
|---|---|---|
| Tap | Placing objects, selecting options | Too many taps make the flow feel sluggish |
| Drag | Repositioning content | Small hit targets frustrate one-handed use |
| Pinch | Scaling products or props | Users can over-scale and lose context |
| Two-finger rotate | Turning an object for inspection | Ambiguous rotation can feel jumpy if tracking is weak |
The cleanest interaction design usually does less, not more. If a user needs a tutorial to understand the controls, the interface probably needs to be simplified rather than explained.
Performance, Occlusion, and Pre-Launch QA
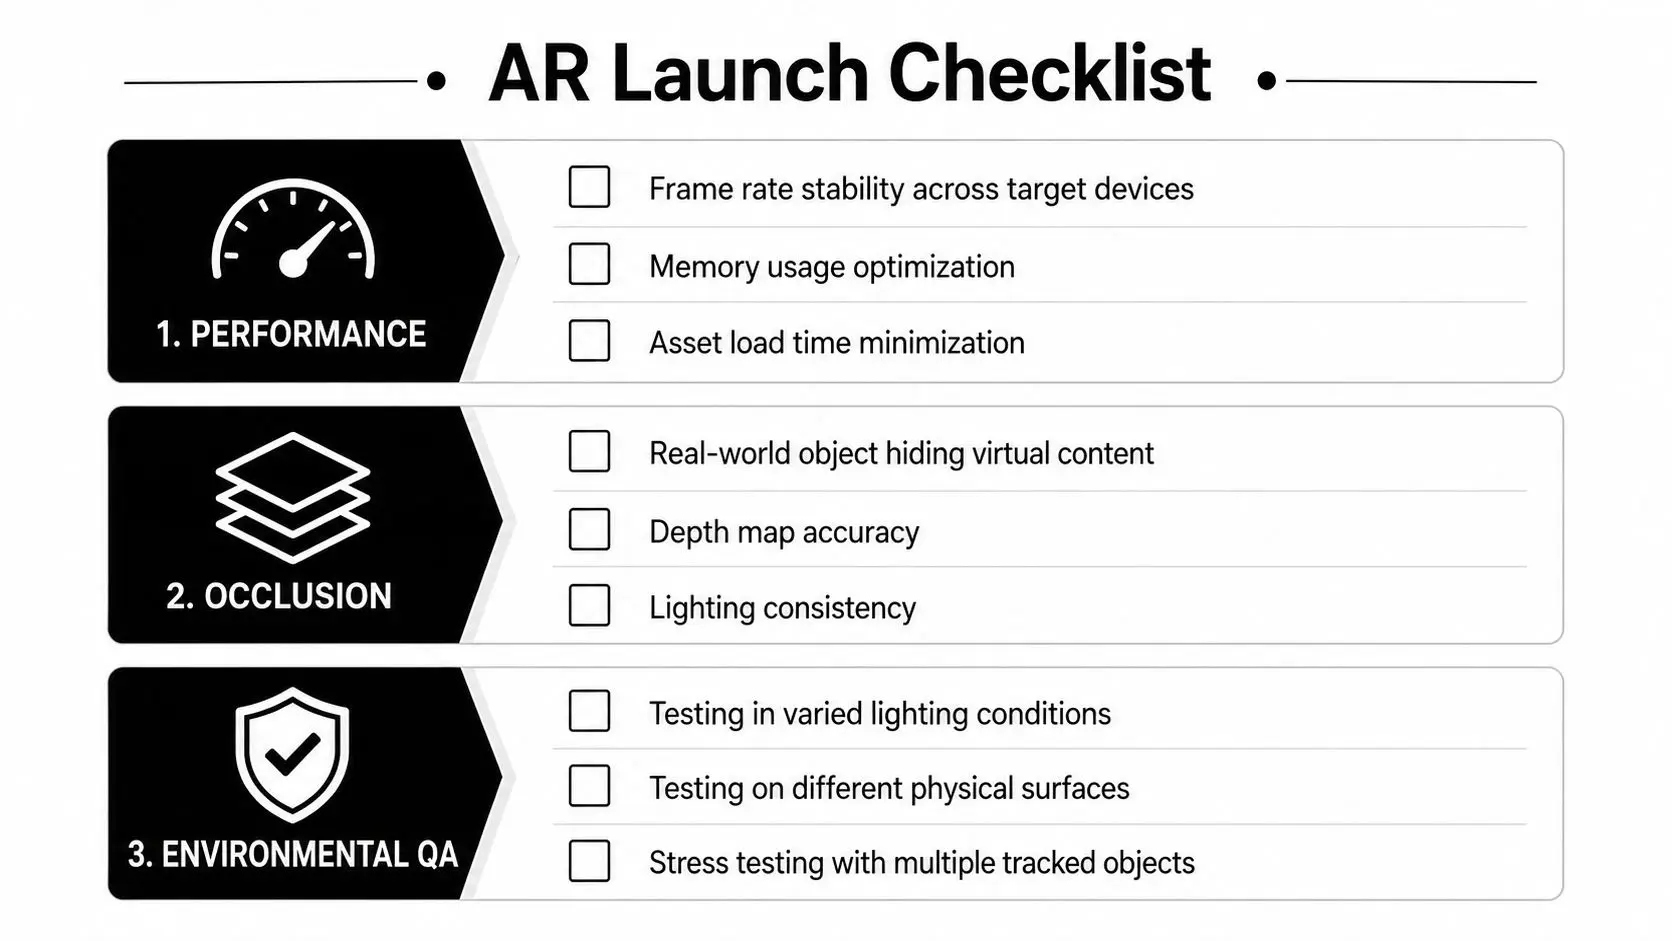
The scenes that look the best in review often break first on device. A model that floats in front of a wall, lags during motion, or stutters when the camera shifts will lose trust fast. In AR, performance, occlusion, and environmental QA are one connected problem, because each one affects whether the virtual content feels like it belongs in the room.
Keep frame rate stable before you chase detail
A practical target is smooth motion on a three-year-old mid-range phone, not just on the latest flagship. That means trimming polygons, reducing texture overhead, and keeping script work tight so the frame rate doesn't wobble when the scene gets busy. The WebXR and Unity build path matters here, but the same basic rule applies across them all, slow scenes feel broken, even when the assets are beautiful.
Practical rule: if the object looks right but feels late, the user will trust it less than a simpler version that responds instantly.
Motion-to-photon latency should be kept as low as possible, because any delay between head movement and screen response makes the object feel detached. Even when the scene renders correctly, lag can be enough to break the illusion.
Occlusion has to match the device
Occlusion is where virtual content hides correctly behind real-world objects. On supported devices, depth-sensor passthrough can help. On older devices, virtual depth buffers and careful scene design may be the only practical route. The important point is to choose the method that fits the hardware floor instead of assuming every device will see the same thing. For teams comparing engines and rendering setup, Studio Liddell's best rendering engine for performance and cost guide is a useful companion when you're balancing visual ambition against runtime stability.
Test in ugly conditions, not just the studio
Lighting variation, shiny surfaces, textured floors, blank walls, and cramped spaces all change how AR behaves. A polished demo room tells you almost nothing about how the experience will hold up in a client's office or a trade-show corner. The QA pass should include multiple device classes, different rooms, and the awkward middle of a hand reaching into frame, because that's how people use these systems. A launch checklist should cover:
- •Performance stability: Check that the scene doesn't hitch when the camera moves quickly.
- •Occlusion accuracy: Confirm that real objects hide virtual content in the right places.
- •Environmental variation: Test the same build in bright, dim, reflective, and cluttered spaces.
- •Device spread: Validate the experience on more than one handset class before shipping.
The best AR releases usually come from teams that treat QA as part of content production, not as a final sweep after the build is “done”.
Production Pitfalls and the Habits That Prevent Them
The same three problems show up again and again. A team over-scopes a simple experience into a platform. An asset pipeline drifts away from the build target. A demo works on one person's phone and falls apart on the client's device. None of that is mysterious, but it's expensive when the schedule is already tight. One retail team can spend weeks polishing a feature that only makes sense in a perfect room, then discover that the printed trigger sits under harsh lighting and the phone never locks on cleanly. Another team can get the interaction right but forget to define what success looks like, so the experience has no obvious finish line. The pattern is always the same, the launch assumptions were never written down clearly enough. The habits that prevent most of that pain are boring, and that's why they work. Test on a real mid-range handset early. Attach a written outcome statement to every brief. Treat any feature that needs a tutorial as a redesign candidate, not as a polished deliverable. If the team can't explain how the experience recovers when tracking drops, the build isn't ready. There's one more producer's rule that saves week three every time. Keep the content pipeline aligned with the device floor from the start, because fixing that mismatch late usually means cutting good work, not just optimising it. That's the part no one likes, and it's exactly why it should happen early. --- Studio Liddell builds AR and XR experiences as part of a wider production pipeline, so if you need a team that can shape the brief, prototype the interaction, and test it on real devices before launch, Studio Liddell is a sensible place to start. If you're planning an AR release for retail, events, training, or branded content, reach out for a production conversation and get the launch risks mapped before they turn into week-three surprises.