Your Guide to Augmented Reality Code
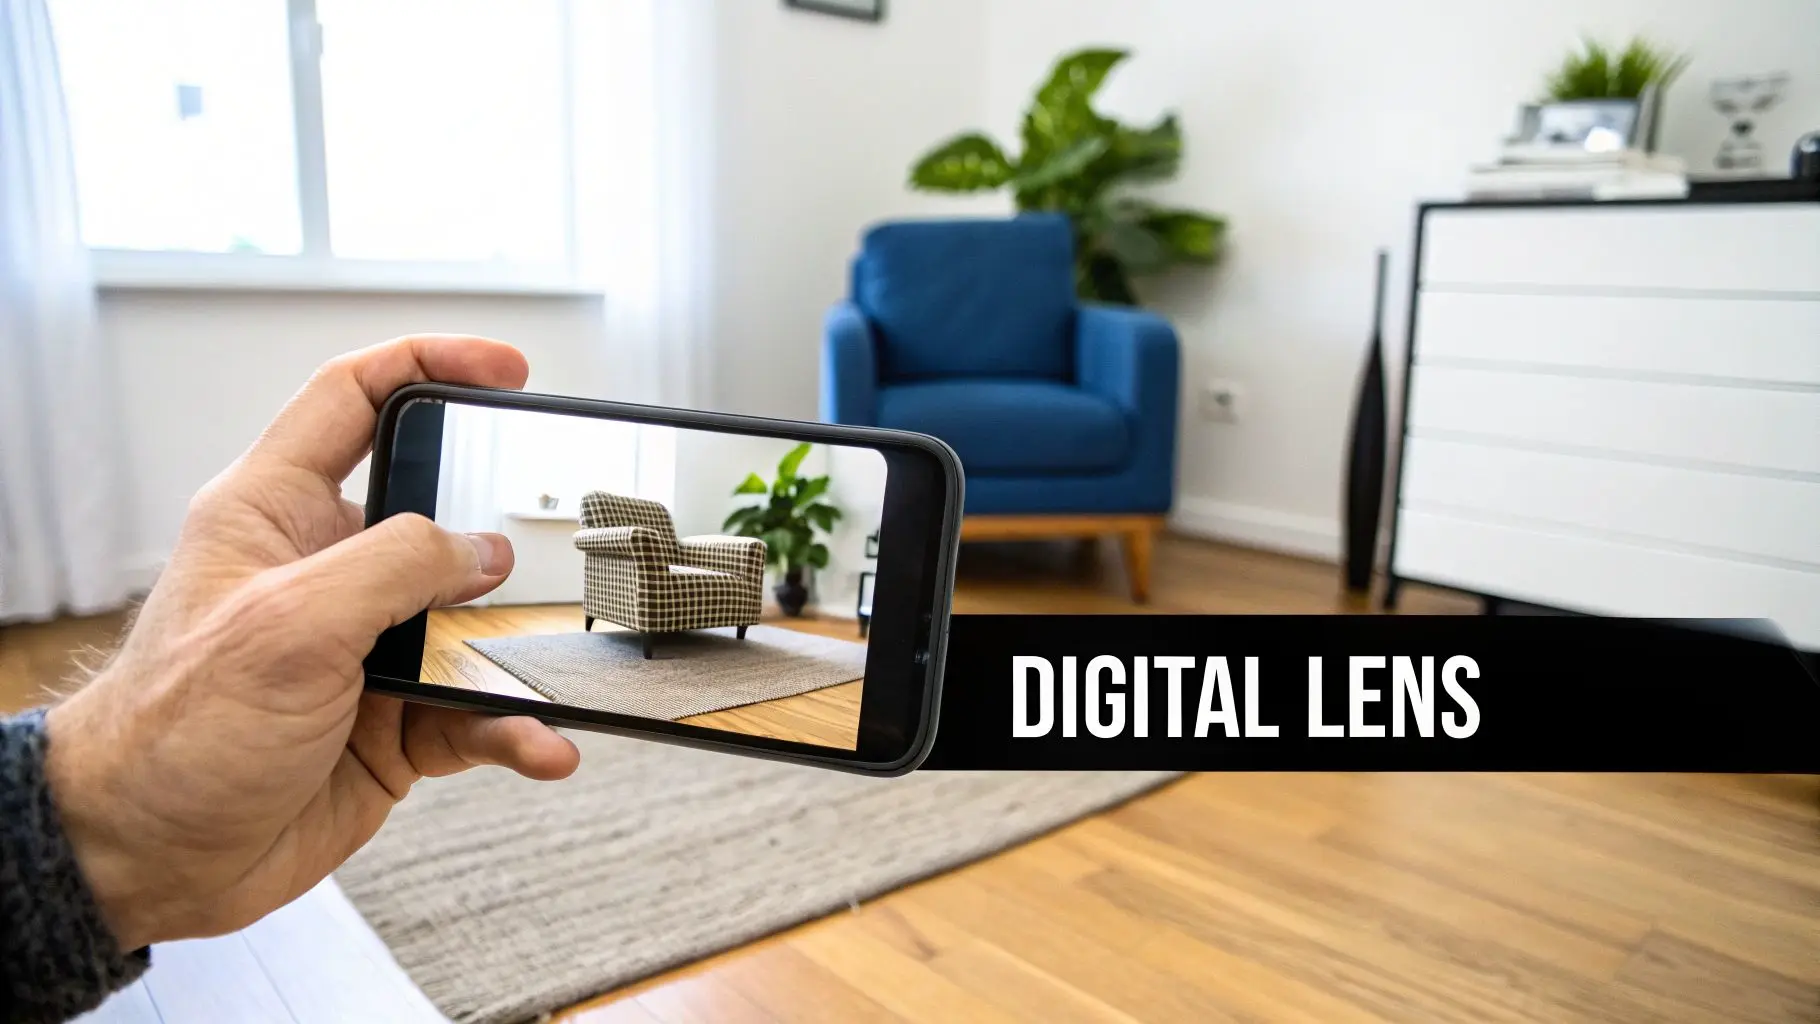
At its heart, augmented reality code is the set of instructions that tells a device, like a smartphone or a headset, how to interpret the real world through its camera and overlay digital information onto it. Think of it as the language that bridges what your camera sees with interactive 3D content. This code is the engine behind every AR experience, handling everything from detecting a flat surface on your floor to ensuring a virtual object is correctly lit by the lamp in your living room.
The Core Functions of Augmented Reality Code

Behind the scenes, AR code performs a staggering number of calculations every second. It’s not just about placing a digital image over a video feed; it’s about creating a convincing illusion that the digital object belongs in your physical space. This complex process can be broken down into a few key functions that the code executes in perfect synchronisation. These functions are part of a broader development lifecycle. A foundational grasp of software development methodologies is invaluable, as it provides the structured approach needed to build a robust and compelling AR application from the ground up.
Key Jobs Performed by AR Code
To achieve the on-screen magic, the code continuously processes data from your device’s sensors, primarily the camera, but also the accelerometer and gyroscope, to build a real-time map of its surroundings.
- •World Tracking: This is the cornerstone of any high-quality AR experience. The code identifies unique visual features in the environment, like the corner of a table or a pattern on a rug. It uses these "feature points" to understand the device's exact position and orientation in 3D space. This is what keeps virtual objects firmly anchored, even as you move around them.
- •Plane Detection: Before an app can place a virtual sofa in your lounge, it needs to find the floor. The code actively scans the camera feed for flat surfaces, both horizontal (floors, tables) and vertical (walls). Once identified, these planes become the stage for your digital content.
- •Light Estimation: For a 3D model to look truly present, it must match the lighting of its environment. Sophisticated augmented reality code analyzes the ambient light in the real world, estimating its intensity and direction, and then applies that same lighting to the virtual objects. It’s a subtle but crucial detail for selling the illusion.
These three pillars form the foundation of almost every AR app. You can see them in action across our breakdown of 10 examples of augmented reality you should know.
Ultimately, the goal of augmented reality code is to create a persistent and believable link between a digital object and a real-world location. When done well, the user shouldn't have to think about the code at all, the experience should just feel intuitive and magical.
Choosing Your AR Development Toolkit

Before writing a single line of augmented reality code, you must make a foundational decision: which toolkit will you use? This isn't just a technical choice; it’s a strategic one. The technology stack you select will dictate everything from the devices you can support to the complexity of the experiences you can build and the skills your team will need. The AR landscape is broadly divided between native software development kits (SDKs), offered by mobile platform owners, and powerful game engines that provide a cross-platform abstraction layer. Each approach has distinct advantages depending on your project goals, team expertise, and required performance.
Native SDKs for Mobile Devices
For a deeply integrated experience on a specific mobile ecosystem, the native toolkits from Apple and Google are the premier choice. They provide direct access to the latest hardware features and typically offer the most stable and performant tracking available.
- •Apple ARKit: This is the primary framework for creating AR experiences exclusively for iPhones and iPads. Coded in Swift or Objective-C, ARKit is renowned for its robust world tracking, realistic light estimation, and advanced features like body and face tracking.
- •Google ARCore: As the Android equivalent, ARCore enables AR on a vast range of compatible devices. It offers core functionalities similar to ARKit, such as motion tracking and environmental understanding, and is typically implemented using Java or Kotlin for native Android development.
Choosing a native SDK is often the right move when you know your target audience is on a single platform and you need to leverage new hardware features the moment they are released.
Cross-Platform Game Engines
Game engines are the workhorses of the modern AR industry. They allow you to build an experience once and deploy it across both iOS and Android, offering significant time and cost savings. They excel at creating visually rich, interactive 3D worlds and handle complex rendering and physics, freeing up your team to focus on the creative aspects of the project. The dominant players are Unity and Unreal Engine. They have become the de facto standard for most commercial AR applications, from marketing campaigns to industrial training simulations, due to their power, flexibility, and extensive asset ecosystems.
Using a game engine like Unity or Unreal streamlines development by unifying the augmented reality code for both ARKit and ARCore under a single, more manageable framework. This approach dramatically reduces development time for cross-platform projects.
Browser-Based WebAR
A third, rapidly growing option bypasses app stores entirely. WebAR allows users to launch augmented reality experiences directly from their mobile web browser. There are no downloads and no installation friction, just instant access via a URL or QR code. Frameworks like A-Frame (built on three.js) empower developers to construct AR scenes using familiar web technologies like HTML and JavaScript. While WebAR cannot yet match the raw performance of native applications, its unparalleled accessibility makes it ideal for marketing activations, product previews, and ephemeral interactive content. To explore where this technology is headed, you can learn about the future of augmented reality with WebAR and its potential to democratise spatial computing. To help you visualise the differences, here’s a quick breakdown of the main platforms.
A Practical Comparison of AR Platforms
This table breaks down the key differences between leading AR development platforms to help you choose the right one for your project.
| Platform | Primary Language(s) | Target OS/Devices | Best For |
|---|---|---|---|
| ARKit | Swift, Objective-C | iOS, iPadOS | High-performance, iOS-exclusive apps that need the latest Apple hardware features. |
| ARCore | Java, Kotlin | Android | Creating native AR experiences for the broad and diverse Android ecosystem. |
| Unity | C# | Cross-platform (iOS, Android) | Visually rich, interactive 3D games and applications for multiple platforms. |
| Unreal Engine | C++, Blueprints | Cross-platform (iOS, Android) | High-fidelity, photorealistic 3D experiences and complex simulations. |
| WebAR (A-Frame) | JavaScript, HTML | Browser-based (any modern mobile) | Quick, accessible experiences where avoiding an app download is key. |
Ultimately, there is no single "best" toolkit, only the one that is right for your project. Carefully weighing these options at the outset will prevent countless challenges down the line.
Writing Your First Lines of AR Code
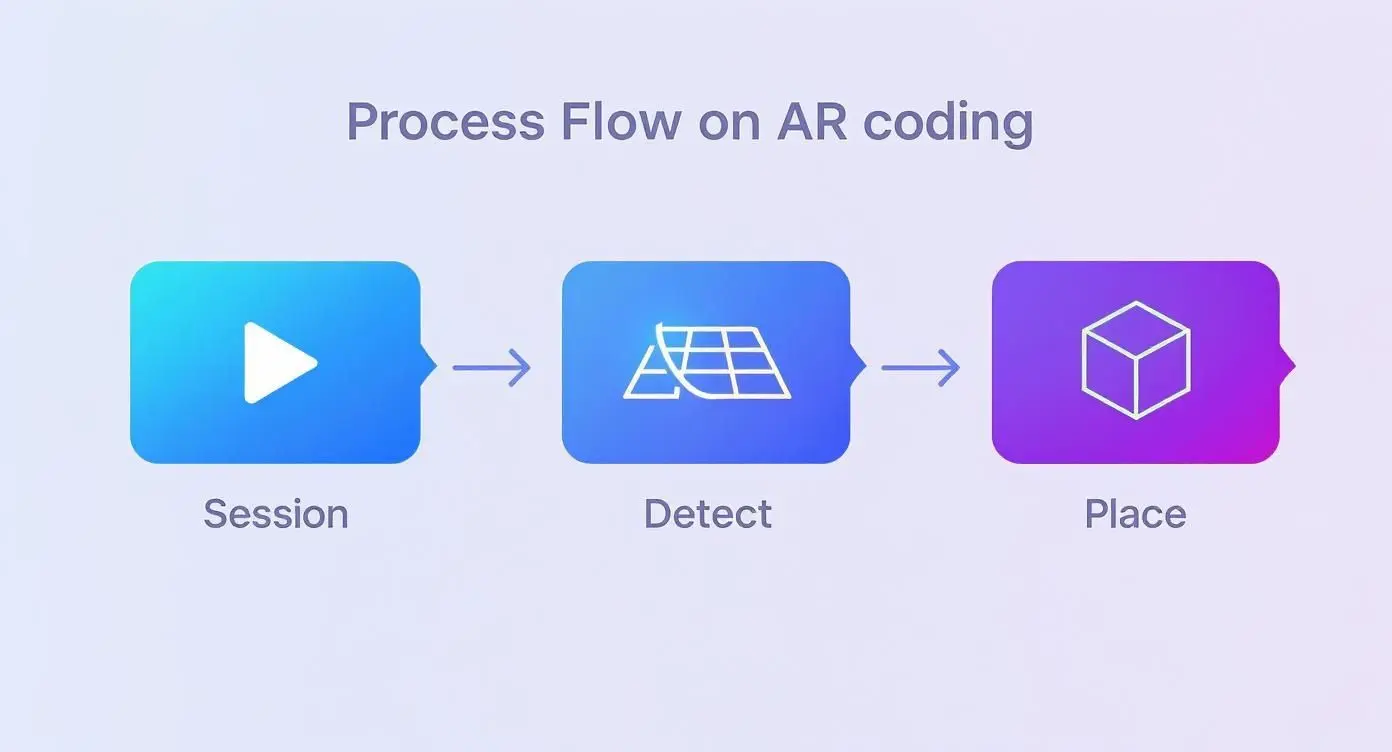
This is where theory meets practice. There is a unique magic in seeing a 3D object appear in your own room, controlled by code you have just written. It’s the moment augmented reality becomes tangible. Let’s walk through the fundamental building blocks of an AR experience. The core process is surprisingly consistent across platforms: you initialize an AR session, allow the device to detect a real-world surface like a table, and then place a virtual object onto it. We'll examine how this is achieved using both native ARKit for iOS and the cross-platform powerhouse, Unity, to provide a solid starting point. Mastering this foundational skill is more valuable than ever. The UK’s AR market generated a substantial USD 4,131.2 million in revenue this year, a figure projected to grow to USD 25,763.2 million by 2030. You can explore more data on this incredible growth from Grand View Research.
Your First AR Project in ARKit and Swift
When developing for the Apple ecosystem, ARKit is your direct interface to the hardware’s AR capabilities. Writing your first lines of augmented reality code in Swift involves telling an `ARSession` to initialize and start interpreting the world through the device's camera and motion sensors. The logic is simple:
- Start the Session: You initiate the process, instructing the app to begin tracking its surroundings.
- Detect a Plane: The code listens for a signal from ARKit that it has identified a flat horizontal surface.
- Place the Object: When you tap the screen, the app uses that precise location to place a simple 3D shape, like a cube, onto the detected surface.
Building the Same Logic in Unity with C#
For those targeting both iOS and Android, Unity’s AR Foundation is the ideal solution. It abstracts away the device-specific code, allowing you to write one set of C# scripts that works across both ARKit and ARCore. The core logic is identical, but the implementation uses Unity’s component-based architecture. You would create a C# script and attach it to an object in your Unity scene. This script's responsibility is to detect a screen tap and then instantiate a 3D model (a "Prefab" in Unity) at the corresponding real-world location. ```csharp // 1. Make sure to include the AR Foundation namespaces using UnityEngine; using UnityEngine.XR.ARFoundation; // 2. In your Update loop, check for a tap and perform a raycast to find a plane void Update() { if (Input.touchCount > 0 && Input.GetTouch(0).phase == TouchPhase.Began) { // This shoots a virtual "ray" from the screen tap into the real world if (arRaycastManager.Raycast(Input.GetTouch(0).position, hits, TrackableType.PlaneWithinPolygon)) { // It hit a plane! Let's get the position. var hitPose = hits[0].pose; // 3. Now, create your 3D object at that exact spot Instantiate(objectToPlacePrefab, hitPose.position, hitPose.rotation); } } } ```Key Takeaway: Whether you’re using Swift or C#, the fundamental logic for basic AR is the same: start a session, understand the environment, and place your content. The syntax and tools might differ, but the principles of how you interact with the real world don't change.Once you’ve mastered these basics, progressing to more complex applications becomes a natural next step. Participating in interactive game coding challenges is an excellent way to sharpen the skills required for building truly engaging AR, and it all starts with simple code snippets like these.
The Blueprint for a Successful AR Project
Exceptional augmented reality code is not an isolated achievement; it's the culmination of a well-planned creative and technical process. Building a polished AR application is a journey that transforms an idea into a fully interactive experience. This journey relies on close collaboration between designers, 3D artists, and developers to ensure every element works in perfect harmony. Understanding this workflow is essential because it demonstrates that coding, while critical, is one part of a larger, integrated pipeline. Each stage builds upon the last, turning an abstract concept into a tangible and interactive product. The most successful projects are invariably those where every step is meticulously planned and executed.Stage 1: Concept and Design
Every great AR project starts not with code, but with a question: what do we want the user to feel and do? This initial phase is about storyboarding the user journey from start to finish.- •Define the Goal: Is this a product visualiser for e-commerce, a training simulation for enterprise, or an interactive game for a brand event? A clear objective guides all subsequent decisions.
- •Map the Interaction: How will users interact with the experience? Will they tap to place objects, follow on-screen prompts, or physically walk around a virtual scene?
- •Create Wireframes: Before any detailed graphics, simple sketches and wireframes are created to map out the user interface (UI) and the overall flow, ensuring the experience is intuitive from the outset.
Stage 2: 3D Asset Creation
With a solid concept defined, the focus shifts to creating the digital assets that will populate the real world. This is where 3D artists model, texture, and animate the virtual objects. The key challenge here is balancing visual fidelity with performance, as overly complex models can degrade the user experience on mobile devices. These digital assets are the visual heart of the application. Their quality directly impacts the believability and engagement of the final product, ensuring each virtual element feels like it truly belongs in the user's environment. The infographic below illustrates how the augmented reality code takes these assets and orchestrates a live, interactive experience.

This visual breaks down the core runtime loop: the code initiates a session using the device's camera, detects a suitable real-world surface (the "plane"), and then places the 3D model onto it in response to user input.
Stage 3: Coding and Implementation
This is where the concepts and assets are brought to life with augmented reality code. Developers write the logic that manages the AR session, detects surfaces, handles user input, and renders the 3D models correctly within the real-world context. They integrate the assets from artists and build out the user interface defined during the design phase.
A well-structured development process is the backbone of any complex digital project. By defining the pipeline early, teams can collaborate effectively, anticipate challenges, and deliver a high-quality product on time.
Stage 4: Testing and Deployment
No AR application is ready without rigorous real-world testing. This stage involves identifying performance bottlenecks, ensuring tracking is stable across different devices and in various lighting conditions, and refining the user experience based on user feedback. Once the app is stable, performant, and bug-free, it is deployed to the relevant app stores or web servers, ready for users to discover. To delve deeper into this entire process, see our comprehensive guide to augmented reality application development.
Optimising Your Code for a Flawless User Experience

A great AR experience feels magical. It’s seamless, responsive, and intuitive. The moment it stutters, lags, or feels clumsy, that illusion is shattered. Writing performant augmented reality code isn’t merely a technical exercise; it's the foundation of a positive user experience. It's what makes an application feel fluid, responsive, and natural. Every 3D model, texture, and line of code competes for the finite processing power and memory of a mobile device. The key to success is ruthless efficiency to maintain a high and stable frame rate. This stability is paramount, it prevents the judder that can cause disorientation or even motion sickness. The demand for high-quality AR is growing exponentially. The global mobile AR market was valued at USD 23.2 billion and is projected to exceed USD 113.6 billion by 2030. A significant portion of this growth is driven by the UK, which has emerged as a key player in the European market. You can explore the trends driving the mobile AR market to see the pace of this evolution.
Performance Best Practices
To ensure an AR application runs smoothly, developers focus on several key areas of optimisation. Each adjustment contributes to a faster, more reliable experience.
- •Lightweight 3D Models: Keep the polygon count of 3D assets as low as possible without sacrificing essential visual quality. High-poly models are a primary cause of performance bottlenecks.
- •Efficient Rendering: Utilise techniques like texture compression and optimised shaders. This significantly reduces the load on the GPU, which is critical for achieving a consistent 60 frames per second (FPS).
- •Smart Memory Management: Load assets into memory only when they are needed and release them as soon as they are no longer in use. Poor memory management leads to slowdowns and can cause the application to crash.
Designing an Intuitive User Experience
Performance is only half the battle. If users don't understand how to interact with your AR world, they will become frustrated. In user experience (UX) design for AR, clarity and simplicity are essential.
The best AR interfaces are almost invisible. They guide the user naturally without getting in the way, making interactions like placing an object feel like second nature.
For example, clear on-screen instructions at the beginning of the experience are vital. A simple prompt like "Scan the floor to begin" tells the user exactly what to do. From there, straightforward interaction models, like the classic "tap-to-place," are universally understood. It’s also crucial to provide immediate visual feedback. A glowing outline that appears on a detected surface or a subtle animation when an object is placed confirms the user's action. This feedback loop makes the entire experience feel responsive and engaging.
Common Questions About Augmented Reality Code
Diving into augmented reality code can feel like learning a new language. It's natural for a host of questions to arise for developers, project managers, and business leaders alike. To provide clarity, we have compiled the most common queries with direct, practical answers. This section serves as a quick-start guide to understanding the technical landscape of AR development. These insights can help you make more informed decisions, whether you are planning your first project or seeking to advance your team's capabilities.
What Is the Easiest Way to Start Learning AR Code?
For absolute beginners, a game engine is almost always the most accessible entry point. Getting started with Unity and its AR Foundation package is an excellent first step. It abstracts away much of the underlying complexity, handling device-specific code so you can focus on the creative aspects of your project using C#. For those with a web development background, A-Frame is a fantastic alternative. It uses a simple, HTML-based syntax that makes building basic WebAR experiences surprisingly straightforward, removing the need to learn an entirely new software suite.
How Does Native AR Code Differ from WebAR?
The primary differences between native and WebAR come down to performance versus accessibility.
- •Native AR: An app built with ARKit (iOS) or ARCore (Android) has direct access to the device's hardware. This results in superior tracking, higher-fidelity graphics, and more advanced features like body tracking.
- •WebAR: This runs directly within a mobile browser. Its superpower is instant access, no download is required. However, this convenience often comes at the cost of reduced performance and a more limited feature set compared to a native app.
Do I Need to Be a 3D Artist to Build an AR App?
Not at all. While professional projects benefit immensely from custom 3D models, you can get started quickly with pre-made assets. Online marketplaces like the Unity Asset Store or Sketchfab are excellent resources, filled with models suitable for prototyping and learning. For commercial work, developers typically collaborate with 3D artists or a full-service studio. This partnership ensures the final product features high-quality, optimised assets that contribute to a polished and smooth user experience.
The most successful AR projects are born from collaboration. A developer’s code brings a 3D artist’s creation to life, and a designer’s user flow makes the entire experience intuitive.
What Are the Biggest Challenges in Writing AR Code?
Even for experienced developers, AR presents unique challenges. The most significant hurdles usually involve managing performance on mobile devices to maintain a smooth frame rate and ensuring the application functions reliably in unpredictable, real-world environments. Other major technical challenges include:
- •Variable Lighting: Real-world lighting is inconsistent and can interfere with tracking stability and the appearance of virtual objects.
- •Surface Detection: Reflective, glossy, or textureless surfaces can be difficult for AR frameworks to detect reliably.
- •Spatial UI/UX: Designing a user interface that feels natural and intuitive in a 3D, spatial context is fundamentally different from designing for a 2D screen and requires a new way of thinking.
At Studio Liddell, we've been tackling these challenges for years, building everything from broadcast animations to complex immersive experiences. If you're ready to bring an AR concept to life, we have the end-to-end expertise to guide you from initial design to final deployment. Book a production scoping call