Developing iPhone Apps: A UK Producer's Guide
Before a single line of code is written, before any pixels are pushed, the most crucial work of developing iPhone apps happens. We're talking about the blueprint. The foundation. Without a solid strategic plan, even the most beautifully designed, technically perfect app can miss the mark entirely. This is where you ground your big idea in reality and turn it into an actionable project.
Laying the Groundwork for Your iPhone App
Embarking on an iPhone app project is far more than a technical exercise; it’s a business venture. Time and again, we've seen that the success of an app is determined not by its code, but by the clarity of its initial strategy. This is the stage where you prevent costly mistakes down the line by asking the right questions upfront. The UK app market is booming, projected to hit a staggering £32.3 billion by 2026. With smartphone ownership at 88% of the UK population in 2023, the audience is there and waiting. For a studio like ours, with a broadcast pedigree in animation and XR since 2019, this opens up incredible avenues to bring our storytelling and immersive content expertise to the iOS ecosystem. The opportunity is immense, but seizing it starts with a plan.
Define Your App's Core Purpose and Vision
Let's get right to it: What problem does your app solve? And who are you solving it for? Answering these two simple questions is your first, non-negotiable step. A crystal-clear vision is your North Star. It guides every single decision you’ll make, from prioritising features to the final design touches. Think about the primary goal. Is your app meant to:
- •Drive sales for your e-commerce brand?
- •Deliver immersive AR training for a complex industrial task?
- •Entertain and educate kids with interactive stories?
- •Streamline a workflow for your internal team?
A well-defined purpose is your best defence against "feature creep", that all-too-common temptation to add just one more thing, bloating the app and diluting its core value. Focus on solving one problem, and solve it brilliantly.
This simple diagram breaks down the process we follow, moving from a raw idea to concrete, measurable goals.
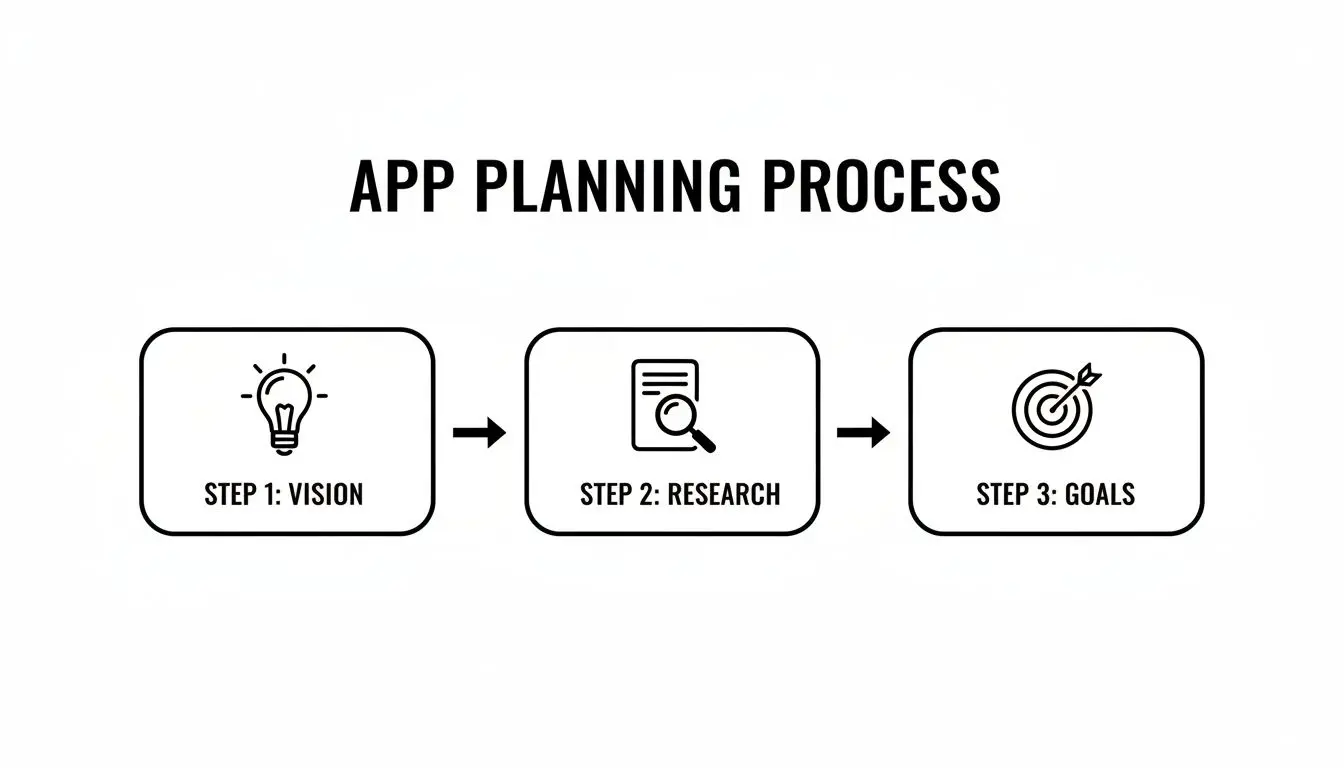
It’s all about making sure your creative vision is anchored in market reality and tied to business outcomes you can actually track.
Conduct Thorough Market and Competitor Research
Once you know _what_ you want to build, it's time to look at what's already out there. Dive headfirst into the App Store. Find your direct and indirect competitors. Download their apps. Use them. A lot. Most importantly, read the user reviews, especially the one- and two-star ones. That’s where the gold is. This analysis is where you’ll find your opening. What are competitors doing well? Great. But where are they falling short? Is their UI a clunky mess? Are users crying out for a feature they've ignored? Is the app slow and buggy? These gaps are your strategic entry points. Building on a foundation of quality from day one is critical. Adhering to Top Software Engineering Best Practices helps you avoid the very pitfalls you've just identified in your competitors' apps. It’s how you build something that not only launches strong but can also be maintained and scaled for years to come.
Choosing Your Development Path and Tech Stack
Now that you've got your strategy nailed down, it’s time to make another critical decision: what technology will actually power your iPhone app? This isn't a small choice. It shapes everything from how fast your app runs to what it feels like to use, and even how easy it will be to add new features down the road. The goal is to match the tech to your creative vision. There’s no single “best” way to build an iPhone app. The right path depends entirely on what you’re trying to create. A simple utility app has completely different technical needs than a visually rich, immersive game. Let’s break down the main routes you can take.
Native Development: The Gold Standard for iOS
For the vast majority of business, e-commerce, and utility apps, going native is the undisputed best choice. This means building your app specifically for the Apple ecosystem, using Apple's own tools and programming languages.
- •Languages: The go-to language is Swift, a modern and powerful language developed by Apple itself. You might still see Objective-C in older codebases, but for any new project, Swift is the industry standard.
- •IDE (Integrated Development Environment): All the magic happens in Xcode, Apple's all-in-one software suite for building apps across all its devices.
The biggest win with native development is performance and deep integration. Your app gets direct, seamless access to the device’s hardware, the camera, GPS, push notifications, you name it. This approach delivers the fastest, most responsive, and most reliable user experience possible, which is why it's our preferred method for high-quality, feature-heavy applications. This is Xcode, the command centre for all native iOS development. It's a completely integrated environment, giving developers everything they need, from writing code and squashing bugs to designing the interface and analysing performance, all under one roof.
Game Engines for Immersive XR and Gaming
When your ideas venture beyond standard app interfaces into 3D worlds, augmented reality (AR), or virtual reality (VR), native tools start to show their limits. This is where real-time game engines like Unity and Unreal step in. These are the powerhouses behind almost every mobile game and immersive XR experience you’ll find on the App Store.
| Engine | Key Strengths & Use Cases |
|---|---|
| Unity | Known for its incredible flexibility and fantastic cross-platform support (iOS, Android, consoles, you name it). It also boasts a massive asset store and a huge developer community, making it a brilliant choice for mobile games, AR apps, and interactive 3D training simulations. |
| Unreal Engine | Famous for pushing the boundaries of graphical fidelity and photorealistic visuals. It truly shines in high-end games and cinematic VR experiences where visual quality is the absolute top priority. |
The choice between Unity and Unreal often boils down to the specific demands of your project. As a studio with deep roots in XR, we use both all the time to create everything from location-based VR games to complex technical training sims. If you’re not sure which engine is the right fit for your concept, you can learn more about how we tackle different app development challenges and solutions.
A Quick Word on AI Coders: While AI tools like ChatGPT and Claude can be handy for churning out simple code snippets, they are nowhere near ready to build a complex, polished iPhone app from the ground up. Someone recently tried to build a podcast app using only AI, and the experiment showed that while these models can help with boilerplate code, they fall apart when it comes to app architecture, fixing tricky bugs, and the nuanced logic a production-ready app demands. Human expertise is still essential. When looking at different development options, exploring routes like offshore app development can be a smart way to tap into specialised human talent at a different cost.
Designing and Prototyping Your App Experience
A brilliant app isn't just about code; it’s about people. A truly exceptional user experience isn't a happy accident, it’s forged through meticulous design and constant prototyping. This is the crucial stage where your big ideas start to feel real, transforming from abstract plans into something you can actually see and touch. It’s the first time you get a glimpse of how your app will look, feel, and behave in a user's hands.
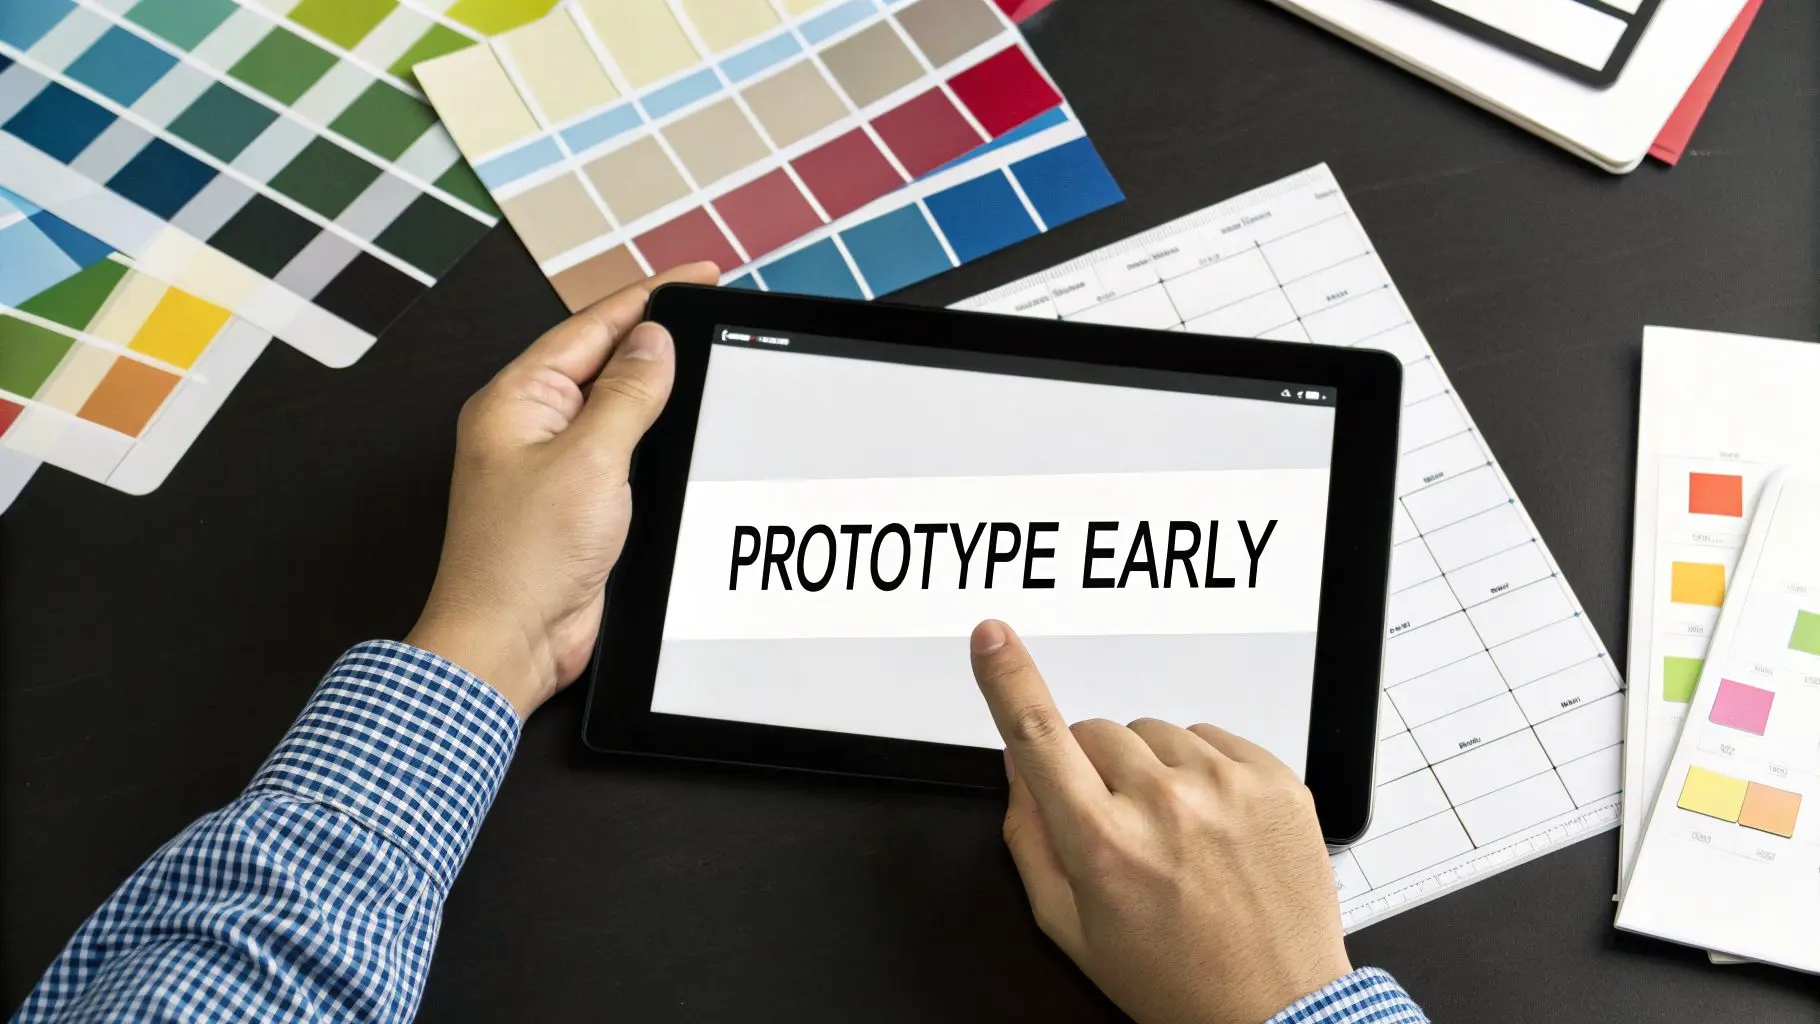
Getting this part right is all about gathering feedback early and often. Let's be honest: making changes to a design in Figma is quick and cheap. Making those same changes once the code has been written? That’s slow and expensive. Prototyping is your chance to test your assumptions and iron out the kinks in the user journey _before_ you commit to a single line of code.
From User Flows to High-Fidelity Prototypes
The design process is a journey, moving from rough, low-fidelity sketches to polished, clickable mockups. Each step deliberately adds another layer of detail, ensuring the final product isn’t just beautiful but also completely intuitive to use. Typically, this journey looks something like this:
- •User Flow Diagrams: It all starts with simple charts that map out every single step a user takes to get something done. Think "Open App → Tap 'Login' → Enter Credentials → View Dashboard." This process is brilliant for spotting dead ends or confusing pathways right from the get-go.
- •Wireframes: Once the flow makes sense, we build wireframes. These are the basic, black-and-white blueprints of your app. They focus purely on structure and function, where buttons go, where text sits, where images will be, without the distraction of colours or fonts.
- •High-Fidelity Mockups: Now for the fun part. This is where your brand’s personality, its colours, typography, and imagery, gets applied to the wireframes. The result is a static but pixel-perfect preview of what the final app will look like.
- •Interactive Prototypes: Finally, we take those gorgeous mockups and link them together in tools like Figma or Adobe XD. This creates a clickable, interactive prototype that feels just like the real thing. You can tap through the entire app on an iPhone, which is an absolutely invaluable tool for user testing.
This structured approach is what separates a professional, polished app from an amateur one. It’s a cornerstone of developing iPhone apps that people genuinely love using.
Creating and Optimising Your App's Assets
With the UI/UX blueprint locked in, our focus shifts to creating all the visual ingredients that will bring it to life. These are the building blocks of your app’s aesthetic, the icons, illustrations, 3D models, character animations, and branding elements that make the experience feel unique and engaging. For a standard UI-based app, this might just mean creating a custom icon set and a few graphics. But for a more immersive app, like an educational game or an AR experience, this pipeline is far more extensive. We could be talking full-scale character rigging, motion capture sessions, and building entire 3D worlds from scratch.
Crucial Tip: Every single image, animation, and 3D model adds to your app's file size and impacts its performance. Optimisation is not optional. Assets have to be compressed and formatted correctly to make sure the app runs like a dream and doesn't guzzle the user's battery, especially on older iPhones.
Striking this careful balance between visual quality and rock-solid performance is a hallmark of professional app production. It's especially vital within the UK's dynamic app economy, which, heavily powered by iPhone apps, contributes an estimated 1.5% to the nation's GDP and supports around 400,000 jobs. This economic impact highlights just how critical high-quality iOS development is in sectors like finance and gaming, areas where deep expertise in multi-episode CGI, XR design, and Unity/Unreal is essential. You can dig into more data about the UK's mobile app market growth on netguru.com.
Building Your Backend and Integrating APIs
While the slick design and smooth animations on the front end often get all the glory, some of the most powerful features in an iPhone app are driven by what’s happening behind the scenes. Think of the backend as the engine of your app. It’s the secure, central hub that handles user data, serves up dynamic content, and plugs your app into the wider world. Without a solid backend, an app is really just an empty shell. Choosing the right backend architecture is one of those foundational decisions that will shape the future of your app. It has a direct impact on how easily your app can scale, what your ongoing running costs will look like, and how quickly you can roll out new features. It’s not just a technical choice; it’s a strategic one.
Choosing Your Backend Architecture
You’ve got two main paths you can go down: a traditional server-based setup or a more modern serverless approach. There’s no single right answer here. The best fit depends entirely on what your app needs to do, your budget, and where you see it going long-term. A traditional backend means setting up and managing your own servers (or, more commonly, renting them from a cloud provider like AWS or DigitalOcean). This route gives you total control and flexibility, but it also means you're on the hook for all the maintenance, security updates, and scaling the whole thing up yourself as your user base grows. On the other hand, serverless computing, often called "Backend-as-a-Service" (BaaS), takes all that server management off your plate. You simply write the code for your functions, and the provider, like AWS Lambda or Google's Firebase, handles the rest.
Key Takeaway: Serverless is often fantastic for getting a prototype out the door quickly and for apps with unpredictable traffic, since you only pay for what you actually use. For highly complex, data-heavy applications, though, the control and predictable costs of a traditional server might be a better fit.
Serverless vs. Traditional: A Quick Comparison
To help you weigh your options, here’s a quick breakdown of how they stack up:
| Factor | Serverless (e.g., Firebase, AWS Lambda) | Traditional Server (e.g., EC2, DigitalOcean) |
|---|---|---|
| Management | The provider handles all server maintenance, scaling, and security patches. | You're responsible for server setup, maintenance, security, and scaling. |
| Cost Model | Pay-per-use. It can be incredibly cost-effective for low or spiky traffic. | Fixed monthly or hourly cost, regardless of usage. Can be cheaper at a very high, consistent scale. |
| Scalability | Automatically scales up or down in response to real-time demand. | Needs manual intervention or complex auto-scaling configurations. |
| Control | Less control over the underlying environment; potential for vendor lock-in. | Complete control over the operating system, software, and network setup. |
For many businesses starting out on their iPhone app journey, a serverless platform like Firebase is an excellent choice. It comes with built-in features for authentication, real-time databases, and cloud storage, which can dramatically cut down development time. For a deeper dive on this, check out our guide on cloud computing in app development.
The Role of APIs in Connecting Your App
APIs, or Application Programming Interfaces, are the messengers that let your app talk to your backend and other third-party services. When a user logs in, their details are sent via an API call to the backend to be verified. When they pull up their order history, another API call fetches that data from the database. But APIs aren't just for talking to your own backend. They're essential for plugging in powerful external services that bring extra functionality to your app, such as:
- •Payment gateways like Stripe or Braintree
- •Mapping services like Apple Maps or Google Maps
- •Social media logins for Facebook or Google
Making sure these connections are secure and reliable is absolutely critical. This means putting proper authentication in place, encrypting data as it travels, and having solid error handling. A poorly implemented API won't just cause your app to crash, it can create serious security holes and put your users' data at risk.
Launching and Navigating the App Store
So, you’ve built your app. The journey from initial concept to a fully functional piece of software is a long one, but the next step is often the most nerve-wracking: submitting it to the App Store. This is the home stretch, but it’s a stage that’s littered with potential tripwires. A rushed or poorly planned submission can get you tangled in Apple’s review process, leading to frustrating delays or even an outright rejection. Getting this right is absolutely non-negotiable.
Success isn’t just about having clean code. It’s about how you present your app, ensuring it complies with Apple's strict rules, and having a solid plan for what happens _after_ you launch. Think of launch day as the starting line, not the finish.
Mastering Your App Store Listing
Your App Store product page is your digital shopfront. It's often your one and only chance to persuade someone to download your app. Don't make the mistake of treating it as a last-minute chore; it's a critical marketing tool. A compelling listing needs to be clear, attractive, and persuasive. Here’s what you need to nail:
- •App Name and Subtitle: They need to be memorable but also descriptive. If you can work in a keyword naturally, do it.
- •Screenshots and Previews: These are your most powerful sales assets, period. Show off the best parts of your app. For games or an XR experience, a high-energy video preview isn't just nice to have, it's essential.
- •Description: Get straight to the point. What problem does your app solve? What makes it special? Use formatting like bullet points and bold text to make it easy for people to scan.
- •Keywords: Choose your keywords carefully. This is how people will find you when they search the App Store, so think like your target user.
Your App Store listing is more than just metadata; it's your primary conversion tool. Every element, from the icon to the last line of the description, should be crafted to persuade and inform, turning browsers into loyal users.
Navigating the App Review Process
Apple is notoriously protective of its ecosystem. That’s a good thing for users, but it means every app faces a rigorous review process. Understanding Apple's App Store Review Guidelines is the key to a smooth ride. We’ve seen apps get rejected for all sorts of reasons, bugs, privacy oversights, confusing user interfaces, you name it. The best way to avoid this is to test, test, and test again. Before you even think about hitting submit, use Apple’s own TestFlight to send beta versions to a trusted group of testers. This lets you iron out the kinks on different iPhone models and iOS versions while gathering honest feedback. If you want to dive deeper, we’ve put together some advice on navigating App Store review guidelines to help you sidestep common pitfalls.
Planning for Life After Launch
Getting your app live is a huge milestone, but the work doesn’t stop there. A successful app needs ongoing care and a smart marketing strategy. Your launch plan should include activities to drive those crucial first downloads, whether that's through social media buzz, reaching out to the press, or running paid ad campaigns. Once you’re live, pay close attention to what your users are saying. Monitor your reviews and check your analytics. This feedback is pure gold, it’s a direct roadmap for what to fix, improve, and build next. Regular updates that squash bugs, add requested features, and support the latest version of iOS are what separates a one-hit-wonder from a long-term success.
Common Questions About App Development
Venturing into iPhone app development for the first time? It’s completely normal to have a long list of questions. Over the years, we've guided countless partners through this journey, and a few key queries always pop up. We’ve put together some straight-to-the-point answers to the most common ones we hear.
How Much Does It Really Cost To Develop an iPhone App?
This is always the first question, and the honest answer is: it varies enormously. The cost is directly tied to the complexity of what you want to build. A very simple app, perhaps with a few static screens and basic functions, might start in the region of £15,000 - £25,000. However, most professional, feature-rich apps that businesses aim for fall into a higher bracket. A medium-complexity app with a custom UI, its own backend server, and API integrations typically ranges from £40,000 to £80,000. For a highly complex app, one involving intricate animations, real-time data, e-commerce, or immersive XR features, the budget can easily top £100,000. The main cost drivers are always the number of features, the sophistication of the design, and the technology stack required to bring it all to life.
How Long Does It Take To Build an App From Start to Finish?
A realistic timeline for a professional iPhone app is generally somewhere between 4 to 9 months. This isn't just one long stretch of coding; it breaks down into distinct phases:
- •Strategy & Design (1-2 months): This is where we do the critical upfront work , initial planning, research, mapping out user journeys, wireframing, and creating the high-fidelity visual designs and prototypes. Rushing this stage is a false economy, pure and simple.
- •Development & Testing (3-6 months): This is the longest phase. It’s where the actual coding happens, the backend is built, and we perform rigorous quality assurance to squash bugs.
- •Submission & Launch (2-4 weeks): This final period is all about preparing the App Store listing, navigating Apple's review process, and executing the initial launch marketing.
More ambitious projects, especially those involving extensive XR development in Unity or Unreal Engine, can certainly extend beyond a year.
It's tempting to look for shortcuts, but a proper development cycle is designed to prevent costly rework. A well-paced project that allows for thorough design, development, and testing is far more likely to succeed than one that's rushed to market.
Do I Need a Separate App for iPad?
Not necessarily, but you definitely need a plan for it. The most efficient approach is to build what’s called a "universal" app. This is a single application designed from the ground up to adapt its layout for both iPhone and iPad screens, and it's standard practice for most projects. That said, simply stretching an iPhone interface to fit an iPad screen often creates a pretty poor user experience. A truly _optimised_ iPad app takes advantage of the larger screen to show more information, enable multi-pane layouts, or provide more immersive interactions. The decision really comes down to your audience, if a significant portion of your users are on iPad, investing in a dedicated design for that form factor is a very smart move.
What Are the Most Common Reasons Apple Rejects Apps?
Apple's review process is notoriously thorough, and rejections are common, especially for developers submitting for the first time. From our experience, the most frequent culprits are:
- •Crashes and Bugs: The app must be stable. Any reproducible crash is an instant rejection.
- •Privacy Policy Violations: You absolutely must have a clear and accessible privacy policy, especially if your app handles any user data. You also need to declare all data collection accurately in your App Store submission.
- •Incomplete or Misleading Information: Your App Store listing has to be accurate. If the reviewer can't access certain features because they don't have login details, for example, the app will be rejected.
- •Poor User Experience: This is a broad one, but it covers everything from a confusing UI to not following Apple's Human Interface Guidelines. At the end of the day, the app has to _feel_ like it belongs on iOS.
Thorough testing with TestFlight and a careful review of the guidelines before you submit can prevent the vast majority of these issues. Getting apps approved consistently just requires discipline and a sharp eye for detail.
If you're looking to transform your idea into a high-quality, professional iPhone app, the team at Studio Liddell has the expertise to guide you through every stage, from strategic planning to a successful App Store launch. Book a production scoping call to discuss your project with our experts.