A Developer's Guide to Oculus VR Development
Oculus VR development is the process of creating immersive experiences for Meta's ecosystem of standalone headsets. It involves building everything from high-energy games to complex training simulations specifically for hardware like the Meta Quest 2, 3, and Pro, using Meta's SDKs and a game engine like Unity or Unreal Engine. This field is a significant component of the UK's burgeoning virtual reality market.
Understanding the Oculus VR Ecosystem
Diving into Oculus VR development means engaging with the largest and most consumer-friendly VR platform available today. The ecosystem is a powerful combination of hardware, software development kits (SDKs), and distribution platforms that work in concert to bring virtual worlds to life. This seamless integration is a primary reason for its widespread adoption.
The platform's influence has profoundly shaped the UK's AR & VR landscape. User penetration is expected to reach an impressive 82.3% by 2025. Looking further ahead, the number of AR & VR users in the United Kingdom is projected to hit 57.7 million by 2030, a surge driven primarily by the success of standalone headsets that do not require an expensive PC. You can explore this market growth and its key drivers to understand the scale of the opportunity.
The Hardware Foundation: Meta Quest Devices
At the core of any Oculus VR project is the hardware. Each headset is designed for a different segment of the market, and understanding their capabilities is fundamental to planning your project’s scope and features. To make sense of the current hardware, here’s a brief overview of the main devices you’ll be developing for.
Meta Quest Hardware at a Glance
| Device | Primary Use Case | Key Features | Target Developer |
|---|---|---|---|
| Meta Quest 2 | Mainstream VR Gaming & Entertainment | Affordable, large user base, solid performance. | Developers aiming for the widest possible audience. |
| Meta Quest 3 | Mixed Reality (MR) & Next-Gen VR | High-resolution colour passthrough, improved performance. | Developers creating MR experiences or next-gen VR games. |
| Meta Quest Pro | Professional & Enterprise Use | Advanced eye and face tracking, premium design. | Developers building for enterprise, training, or social VR. |
As you can see, each device opens up distinct creative possibilities.
For developers, the real challenge isn't just making a great experience; it's making one that scales beautifully across this hardware family, from the foundational Quest 2 right up to the advanced tracking of the Quest Pro.
The Essential Software Tools
To build for this hardware, you need the appropriate software. Meta provides a suite of tools designed to integrate seamlessly with the most popular game engines, forming the technical backbone of any project. There are two primary components to this software stack:
- Meta Quest SDK (Software Development Kit): This is your direct interface with the hardware's unique features. It’s a toolkit packed with libraries and APIs for functionalities like controller tracking, Guardian boundary setup, and accessing passthrough cameras.
- OpenXR: This is an open, royalty-free standard that acts as a universal API for VR and AR development. When you build with OpenXR, your application becomes more portable, meaning it can run on different VR hardware with minimal changes. It’s an excellent way to future-proof your work.
Choosing Your Engine: Unity vs Unreal for VR
Once you have a grasp of the Oculus hardware and software, the next major decision is selecting your game engine. This choice is not merely a technical detail; it defines your project's entire workflow, its visual potential, and the type of team you will need. For Oculus VR development, the discussion almost always centers on two industry leaders: Unity and Unreal Engine. This is not a simple "which is better?" question. The right engine depends on your project's specific goals, your team's existing skillset, and the compromises you're willing to make, especially when targeting the mobile processors that power the Quest headsets.The Case for Unity: A Flexible Powerhouse
For a long time, Unity has been the preferred engine in the VR community, particularly for developers building for standalone headsets like the Quest. Its reputation is built on a solid foundation of flexibility, a massive developer community, and an ecosystem that enables rapid prototyping. For many studios, Unity's component-based architecture is highly intuitive. It provides a straightforward way to assemble complex, interactive systems without getting bogged down in low-level details. A significant part of its appeal is the Unity Asset Store. This is a vast marketplace filled with ready-made models, tools, and scripts that can reduce development time by weeks or even months. This is invaluable for smaller teams or any project on a tight schedule, as it eliminates the need to build everything from scratch. This screenshot shows Unity's XR Interaction Toolkit, a foundational component for building VR experiences. This toolkit provides a solid framework for handling controller inputs, creating interactable objects, and setting up player locomotion. It significantly simplifies the process of building core VR mechanics. Unity’s scripting language, C#, is also widely used and generally considered more approachable than Unreal's C++, which lowers the barrier to entry for new developers joining a project. For a more detailed look, our guide on Unity VR development for immersive experiences explores how to push the engine for top-tier results.Unity truly excels on projects that require complex interactivity and rapid iteration. It’s the pragmatic, go-to choice for many non-gaming VR applications, from intricate training simulations to interactive educational tools, where leveraging a rich ecosystem of third-party assets is key.
The Power of Unreal Engine: Visuals and Accessibility
Unreal Engine, developed by Epic Games, has always been the champion of graphical fidelity, powering some of the most visually stunning games ever created. It brings the same potential for high-fidelity visuals to the Oculus Quest, but this power comes at a cost, it requires meticulous performance management to run smoothly on a mobile chipset. With features like its advanced material editor and sophisticated lighting systems, artists can create visuals that approach photorealism. This makes it an excellent choice for projects where the visual "wow" factor is paramount, such as architectural visualisations or cinematic VR narratives. However, Unreal’s secret weapon, especially for mixed-discipline teams, is its Blueprint visual scripting system. This node-based interface is a game-changer, allowing non-programmers to implement complex logic without writing a single line of code. Here’s how Blueprint empowers the entire team:- •Artists: Can implement their own visual effects and animations directly, without waiting for a programmer.
- •Designers: Can prototype and construct entire game mechanics and levels independently.
- •Producers: Can visually inspect the game logic and understand it, which drastically improves team communication.
This approach can democratise the development process, enabling more creative input from everyone. Of course, to access the engine's core or to extract maximum performance, a skilled C++ programmer is still essential.
Making the Right Decision for Your Project
The Unity vs. Unreal decision is a strategic one, balancing your visual ambitions against the realities of production. Unity often provides a faster, more direct path to a functional, interactive prototype and is built for rapid iteration. On the other hand, Unreal Engine offers a higher graphical ceiling out of the box, supported by a visual scripting system that empowers artists and designers like no other. Ultimately, the best engine is the one that aligns with your team’s expertise and your project’s unique requirements. Carefully consider your desired visual style, the complexity of the interactions you need to build, and your project timeline. Making the right choice at this stage will set your Oculus VR development journey up for success from the beginning.
The Core Production Pipeline for VR Experiences
Once you’ve selected your engine, it’s time to begin development. Building a VR experience for Oculus is different from standard 2D development; it’s a structured workflow that requires you to think spatially from the very start. You are crafting an entire world, not just what appears on a screen. This journey begins long before you write a single line of code or create a single 3D model. It starts with designing for a 360-degree canvas where the user is the camera, a fundamental shift that influences every decision you make throughout the process.
From Concept to Pre-production
This is the blueprint phase. It is about defining the experience, testing your ideas against the practicalities of VR, and planning for its unique challenges. You are not just considering what the user sees, but how they feel and move within the virtual space. This critical planning stage typically includes:
- •VR Storyboarding: Forget flat panels. Designers often use spherical sketches or simple 3D blockouts to view scenes from a true first-person perspective. This helps determine where a user is likely to look and where to place key events.
- •Interaction Design: How will users grab, throw, or manipulate objects? Prototyping these actions is vital. The goal is to make mechanics feel natural and satisfying with motion controllers, not clunky or awkward.
- •Comfort and Accessibility Planning: You must design to prevent motion sickness from the outset. This means making smart choices about locomotion (e.g., teleportation vs. smooth movement), field of view, and ensuring a consistent, high frame rate.
A successful VR project is built on a foundation of empathy for the user. Every design choice must prioritise comfort and intuitive interaction, as even minor friction can break the sense of presence and lead to a negative experience.
Asset Creation and Environment Building
With a solid plan in place, you can begin producing the 3D assets. For standalone headsets like the Quest, this stage is a constant balance between visual quality and performance. Your assets must look great without overwhelming the limited processing power of a mobile chipset. A few best practices for creating VR-ready assets include:
- •Low-Polygon Modelling: Keeping the polygon count of your models efficient ("low-poly") is essential. Every triangle adds to the rendering load, so artists must be disciplined.
- •Texture Optimisation: Using compressed texture formats and being mindful of texture sizes (resolutions) prevents overloading the headset’s memory, which is a common cause of performance issues.
- •Static and Dynamic Batching: Game engines are capable of grouping multiple objects together and rendering them in a single instruction (a "draw call"). Organising your assets to facilitate this is a key optimisation technique.
This flowchart illustrates the high-level decision process when moving from pre-production into the full development phase.
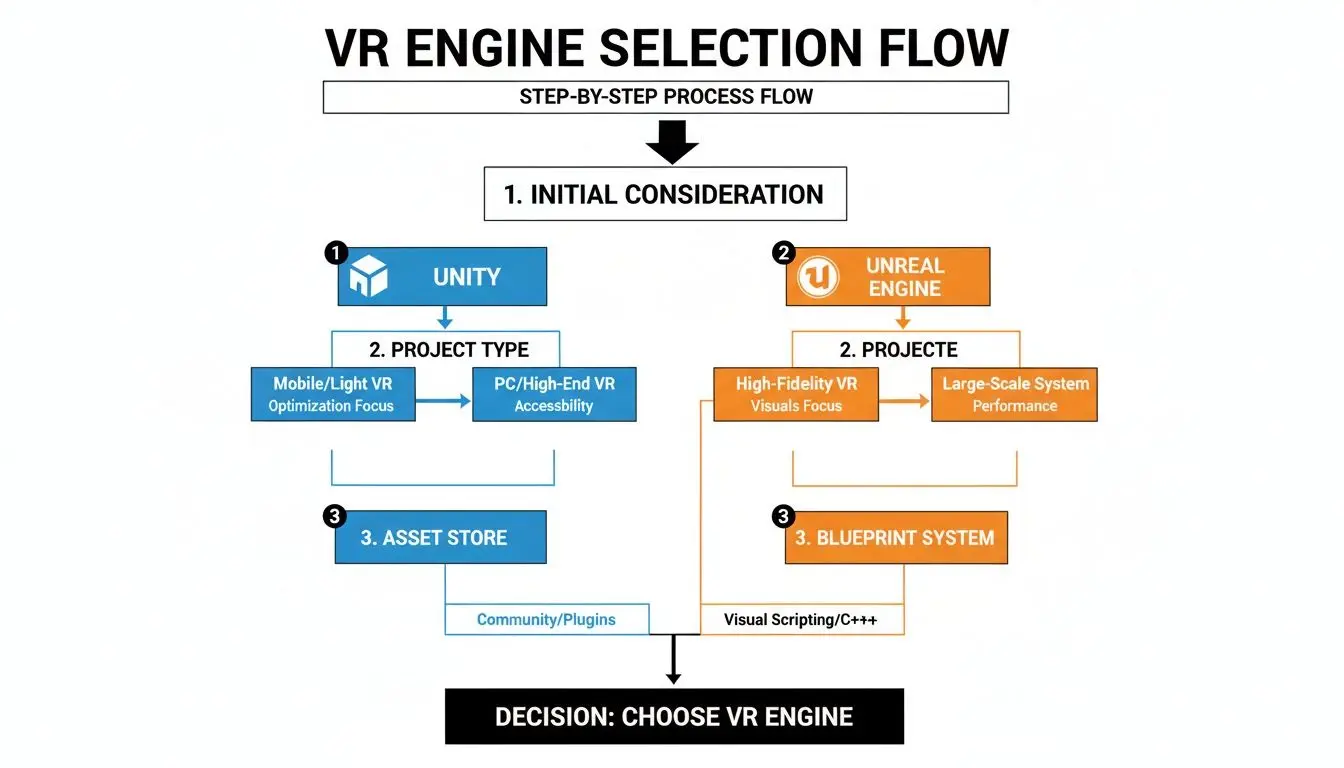
As you can see, the project's needs, from visual targets to your team's existing skills, directly influence which engine's pipeline is the better fit.
Implementation and Iteration
This is where all the elements come together. The art, sound, and programmed logic are integrated within your chosen game engine. The core gameplay loop is built, interactions are coded, and the virtual world begins to feel alive. This phase is defined by iteration, a continuous cycle of testing and refinement directly inside the VR headset. Here, developers focus on bringing all planned elements to life, from character animations and UI to sound design and haptic feedback. This loop of building, testing in-headset, and refining is the true heart of Oculus VR development. It’s how you ensure the final product is not just functional, but genuinely immersive and enjoyable.
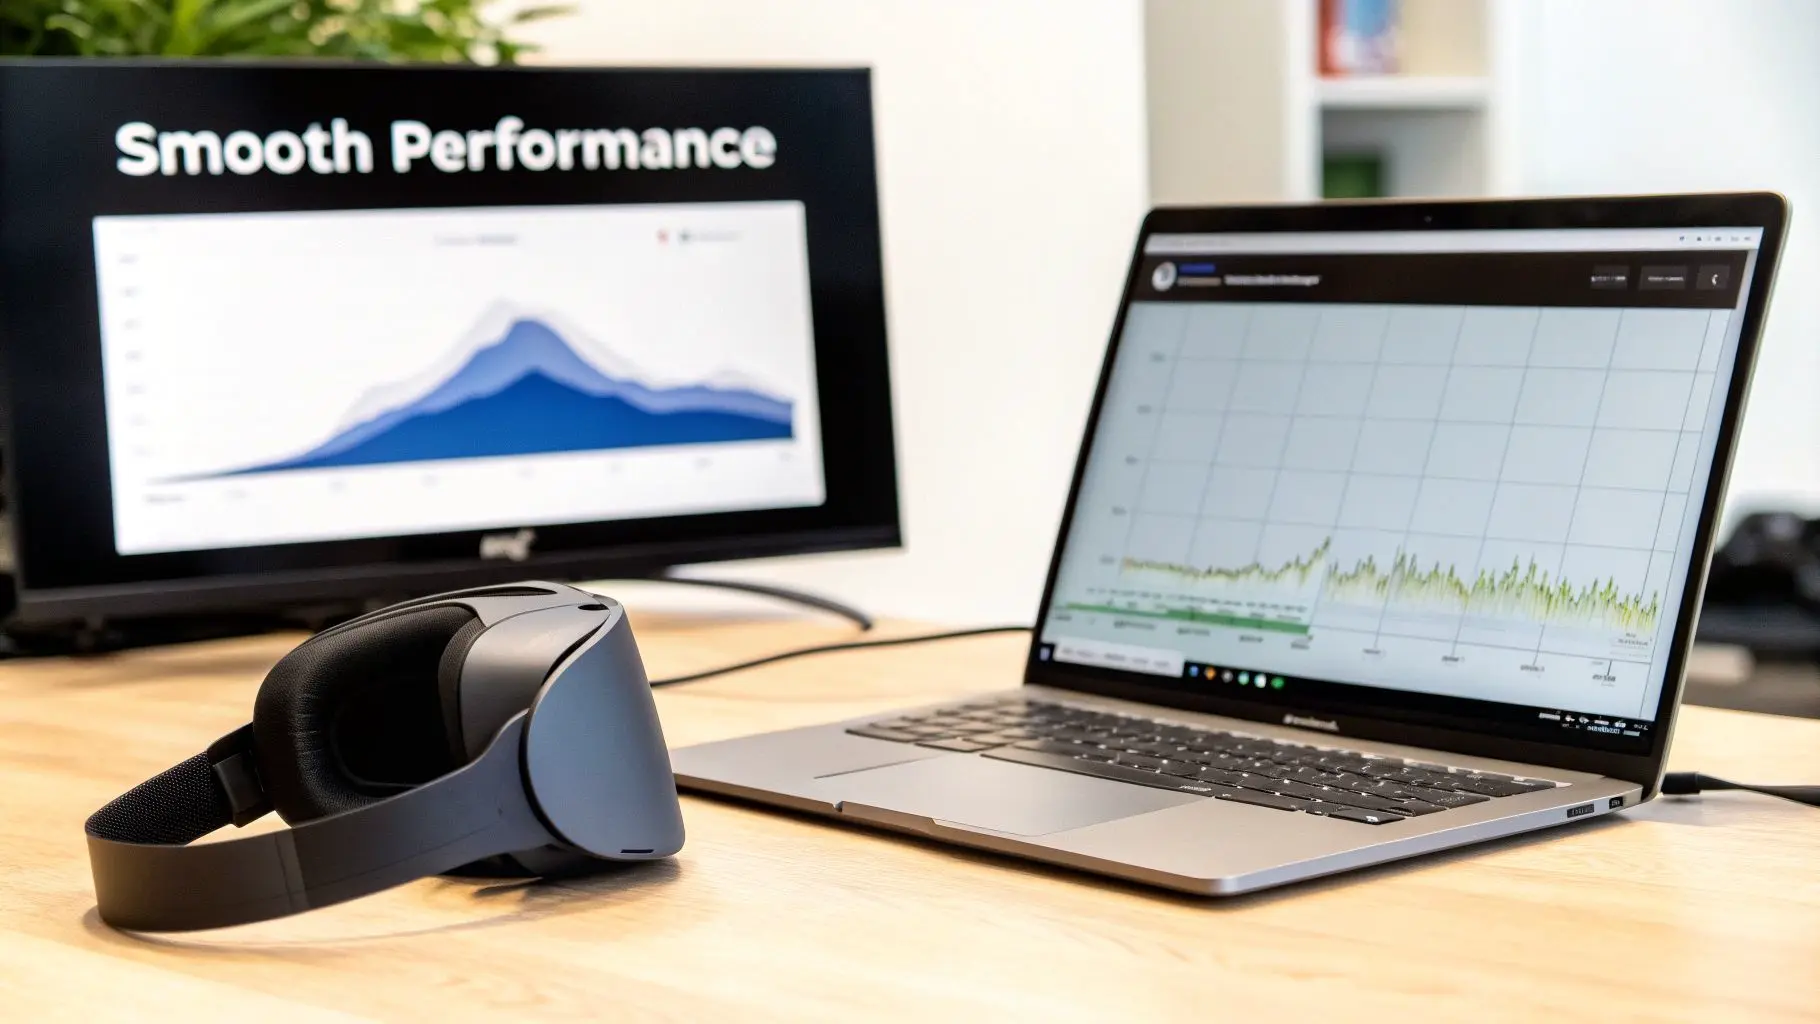
Optimising Performance for Standalone VR Headsets
In virtual reality development, performance is not just a desirable feature; it is the absolute foundation of the entire experience. Unlike watching a film or playing a game on a flat screen, a dropped frame or a stuttering frame rate in VR can instantly shatter the user's sense of presence. Worse, it can cause genuine physical discomfort and motion sickness. When you are building for a standalone headset like the Meta Quest, you are working with mobile hardware. This means every ounce of performance must be extracted from the device. It is a non-negotiable part of the development process.
This relentless focus on smooth performance is what consumers expect, especially in gaming. The UK's virtual reality gaming market, dominated by Meta's hardware, is a testament to this, generating an impressive USD 1,376.2 million in 2024 alone. A significant 65.13% of that revenue came directly from hardware sales, indicating how many people are purchasing Quest headsets and expecting top-tier experiences out of the box. You can read more about the growth of the UK's VR gaming market to see how hardware is driving expansion.
Mastering the Art of Resource Management
Developing for a standalone headset is about managing a very tight budget of processing power, memory, and heat. Every decision, from how an artist creates a 3D model to how a programmer writes a piece of code, directly impacts performance. The usual culprits behind poor frame rates typically fall into three main categories. You must be incredibly disciplined with:
- •Draw Calls: Every time the CPU instructs the GPU to draw something on the screen, it's a "draw call." Too many of these create a bottleneck, slowing everything down. We use clever techniques like texture atlasing (combining multiple textures into one large sheet) and mesh combining to keep this number as low as possible.
- •Polygon Counts: Modern hardware is capable, but every vertex in a 3D model still has a processing cost. A classic strategy is to use Level of Detail (LOD) systems, which automatically switch to lower-polygon models for objects far from the player.
- •Texture Memory: High-resolution, uncompressed textures can quickly consume a headset's limited video memory. Using efficient compression formats and ensuring textures are sized appropriately for their use is crucial for stability.
The core principle of VR optimisation is simple: do less, but do it more intelligently. The goal is always to deliver the most stunning visual experience possible while making the mobile hardware do the absolute minimum amount of work for every single frame.
To give you a clearer picture, here's a breakdown of some of the most critical techniques we use to maintain performance.
Key VR Performance Optimisation Techniques
| Technique | Description | Primary Impact |
|---|---|---|
| Mesh Combining | Merging multiple static 3D models into a single object. | Reduces CPU draw calls. |
| Texture Atlasing | Combining several smaller textures into one large texture sheet. | Reduces draw calls and memory usage. |
| Level of Detail (LODs) | Using lower-polygon models for objects that are far from the camera. | Reduces GPU load from vertex processing. |
| Fixed Foveated Rendering | Rendering the screen periphery at a lower resolution than the centre. | Significantly reduces GPU fragment shading workload. |
| Occlusion Culling | Preventing the GPU from rendering objects hidden behind other objects. | Reduces overdraw and GPU workload. |
| Efficient Culling | Setting aggressive culling distances to avoid rendering distant objects. | Reduces both CPU and GPU load. |
Each of these methods contributes to managing the processing budget, collectively ensuring the experience remains smooth and immersive.
Leveraging Platform-Specific Optimisation Tools
Beyond these general best practices, Meta provides powerful, hardware-specific tools to help developers achieve a rock-solid frame rate. These are not just optional extras; for any serious Oculus VR project, they are essential. Two of the most impactful technologies are:
- Fixed Foveated Rendering (FFR): This is a brilliant technique that mimics how human vision works. It renders the very centre of your view at full, crisp resolution while progressively lowering the resolution towards the periphery, where you do not perceive fine detail. It saves a massive amount of rendering power with virtually no noticeable drop in quality for the user.
- Application Spacewarp (AppSW): What if your app cannot consistently hit the target frame rate, say 90 frames per second (FPS)? AppSW can be a lifesaver. It allows your app to run at half the frame rate (e.g., 45 FPS), and then it intelligently generates a synthetic "in-between" frame for each real one. To the user, it creates the illusion of perfectly smooth motion.
The Profiler Is Your Best Friend
You cannot fix what you cannot measure. Both Unity and Unreal Engine have fantastic profiling tools that provide a frame-by-frame breakdown of exactly what your app is doing and where the slowdowns are occurring. Using the profiler allows you to hunt down performance bottlenecks with surgical precision. Is a particular script taking too long to execute? Is a 3D model consuming too much memory? Are your draw calls spiking in a certain area? The profiler provides the answers. Spending time with this tool turns optimisation from guesswork into a data-driven science, ensuring your app is not just beautiful, but comfortable and performant for every user.Launching Your App on the Meta Quest Store
Completing your Oculus VR project is a massive achievement, but it is only half the battle. Now comes the real test: getting your creation into the hands of users by navigating Meta’s app store ecosystem. This is where your focus must shift from creative development to meticulous quality assurance and smart marketing. This final push to launch is where many otherwise great projects can falter. It’s a gauntlet of testing against a very specific set of VR standards, preparing eye-catching promotional materials, and understanding a tough, curated review process. Getting this stage right is absolutely make-or-break for a successful release.Mastering VR-Specific Quality Assurance
Testing a VR app is not a typical bug hunt. Of course, you need to check for crashes and functional errors like any other software, but VR QA must go much deeper. The primary focus must be on user comfort and the physical experience of actually being in your world. A technically perfect app that makes people feel sick is a commercial failure. Your QA process needs to focus on a few key areas:- •Comfort and Motion Sickness: This is priority number one. Every movement mechanic, camera shift, or interaction must be tested for its potential to cause discomfort. A rock-solid, high frame rate is not just a nice-to-have; it's non-negotiable.
- •Tracking Stability: Hand and controller tracking must be flawless. Any hint of jitter, lag, or loss of tracking shatters the illusion instantly and will frustrate the user. Be sure to test this in various lighting conditions.
- •Playspace Compatibility: Your app must work for everyone, regardless of their room size. This means rigorously testing for seated, standing, and full room-scale setups. Can the user reach everything they need to? Does the experience still work with limited space?
In VR, the user's physical well-being is part of the user experience. Your QA process isn't just about finding bugs; it's about guaranteeing a safe, comfortable, and stable immersive experience every single time.
Navigating the Submission Process
Meta offers two main routes to distribute your app, each serving a very different purpose. Understanding the distinction is the first step in choosing the right path for your project.
- The Meta Quest Store: This is the primary, highly curated storefront. A listing here provides maximum visibility and an instant stamp of credibility. The catch? The review process is incredibly rigorous, and your app must meet high standards for quality, performance, and overall polish.
- App Lab: Think of this as a more accessible launchpad. It’s ideal for apps that are still in early development, cater to a niche audience, or are more experimental. The technical checks are still in place, but the content requirements are far more relaxed. The trade-off is that App Lab titles are not featured on the main store; users need a direct link to find them.
Preparing Your Store Presence
Once your app is technically sound, you have to convince people to download it. This comes down to creating a compelling store page with high-quality assets that effectively sell your experience. You will need to assemble a complete "store kit" that includes engaging video trailers, stunning screenshots, and a punchy, well-written description that highlights your app's unique selling points. Your store page is your first, and often only, chance to make an impression. Do not skimp on it, investing time in polished, professional assets is vital for a successful launch.Finding Your VR Business and Monetisation Model
Having a brilliant VR experience is fantastic, but it's only part of the equation. To make any Oculus development project a true success, you need a solid business strategy to support it. Deciding how you will generate revenue is a decision that should be made early, as it will shape everything from the design and content to your plans for long-term support. Ultimately, the monetisation model you choose defines the user's entire relationship with your app, from their first impression to their long-term engagement.Premium vs Free-to-Play Models
For most consumer-facing apps, the primary debate is between two classic approaches: a one-time purchase or a free download with in-app purchases.- •Premium (Pay-Once): This is the traditional model. Users pay an upfront fee for the entire experience. It provides predictable revenue and is simple for consumers to understand. This model is ideal for content-heavy, story-driven games or polished, self-contained apps like our award-winning VR short, Aurora, where the value lies in the complete package.
- •Free-to-Play (F2P) with In-App Purchases (IAP): This approach removes the initial price barrier, potentially attracting a much larger audience. Revenue is generated through optional extras like cosmetic items, new levels, or time-saving boosts. While the long-term revenue potential can be substantial, care must be taken to avoid an exploitative feel. It also requires a steady stream of new content to keep players engaged.
Whichever path you're considering, understanding effective startup customer acquisition strategies is crucial. You need to know how to reach your target audience, especially in the crowded F2P market.
Enterprise and Location-Based Opportunities
Beyond the consumer Quest store, the B2B and enterprise markets are incredibly valuable avenues for Oculus VR development. These projects are typically custom-built solutions that solve a specific business problem, which means they can command much higher project fees. In the UK, the popularity of Oculus hardware has cemented its place in consumer technology, fuelling spending in the B2C space. Most revenue forecasts are based on consumer habits and high internet usage. You can learn more about the UK's AR/VR market dynamics to see how consumer trends are shaping the landscape. The enterprise world, however, operates under a different set of rules. The major opportunities here are:
- •B2B Training Simulations: This involves creating safe, endlessly repeatable virtual environments for training in high-stakes fields like medicine, aviation, or heavy machinery operation. These projects command premium budgets because the value they deliver in safety and skill development is immense.
- •Location-Based Entertainment (LBE): This involves designing experiences for VR arcades, theme parks, or special events. These projects, like our high-throughput mixed reality game Dance! Dance! Dance!, are built for short, fun, repeatable gameplay that works perfectly in a public setting.
Choosing the right monetisation strategy is about aligning your project's strengths with your audience's expectations. Whether you're creating a one-off artistic piece, a game-as-a-service, or a high-value business tool, your business model should feel like a natural extension of the experience.
A Few Common Questions About Oculus VR Development
When you're diving into the world of Oculus VR, a few questions always seem to pop up, whether you're a seasoned studio or just starting out. Let's tackle some of the most common ones to give you a clearer picture of the road ahead.
How Much Does It Cost to Develop a VR Game for Oculus Quest?
This is the big one, and the honest answer is: it depends entirely on your ambition. The cost of VR development can swing wildly based on the project's size and polish. A simple, tightly-focused experience put together by a solo developer might only run up a few thousand pounds, mostly in asset store purchases and their own time. On the other hand, a high-quality, feature-packed game from a full team of artists, programmers, and designers can easily climb into the hundreds of thousands. The real cost drivers are always content creation (3D models, textures, sound design), developer salaries, and the crucial (and often lengthy) QA testing phase.
Do I Need to Know How to Code to Start VR Development?
Not necessarily! While traditional coding is the backbone of complex and highly unique VR experiences, you absolutely don't need it to get your foot in the door. Many of the best developers today started out using visual scripting tools, which are powerful, intuitive alternatives to writing code.
Unreal Engine’s Blueprint system is a perfect example. It's a node-based interface that lets designers and artists visually connect blocks of logic to build gameplay and interactions. It’s a fantastic entry point for non-programmers, empowering them to prototype ideas and build real functionality without touching a single line of C++.
What Is the Difference Between the Meta Quest Store and App Lab?
Figuring out where to launch your app is a critical strategic decision. Meta offers two main distribution channels, and they serve very different purposes.
- •Meta Quest Store: Think of this as the high street of VR. It’s the main, heavily curated storefront where users go to find top-quality apps. Getting your title listed here guarantees maximum visibility and signals a certain level of polish. However, it requires passing an incredibly tough review process that examines every single part of your app.
- •App Lab: This is more like a specialised, direct-to-consumer channel. It’s designed for apps that are still in development, experimental, or serve a very specific niche audience. The technical bar is much lower, but your app won't be browsed on the main store, users have to find it through a direct link.
Which one is right for you? It all comes down to your project's maturity, who you're trying to reach, and what your ultimate commercial goals are. Ready to turn your immersive idea into a reality? The team at Studio Liddell has been creating award-winning VR and animation since 2019. We have the deep technical expertise and creative flair to guide your Oculus VR project from the first sketch to a successful launch. Book a production scoping call with our experts