Designing Snapchat Filters for UK Brands
Designing Snapchat filters is one of the most effective ways to get your brand directly into the hands of your audience. We’re talking about creating interactive, genuinely fun, and massively shareable content that people choose to engage with. Whether it's a simple 2D graphic overlay for an event or a complex 3D augmented reality (AR) Lens, you're essentially empowering users to become brand advocates with every single Snap they send.
Why Snapchat Filters Are a Smart Play in the UK
Before we get into the nuts and bolts of how to build these things, let's talk about the why. In the UK, Snapchat isn't just another messaging app; it's a cultural fixture, especially for younger audiences who crave authentic, in-the-moment communication. For brands, this is a golden opportunity to sidestep traditional, interruptive advertising and create experiences people actually enjoy. The real magic here is tapping into an incredibly active and loyal user base. Unlike platforms where you're just broadcasting a message to a passive crowd, Snapchat filters are used. They become part of someone's personal story, shared directly with their inner circle. This peer-to-peer sharing gives your brand an organic reach that feels personal, not promotional.
The Power of the UK Snapchat Audience
The numbers alone should get any marketer's attention. As of 2025, the UK is home to 23.9 million active Snapchat users, a figure that includes a staggering 90% of all 13-24 year-olds. But it’s the engagement that’s truly off the charts. Among UK Android users, Snapchat is the most frequently opened social app, with the average person launching it 424 times a month. This isn't just a large audience; it's a deeply committed one.
This isn't about blasting a single ad to millions. It's about empowering millions of individuals to interact with your brand, one personal Snap at a time. The cumulative effect of these small, authentic engagements is what builds real brand affinity.
To really nail it, your designs have to resonate. Understanding the unique cultural and linguistic DNA that shapes UK branding is non-negotiable. A concept that works perfectly in London might fall completely flat in Manchester, so acknowledging those regional nuances in your creative is key to success.
Geofilters vs. AR Lenses: What's the Difference?
When you decide to jump into Snapchat, you’ve got two main tools at your disposal, each built for different jobs. Your choice will come down to your campaign goals, budget, and how interactive you want the experience to be. To help you decide, here’s a quick breakdown of how they stack up.
Snapchat Geofilters vs. AR Lenses at a Glance
| Feature | Geofilters (2D Overlays) | AR Lenses (Interactive Effects) |
|---|---|---|
| Complexity | Simple 2D graphics, static overlays | Complex 3D models, animations, interactive triggers |
| Interactivity | Low (users apply it to a photo/video) | High (face tracking, games, sound effects, world objects) |
| Use Case | Location-specific events (festivals, store openings) | Brand campaigns, virtual try-ons, interactive games |
| Cost | Lower cost, based on time and geographic area | Higher creative and development investment |
| Reach | Geographically-fenced, local | Potentially global, highly shareable |
| Creation Tool | Snapchat Create Tool / Adobe Photoshop | Lens Studio |
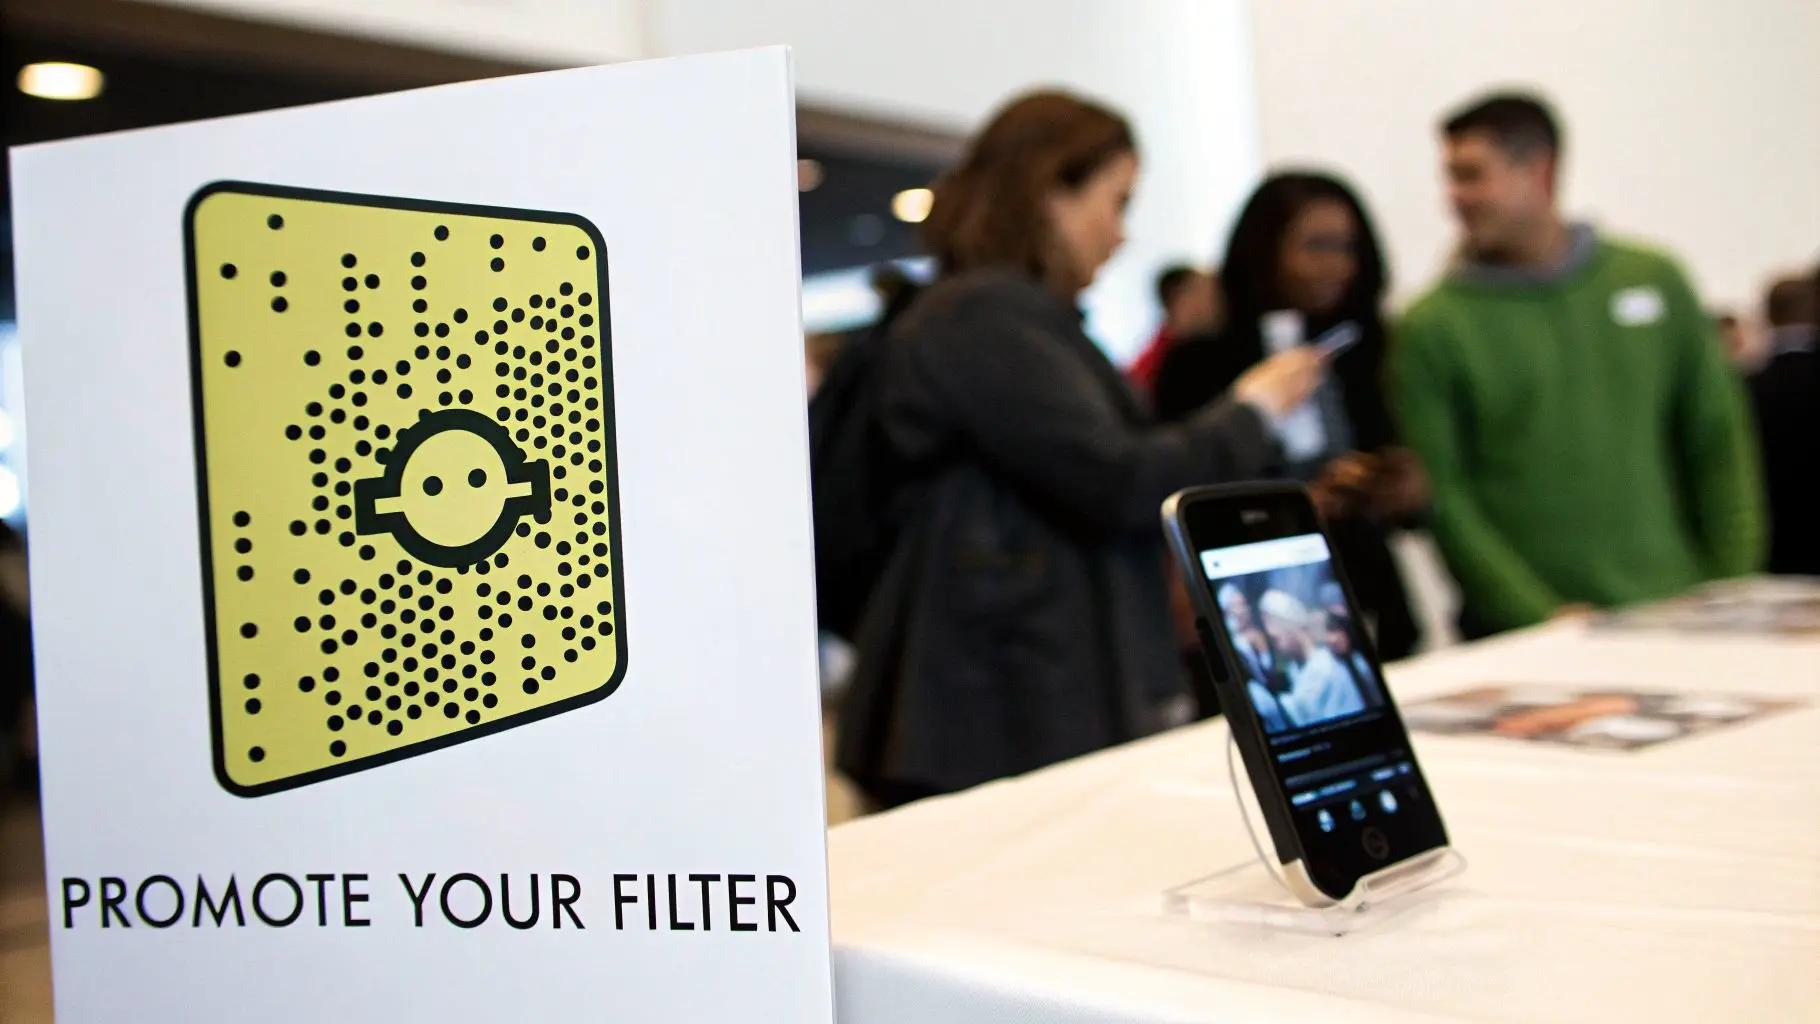
Essentially, you're choosing between a simple, location-based shout-out and a full-blown interactive experience. A 2D Geofilter is your go-to for tying your brand to a specific place and time, think a festival, a product launch, or a new shop opening. They’re a fantastic, low-cost way to drive local buzz. On the other hand, a fully interactive AR Lens, built with a powerful tool like Lens Studio, can create a national or even global moment. As you can see from the Lens Web Builder interface below, these tools have become much more accessible, allowing brands to build incredible experiences without needing a team of developers. These immersive effects are where you can drive deep user connection and see a significant return on your creative investment, a topic we explore more in our guide to using AR for brands. The decision really boils down to this: do you want users to simply mark a moment, or do you want them to become part of an interactive story?
Bringing Your Filter Concept to Life
Every great filter starts with an idea, but turning that spark into a polished, usable experience is where the real work begins. This is the stage where you move from a rough concept to a collection of assets ready for the build, whether it’s a simple 2D Geofilter for a local festival or a complex AR Lens for a global brand campaign. First thing's first: anchor your concept in your audience's world. What's going to make them stop scrolling and actually play with your filter? Your brainstorm should be less about creating a static overlay and more about designing an experience. Maybe it's a virtual try-on for a new pair of trainers, a goofy character that mimics your facial expressions, or a simple branded frame that just nails the vibe of a specific moment. Mood boards and rough sketches are your best friends here, helping you lock down the visual style and colour palette before you even touch a design program. To really make your concept sing, you need solid design skills. Mastering essential tips for graphic design in social media is non-negotiable if you want to create visuals that grab attention and don't look amateurish.
From Storyboard to Technical Specs
With a solid concept in place, it’s time to storyboard the user journey. Think of it like a mini-script for your filter. What happens the moment a user opens it? Do they need to tap the screen or raise their eyebrows to trigger an animation? Mapping these interactions out step-by-step is crucial for making sure the experience feels intuitive and fun from the get-go. Once the creative direction is locked, you have to get practical and prep your assets. This means creating or sourcing all the 2D and 3D bits and pieces that will make up your filter. This is also where the cold, hard reality of technical constraints kicks in. Snapchat has strict guidelines to ensure every filter runs smoothly, even on older phones. Here are the key technical details you absolutely must keep in mind:
- •File Formats: For any 2D assets like textures or overlays, PNG files with transparent backgrounds are the industry standard. For 3D models, you'll be working with FBX or glTF formats for Lens Studio.
- •Dimensions: While Lens Studio is pretty flexible, designing your 2D assets at 1080x1920 pixels ensures they perfectly fit a standard full-screen phone display. No weird cropping or stretching.
- •File Size: This is the big one. Your entire Lens project has to come in under 8MB. This limit forces you to be smart and efficient, optimising textures and simplifying 3D models without tanking the quality.
Getting your project file size down is a deal-breaker. If it's too big, your Lens will be flat-out rejected during submission. Get into the habit of optimising your assets right from the start. We're talking compressed textures and low-poly 3D models.
This workflow visualises the strategy that has fuelled Snapchat's growth, showing why well-designed filters are so effective on the platform.
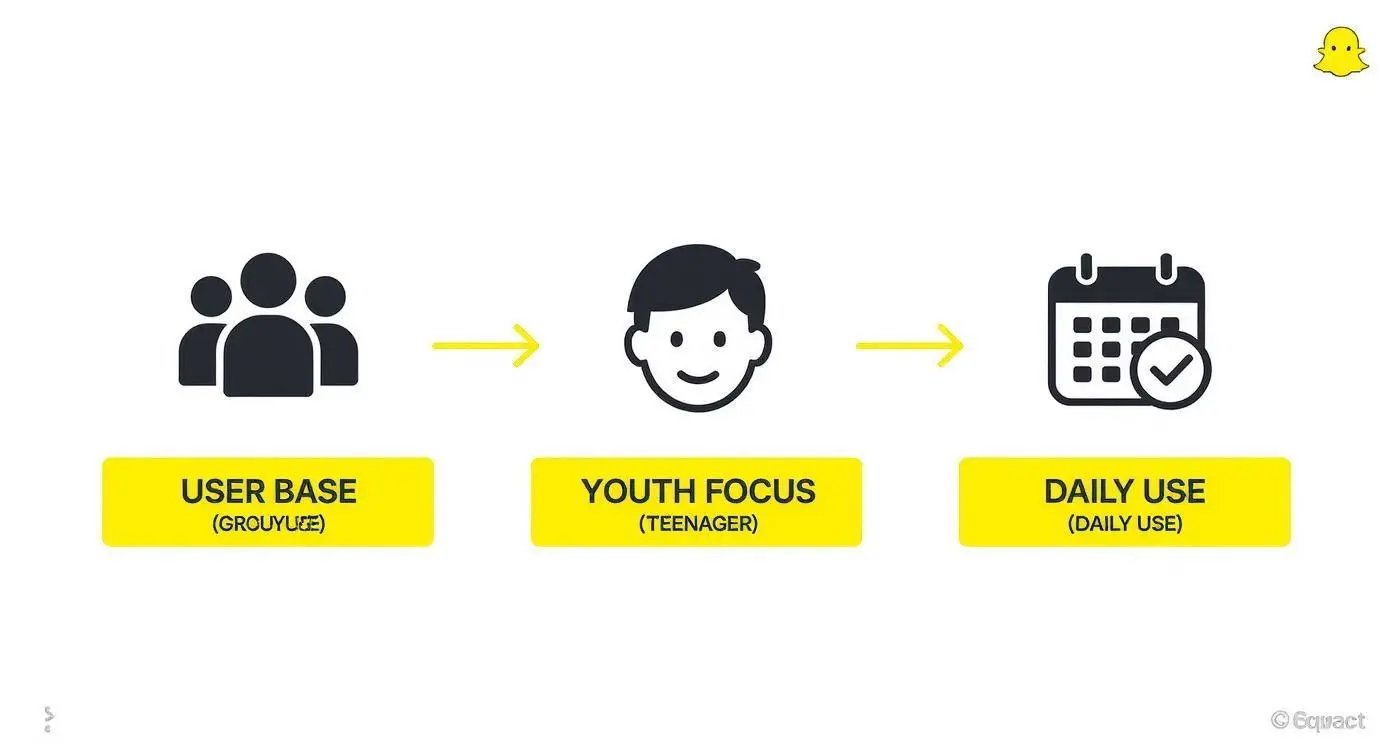
The image really drives home that success on Snapchat is all about understanding its appeal to a young, highly engaged audience that expects cool, interactive content.
Preparing Assets in Your Favourite Tools
The good news is you don't need fancy new software. Whether you're a Photoshop wizard or a Blender guru, your current design tools are more than capable of creating filter assets. For 2D work in Photoshop or Illustrator, just focus on creating high-res graphics and always remember to export them as PNGs to keep that all-important transparency. This is vital for things like logos, frames, or custom stickers that need to sit cleanly over the camera feed. If you're diving into the world of 3D Lenses, tools like Blender, Maya, or Cinema 4D are where you'll be building your models. The golden rule here is to keep your polygon count low. A high-poly model might look amazing in a standalone render, but it will absolutely cripple performance on a mobile phone. Aim for clean geometry and well-optimised textures. By prepping your assets properly and sticking to the technical specs, you'll save yourself a world of frustration when you finally jump into Lens Studio to piece it all together.
Your Practical Guide to Snapchat Lens Studio
Okay, with your creative assets prepped and optimised, it’s time to bring your filter to life. This is where Lens Studio comes in. It's a powerful, and surprisingly approachable, piece of free software from Snap that turns your 2D and 3D designs into interactive AR experiences. Don't be intimidated if it looks complex at first glance. Lens Studio is built for creators, leaning heavily on a template-driven workflow that makes getting your first filter off the ground pretty straightforward. When the software first dropped back in 2017, it completely changed the game. Before Lens Studio, designing Snapchat Lenses was a closed-door affair, handled exclusively by Snap's internal teams. Its release handed the keys to brands, agencies, and individual creators, sparking a massive wave of user-generated AR content that continues to define the platform today.

The interface is built around these pre-made projects, which is fantastic for learning. You can jump in and start customising an existing template rather than feeling lost on a blank canvas.
Getting Started with a Simple 2D Filter
Let's walk through a common first project: attaching a simple 2D graphic to a user’s face. This could be anything from branded sunglasses and custom face paint to a little company logo sitting on someone’s cheek. It's the perfect way to get a feel for the core mechanics of Lens Studio. Here's the general flow of how it works:
- Pick a Template: Fire up Lens Studio and choose something like the "Face Paint" or "Photo" template. These are already set up to track a user's face and apply a texture, which is exactly what we need.
- Import Your Asset: Head to the "Resources" panel, hit the '+' icon, and import the PNG file you made earlier. This brings your graphic into the project's library.
- Apply the Texture: Now, just drag your imported PNG from the "Resources" panel over to the material or texture slot in the "Inspector" panel. You should immediately see your graphic pop up on the preview model's face.
- Position and Scale: Use the handles in the main preview window to nudge, rotate, and resize your graphic until it sits perfectly.
Levelling Up with 3D Models and Interactivity
Once you’re comfortable with 2D face filters, the natural next step is to start playing with 3D models. This unlocks a whole new realm of possibilities, from virtual try-on products like hats and jewellery to animated characters that react to the user. The process feels familiar. You'll import your optimised FBX or glTF model into the "Resources" panel, then drag it into the "Objects" panel. The key difference is that you'll need to parent it to a "Head Binding" object. This crucial step anchors the 3D model to the user's head, making sure it moves, turns, and scales realistically along with them.Pro Tip: When you're working with 3D, keep a close eye on your materials and textures. A perfectly optimised model can still lag if its textures are massive. Always use compressed textures and simple shaders to keep your filter running smoothly on every type of phone.
Adding Simple Triggers and Animations
The real magic of a great Lens is its interactivity. Lens Studio makes this surprisingly easy, even if you can't code. Using the built-in Behaviour script system, you can set up simple cause-and-effect interactions in minutes. For example, you could easily create a trigger for when a user:- •Opens their mouth: Maybe this plays a sound effect or makes a hidden object appear.
- •Raises their eyebrows: This could kick off a particle effect like sparks or confetti.
- •Taps the screen: A tap could cycle through different colour schemes for your 3D model.
By mixing and matching these simple building blocks, you can quickly graduate from static filters to genuinely fun, playful experiences. The best way to learn is simply to experiment. Open up different templates, mess around with the triggers, and see what you can create. Before you know it, Lens Studio will feel like your own creative playground.
Submission, Targeting, and Approval
Right, you've poured your heart and soul into designing an incredible filter. The creative work is done, but don't pop the champagne just yet. Getting your masterpiece through Snapchat's submission and review system is a crucial final hurdle. This is where your design becomes a real-world campaign, and it’s all about nailing the targeting and sidestepping the common traps that get filters rejected. The whole process kicks off when you upload your final Lens package or Geofilter graphic. For Geofilters, your first job is to draw a geofence, that’s the virtual perimeter where your filter will be live. You could draw a tight fence around a single shop for a product launch or go big and cover an entire city for a festival. It’s entirely up to you. After that, you’ll need to set the schedule for your campaign, picking the start and end dates and times. A word of advice from someone who's been there: submit your filter well before you need it to go live. While Snapchat’s review can be surprisingly quick, sometimes just a few hours, it can also take up to 24 hours. Give yourself a buffer of at least 2-3 business days. Trust me, it’ll save you a world of last-minute stress if any changes are needed.
Mastering Targeting and Scheduling
Smart targeting is the difference between a campaign that sings and one that sinks without a trace. You’ve got to get inside your audience's head and think about where and when they’ll actually be using your filter.
- •Running an event? Draw your geofence snugly around the venue. It’s also worth extending it a little to cover nearby train stations or popular pubs where people might gather beforehand.
- •Driving footfall to a shop? Target your specific locations. Feeling cheeky? You could even target your competitors' locations to get in front of their customers.
- •Building brand awareness? A wider city- or region-wide campaign can work wonders, but keep a close eye on the cost. Make sure your creative has broad appeal if you're going for this approach.
Scheduling is just as vital. Running a filter for a nightclub during office hours is a surefire way to waste your budget. You need to align your filter's uptime with your audience's natural behaviour. Think about when people are most social, evenings and weekends are almost always prime time.
Avoiding Common Rejection Reasons
There’s nothing more frustrating than getting that rejection email from Snapchat. The good news is, most rejections are completely avoidable. They usually happen when a design bends or breaks Snapchat’s ad policies or submission guidelines. The quickest path to approval is simply playing by the rules from the very beginning. The most common slip-ups are around branding and intellectual property. You absolutely cannot use someone else’s trademarks, logos, or beloved characters without their explicit permission. This rule also covers using logos or hashtags from other social media platforms in your design.
Key Takeaway: Snapchat is incredibly protective of its user experience. Any filter that screams "generic ad," contains contact info, or features a dead URL will almost certainly be binned. Your goal is to add something cool to a user's Snap, not to barge in with a clunky advertisement.
Before you hit that submit button, run your design through this quick compliance checklist to keep yourself on the right side of the review team:
- •No Contact Information: Steer clear of phone numbers, email addresses, and social handles (your own Snapchat username is the only exception).
- •No URLs or Hashtags: Filters can't feature URLs that don't actually work or any hashtags.
- •Respect Trademarks: Make sure you have the legal right to use every single logo, name, and graphic in your filter.
- •Adhere to Ad Policies: Your filter can’t promote anything illegal, and its content must be appropriate for Snapchat's audience.
- •Sufficient Branding: If it’s a sponsored filter, your brand name or logo must be clearly visible. Trying to be too subtle can actually get you rejected.
By tackling these common issues before you submit, you massively boost your chances of getting a quick thumbs-up. This kind of due diligence means your campaign launches without a hitch, leaving you free to focus on promotion instead of getting stuck in a back-and-forth with the review team.
Promoting Your Filter to Maximise Engagement
A beautifully designed filter is only half the battle. If nobody knows it exists, its impact is completely lost. Once your creation gets the green light from Snapchat, the real work begins: getting it in front of people and encouraging them to actually use it. This calls for a smart, multi-channel promotional strategy that turns your creative asset into a shareable experience with genuine reach. The goal isn't just views, it's active participation. Effective promotion is everything, especially when you consider the spending power of the UK Snapchat audience. This group is part of a global user base with a staggering $4.4 trillion in combined spending capacity. What really makes this a big deal for brands is that 63% of Snapchatters report making purchases influenced by the platform. A well-promoted filter can translate directly into commercial success, making it a powerful strategic investment. You can find more insights on Snapchat's commercial influence on their statistics page.
Unlocking Your Filter with a Custom Snapcode
Every filter you create comes with its own unique Snapcode. This scannable, QR-style code is your golden ticket to bridging the gap between your offline and online promotions. Think of it as a direct, physical link to your digital experience, and you should be plastering it everywhere. Don't just share it online. A Snapcode can be an incredibly powerful call to action in the real world.
- •Print Materials: Slap it on posters, event flyers, business cards, and even your product packaging. Imagine a coffee shop putting a Snapcode on its cups that unlocks a fun, branded filter for customers.
- •In-Store Displays: Place it near the till, on menus, or on table talkers. This encourages immediate interaction while customers are physically engaging with your brand.
- •Event Signage: For festivals, conferences, or product launches, large Snapcodes on banners or screens make it dead simple for attendees to unlock and share on the spot.
The key is to treat the Snapcode as a core part of your campaign creative, not just an afterthought.
Paid Promotion Through Snap Ads
For campaigns that need a serious visibility boost, running paid Snap Ads is the most direct route. Snapchat’s advertising platform lets you target users with remarkable precision, making sure your filter lands in front of the right people. You can build audiences based on specific demographics, interests, and behaviours. A fashion brand, for instance, could target users who have shown an interest in luxury shopping. A gaming company could target those who follow gaming influencers. You can also run a "Filter Ad" format, which places your Lens directly in the main filter carousel for your target audience, guaranteeing prime real estate.
Driving Organic Buzz
Paid ads are great, but organic promotion is where the true viral potential lies. These strategies are all about creating genuine excitement and encouraging user-generated content (UGC).
The most shareable filters don't just feel like ads; they feel like content. They add value to a user's Snap, whether through humour, beauty, or a fun interaction, making them something people want to share with friends.
Here are a few proven tactics for drumming up organic engagement:
- •Influencer Partnerships: Team up with UK-based influencers whose audience is a natural fit for your brand. Get them to use the filter in their Stories and encourage their followers to try it out. Authenticity is crucial here; choose partners who genuinely align with your brand’s vibe.
- •User-Generated Content Contests: Run a competition asking users to share their most creative Snap using your filter. Offer a decent prize for the best submission and feature the winning content on your own channels. This incentivises use and floods social feeds with your branded filter.
- •Cross-Platform Promotion: Don't keep your promotion locked inside Snapchat. Announce the filter on Instagram, TikTok, and X (formerly Twitter). Share a video of the filter in action to tempt followers from other platforms to open Snapchat and give it a go.
By combining physical Snapcode promotion, targeted paid ads, and creative organic strategies, you build a comprehensive playbook that gives your filter the best possible chance to succeed. For more inspiration, check out our guide on augmented reality advertising strategies. This kind of integrated approach ensures all your hard work designing the filter translates into measurable engagement.
Measuring Success and Refining Your Strategy
Getting your filter live is a massive win, but don't pop the champagne just yet. The real work begins now. To figure out if your design actually landed with your audience and to sharpen your next campaign, you've got to get friendly with the data. Snapchat’s analytics dashboard is where your creative flair meets cold, hard numbers, giving you the insights you need to prove ROI and refine your entire strategy. This isn't just about chasing vanity metrics. It's about translating data into a clear roadmap for what to do next. Every single number tells a story about how people interacted with your creation. Once you learn to read that story, you stop just designing filters and start engineering shareable experiences that deliver genuine results.
Decoding Key Performance Metrics
Once your campaign wraps up, Snapchat will serve you a platter of data. It can look like a lot at first glance, but you only need to focus on a few core metrics to get a solid picture of how things went. These are the numbers that truly matter. Here’s what you need to keep your eye on:
- •Views: This is the total number of times your filter was seen within a Snap, whether in a Story or a direct message. Think of it as the top-level indicator of your filter's overall reach.
- •Uses: This metric counts how many times someone actually applied your filter to their Snap. It's a much more powerful engagement signal than views because it shows how many people actively chose to play with your design.
- •Shares: This tracks how many Snaps created with your filter were sent directly to friends. High shares are gold, they mean your filter was compelling enough for people to personally recommend it.
- •Captures (or Saves): This is the number of times a user saved a Snap using your filter to their Memories. A high capture rate signifies real value; the user loved the result so much they wanted to keep it for themselves.
- •Playtime: For AR Lenses, this measures the average time users spent interacting with the Lens before they hit send. It's a brilliant metric for gauging just how engaging and fun your experience really is.
Turning Insights into Actionable Improvements
Just knowing the numbers is half the battle; you have to interpret what they're telling you. This is where you can properly diagnose what hit the mark and what missed. For instance, getting high views but seeing low uses might suggest your filter didn't have a strong enough hook to encourage interaction, or maybe your targeting was a bit too broad.
A classic scenario we see is high captures but low shares. This can be a major red flag that your branding is too heavy-handed. People love the effect for their own photo, but they're hesitant to send what feels like a blatant advert to their mates.
Analysing these metrics also helps you get a better handle on your audience. While Snapchat is famous for its younger demographic, it's crucial to remember how diverse the user base is here in the UK. For instance, users aged 35-44 make up a significant 38% of the platform's users, with big interests in movies and gaming. By digging into your filter's performance data, you can see which of these valuable consumer groups are actually engaging, allowing you to create much more targeted designs next time. You can discover more about Snapchat's diverse user statistics and what they mean for brands. This whole analytical process should be a cycle. The insights from one campaign should feed directly into the creative brief for the next one. Did a simple 2D overlay smash the performance of a complex 3D Lens? Was playtime way higher when you included an interactive trigger? Use this data to double down on what truly resonates, making sure every filter you design from here on out is more effective than the last.
Got Questions About Snapchat Filter Design?
When you’re first diving into creating Snapchat filters, a few practical questions always pop up. Let's get those sorted so you can move forward with confidence. Here are the quick, no-nonsense answers to what brands usually ask.
How Much Does a Snapchat Filter Cost in the UK?
The price really swings depending on what you’re trying to achieve. If you're running a simple, temporary On-Demand Geofilter for a local event, you could be looking at as little as £5, £20 per day. It's incredibly accessible for small-scale promotions. On the other hand, a nationally targeted, sponsored AR Lens is a much bigger investment. These campaigns are run on a bidding system, so for a major brand push, the budget can easily climb into the thousands of pounds.
How Long Does Filter Approval Take?
Snapchat says to allow up to 24 hours for a review, but from my experience, it’s often much quicker than that. I’ve seen approvals come through in just a few hours.
That said, don't leave it to the last minute. Always aim to submit your filter at least 2-3 business days before your campaign needs to be live. This buffer is your best friend, it gives you breathing room for any unexpected revisions or delays and keeps the launch stress-free.
Can I Put My Company Logo on a Filter?
Absolutely! In fact, for sponsored filters, clear branding isn’t just allowed; it’s a requirement. As long as you own the legal rights to your logo or branding, you should definitely include it. Just be careful about what else you add. Snapchat is very particular about third-party assets. You absolutely cannot include:
- •Logos or trademarks from other social media platforms (a big no-no).
- •Any kind of hashtag.
- •URLs that don't work or link out to dodgy sites.
Stick to these guidelines, and you’ll sail through the approval process. Ready to create a Snapchat filter that genuinely captivates your audience? Studio Liddell has been producing high-quality digital content since 2019, from engaging animations to immersive XR experiences. Let our expertise bring your vision to life. Learn more about our services.