Mobile App Building: How to Turn Your Idea into a Launch-Ready Product
Building a mobile app isn't a linear path from A to B. It’s a journey that unfolds in distinct phases: defining your idea, picking the right tech, crafting the user experience, building the thing, and finally, getting it out into the world. But the most crucial part happens long before a single line of code is written. It’s all about making sure your app solves a real problem for real people.
Defining Your App Before You Start Building
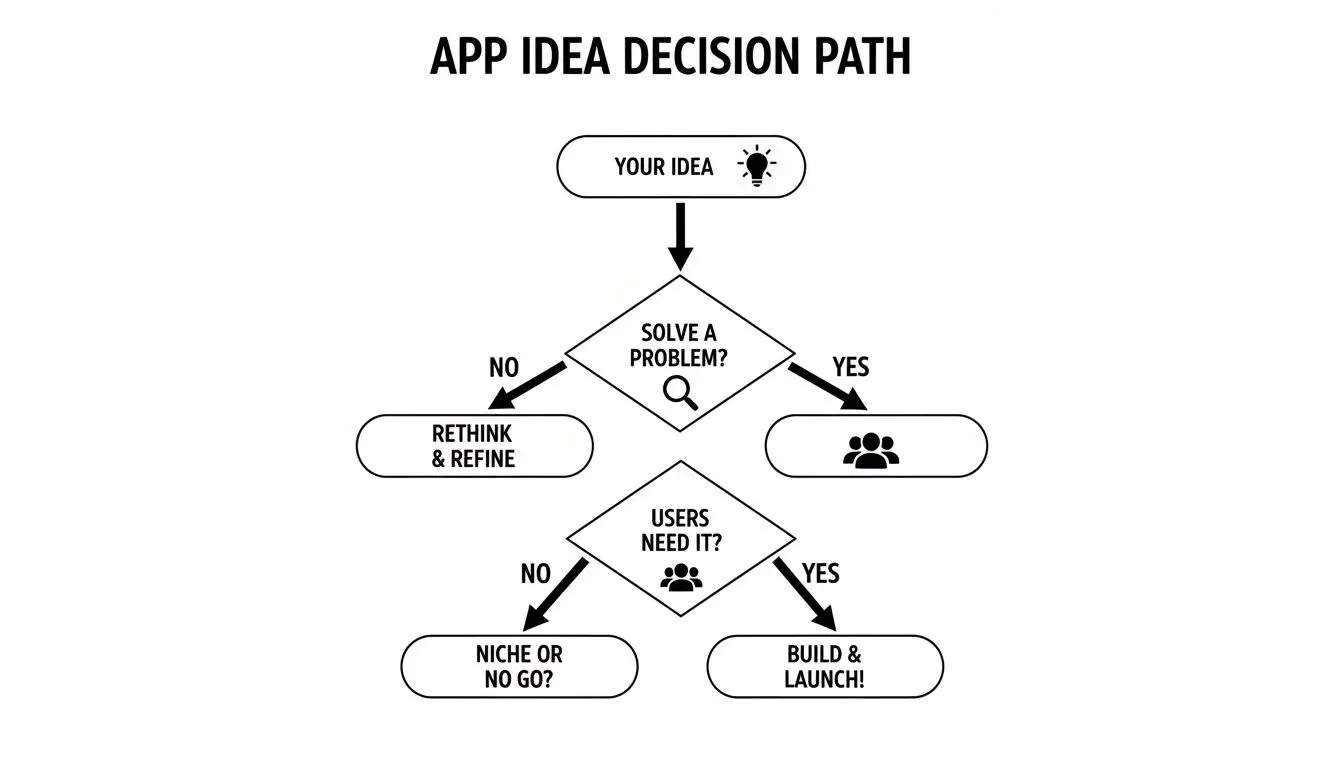
Every great app starts with a powerful question: why? Getting this foundational stage right means digging deep into the problem you're solving, ensuring there’s a genuine need before you commit your time and money. Many apps fail to gain traction simply because the creators skipped this vital step. The process kicks off with solid market research, not just finding articles that confirm what you already believe. It's about getting laser-focused on your target audience and building out detailed user personas. These aren’t just checklists of demographics; they're rich, semi-fictional characters based on real data, representing the very people you want to help. An app for a busy parent has a completely different set of needs than one designed for a university student. What are their goals, their frustrations, their daily routines?
Understanding the Competitive Landscape
Once you know who you're building for, it's time to size up the competition. Don't just list their features. Dive into their user reviews. What do people love? And more importantly, what drives them crazy? Those frustrations are your golden opportunities. Your goal isn't always to do more than everyone else, but to do something better or serve a niche that’s being ignored.
A classic mistake is trying to build the "do-everything" app right out of the gate. Instead, zero in on a core value proposition that makes you stand out. Is your app faster? Easier to use? More beautiful? Does it solve one specific problem better than anyone else? That’s how you gain a foothold.
All this research leads you to define your Minimum Viable Product (MVP). The MVP isn’t a buggy, stripped-down version of your app. It’s the simplest, most elegant version that still delivers on its core promise to your first wave of users. It should only have the essential features needed to solve that primary problem. This strategy lets you launch faster, get real-world feedback, and make changes based on how people actually use your app, not just on your assumptions.
Setting Clear Goals and KPIs
Finally, tie all this strategic planning to goals you can measure. What does success look like? "Getting lots of downloads" isn't a goal; it's a wish. You need specific Key Performance Indicators (KPIs).
- •User Engagement: How often will people use your app? (Think Daily Active Users).
- •User Retention: What percentage of users come back after the first week?
- •Monetisation: If you plan to make money, what's your target revenue per user?
These metrics become your North Star, guiding every decision from here on out. The UK mobile app market is booming, fundamentally changing how businesses approach digital products. By 2024, the UK mobile app market hit £12.1 billion in revenue, with analysts expecting it to climb to around £28.1 billion by 2030. With smartphone usage through the roof, the potential audience is massive. This initial definition phase is the blueprint for your entire project. To help you navigate the full journey from a spark of an idea to a polished product, a comprehensive guide to building a mobile app from idea to launch can be a massive help. Get this part right, and you're not just building an app, you're building the right app.
Choosing Your Development Path and Technology Stack
Picking the right technology for your project is one of the most critical decisions you'll make when building a mobile app. This choice affects performance, user experience, speed to market, and your budget for years to come. It’s not about chasing the latest trend, it's about finding the perfect fit for your specific goals. This decision tree gives you a good starting point for visualising the initial questions that should guide your choice of tech.
As the flowchart shows, the core purpose of your app, whether it's there to solve a practical problem or deliver a completely immersive experience, is what really points you toward the right development path. Let's break down the main options you’ll be weighing up.
The Native Approach for Peak Performance
Going native means building an app specifically for a single platform. For iOS, developers use Swift or Objective-C, and for Android, they'll use Kotlin or Java. The result? Unbeatable performance and responsiveness. Because you're building with the platform's own programming language, you get direct, unrestricted access to every device feature, the camera, GPS, accelerometer, you name it. This leads to a silky-smooth, deeply integrated user experience that feels completely at home on the device. But all that power comes with a trade-off. Building natively means maintaining two separate codebases, which usually requires two separate development teams. This translates to a larger budget and a longer timeline.
When to go Native: Choose the native path when your app must deliver high performance. Think graphically intense games, complex animations, or apps that lean heavily on specific device hardware. If a flawless, top-tier user experience is your number one priority, native is often the best investment.
Cross-Platform for Efficiency and Speed
Cross-platform development offers a tempting alternative: write your code once and deploy it on both iOS and Android. Frameworks like React Native and Flutter are the big players here. They allow a single team to build and maintain the app, which can slash both development time and cost. This efficiency is why these frameworks have become so popular. In the UK, there's been a clear shift towards faster, more iterative ways of building apps. To keep up, many UK organisations are embracing cross-platform development; between 2023 and 2024, roughly 30% of UK enterprises adopted Flutter or React Native to get their products to market faster and keep budgets in check. You can dig deeper into these industry movements by exploring IBISWorld's research on app development trends in the United Kingdom. So, what's the catch? Sometimes, there's a slight performance dip compared to a true native app, and getting access to the very latest OS features might come with a short delay. For the vast majority of business, e-commerce, and content-focused apps, the performance is more than good enough to deliver a fantastic user experience.
Game Engines for Immersive Experiences
But what if your app isn't about filling out forms or scrolling through lists? What if you're building rich, interactive 3D worlds? This is where game engines like Unity and Unreal Engine step in. Originally designed for video games, their power now extends far beyond entertainment. These engines are the go-to choice for:
- •Augmented Reality (AR) and Virtual Reality (VR) apps
- •Complex training simulations for medical or industrial use
- •Interactive product configurators and architectural visualisations
- •Any app that relies on high-fidelity 3D graphics and complex physics
Unity and Unreal provide sophisticated tools for rendering, animation, and interaction that would be almost impossible to build from scratch. They are also inherently cross-platform, capable of deploying to mobile, desktop, and XR headsets from a single project. For projects this complex, it’s almost always essential to engage a specialist studio with deep expertise in these engines.
Comparing App Development Approaches
Choosing between these paths comes down to balancing your ambition with your resources. This table summarises the key differences to help you see where your project might fit.
| Approach | Core Technology | Best For | Performance | Development Cost & Time |
|---|---|---|---|---|
| Native | Swift/Objective-C (iOS), Kotlin/Java (Android) | High-performance apps, complex animations, heavy device integration. | Highest | Highest |
| Cross-Platform | React Native, Flutter | Business apps, e-commerce, content platforms, MVPs. | Good to Great | Moderate |
| Game Engine | Unity, Unreal Engine | 3D games, AR/VR, interactive simulations, architectural visualisation. | Excellent for graphics | High (Specialised) |
Ultimately, making the right decision requires a clear look at your priorities. A deep dive into your specific needs will tell you whether a native, cross-platform, or game engine approach is the right foundation for your vision. To see how these technologies are applied in the real world, check out some examples of our custom app development projects. Choosing the right path at the start sets you up for success down the line.
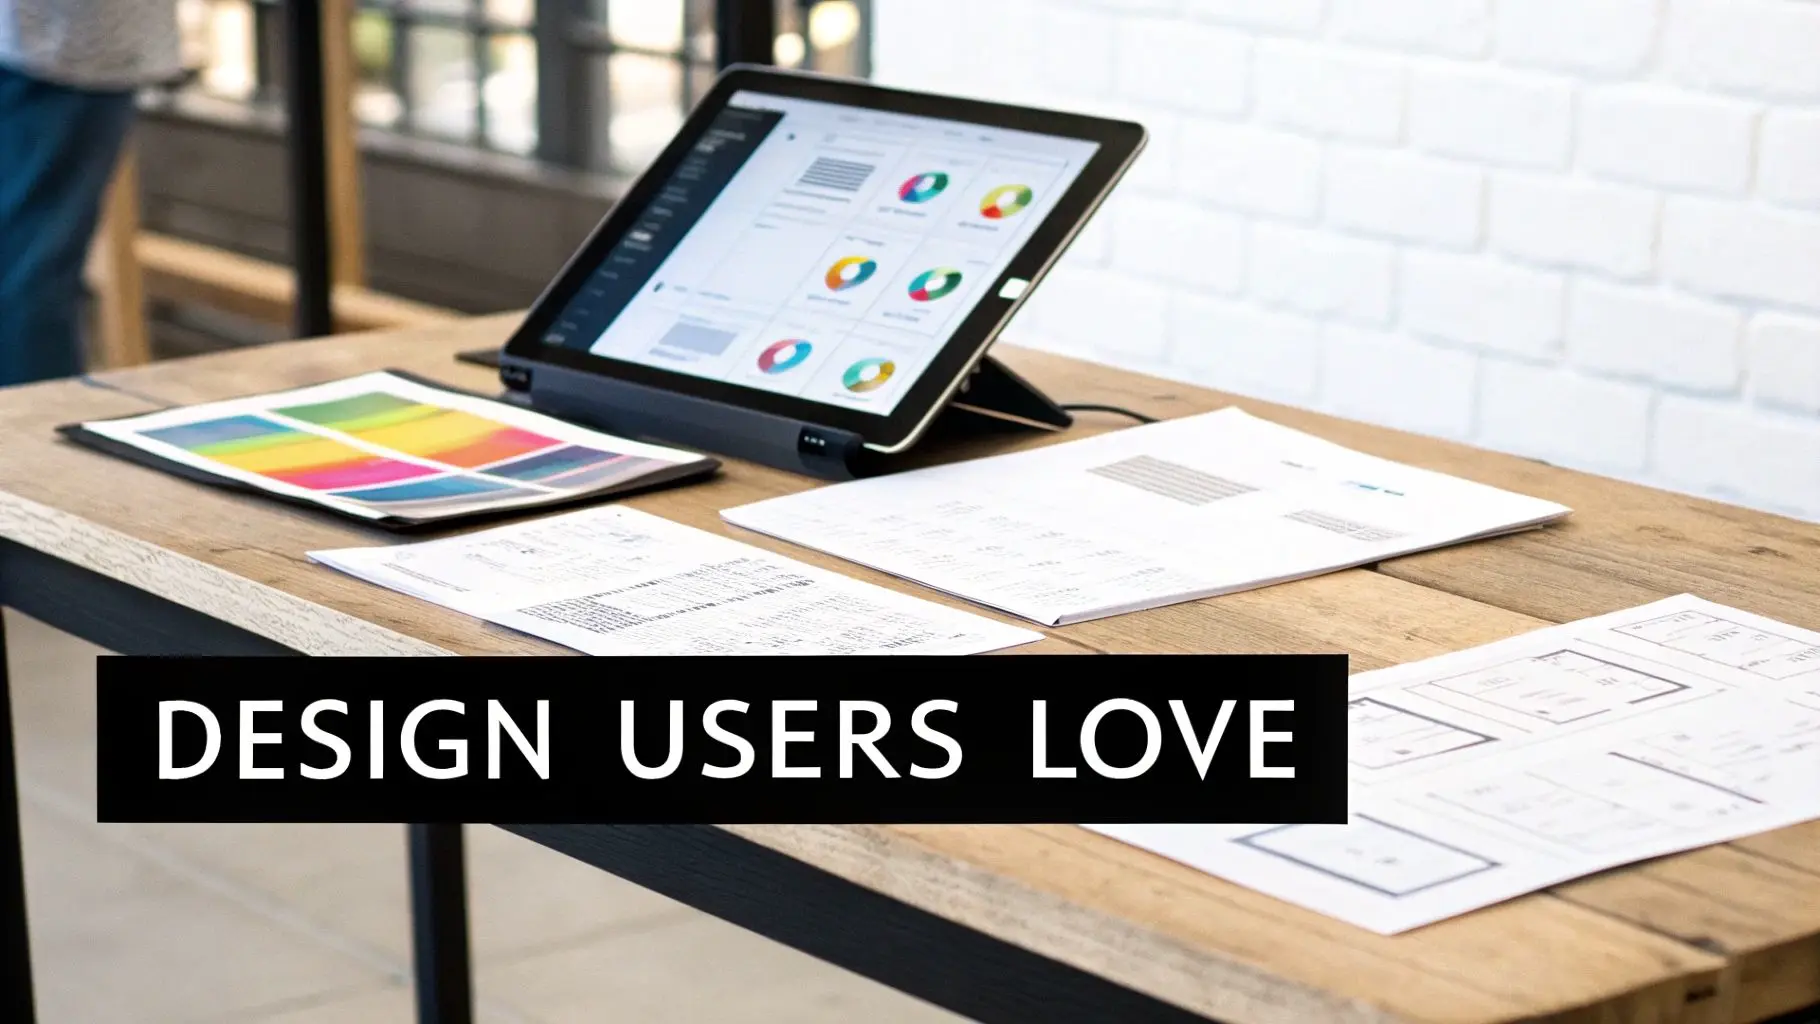
Designing an Experience Users Will Love
A brilliant app idea can fall flat if the design is clunky, unintuitive, or confusing. This is where your vision becomes tangible. Great design is the bridge between your concept and a product people genuinely enjoy using, blending an intuitive user experience (UX) with a beautiful user interface (UI) so they work in perfect harmony. This journey from idea to interactive design doesn't start with colours and fonts, but with structure.
Building the Blueprint with User Flows and Wireframes
Before you think about how your app will look, you need to map out how it will work. This process kicks off with creating user flows, simple diagrams that chart the path someone takes to get something done. For instance, what are the exact steps from opening your app to making a purchase? Once you've defined these journeys, it's time for wireframes. Think of them as the architectural blueprints for your app. They're simple, low-fidelity layouts that focus purely on structure, hierarchy, and function. All the shiny stuff like colours and images is intentionally left out. Wireframing helps you:
- •Define the information architecture so content is organised logically.
- •Clarify the core features on each screen without distractions.
- •Spot potential usability issues early on, saving a huge amount of time and money down the line.
This blueprinting phase is all about function over form. It forces you to solve hard structural problems before you get invested in aesthetics, which is a smarter and more efficient way to build.
Bringing Your Design to Life with Prototypes
With a solid set of wireframes, the next step is building an interactive prototype. This is a clickable, mid-fidelity model of your app that simulates the final user experience. Using tools like Figma or Adobe XD, designers link screens together to create something tangible that you and your stakeholders can navigate. Prototyping is a vital part of the process. Why? Because it lets you test your assumptions with real users before a single line of code gets written. You can watch how people interact with your app, see where they get stuck, and gather honest feedback to refine the entire journey.
A prototype isn’t just a demo; it’s a crucial validation tool. It’s the difference between saying, “I think this will be easy to use,” and knowing it is because you’ve watched five different people successfully complete a task without any guidance.
Polishing the Visuals with UI Design
Once the user experience has been mapped out and validated, it’s time to bring in the User Interface (UI), the visual layer that your users see and touch. This involves creating a cohesive visual language that clicks with your brand identity. Key UI considerations include:
- •Colour Palette: Using colour psychology to evoke the right emotions and guide the user's eye.
- •Typography: Choosing fonts that are legible, scalable, and reflect your brand's personality.
- •Iconography: Designing clear, universally understood icons that make navigation a breeze.
- •Imagery & Animation: Selecting visuals and motion that enhance the experience rather than distract from it.
The goal is to create an interface that's not only beautiful but also intuitive and accessible. To push the experience further, think about the impact of thoughtful micro-interactions. These small, responsive animations provide feedback and make the app feel alive and satisfying to use. For apps in specialised fields like training, education, or entertainment, high-quality 2D or 3D animation can be a game-changer. It can transform a purely functional tool into an unforgettable, engaging experience, capable of explaining complex ideas or telling compelling stories in a way static screens simply can't. This is where the expertise of a specialist studio can make all the difference, turning a good app into a truly great one.
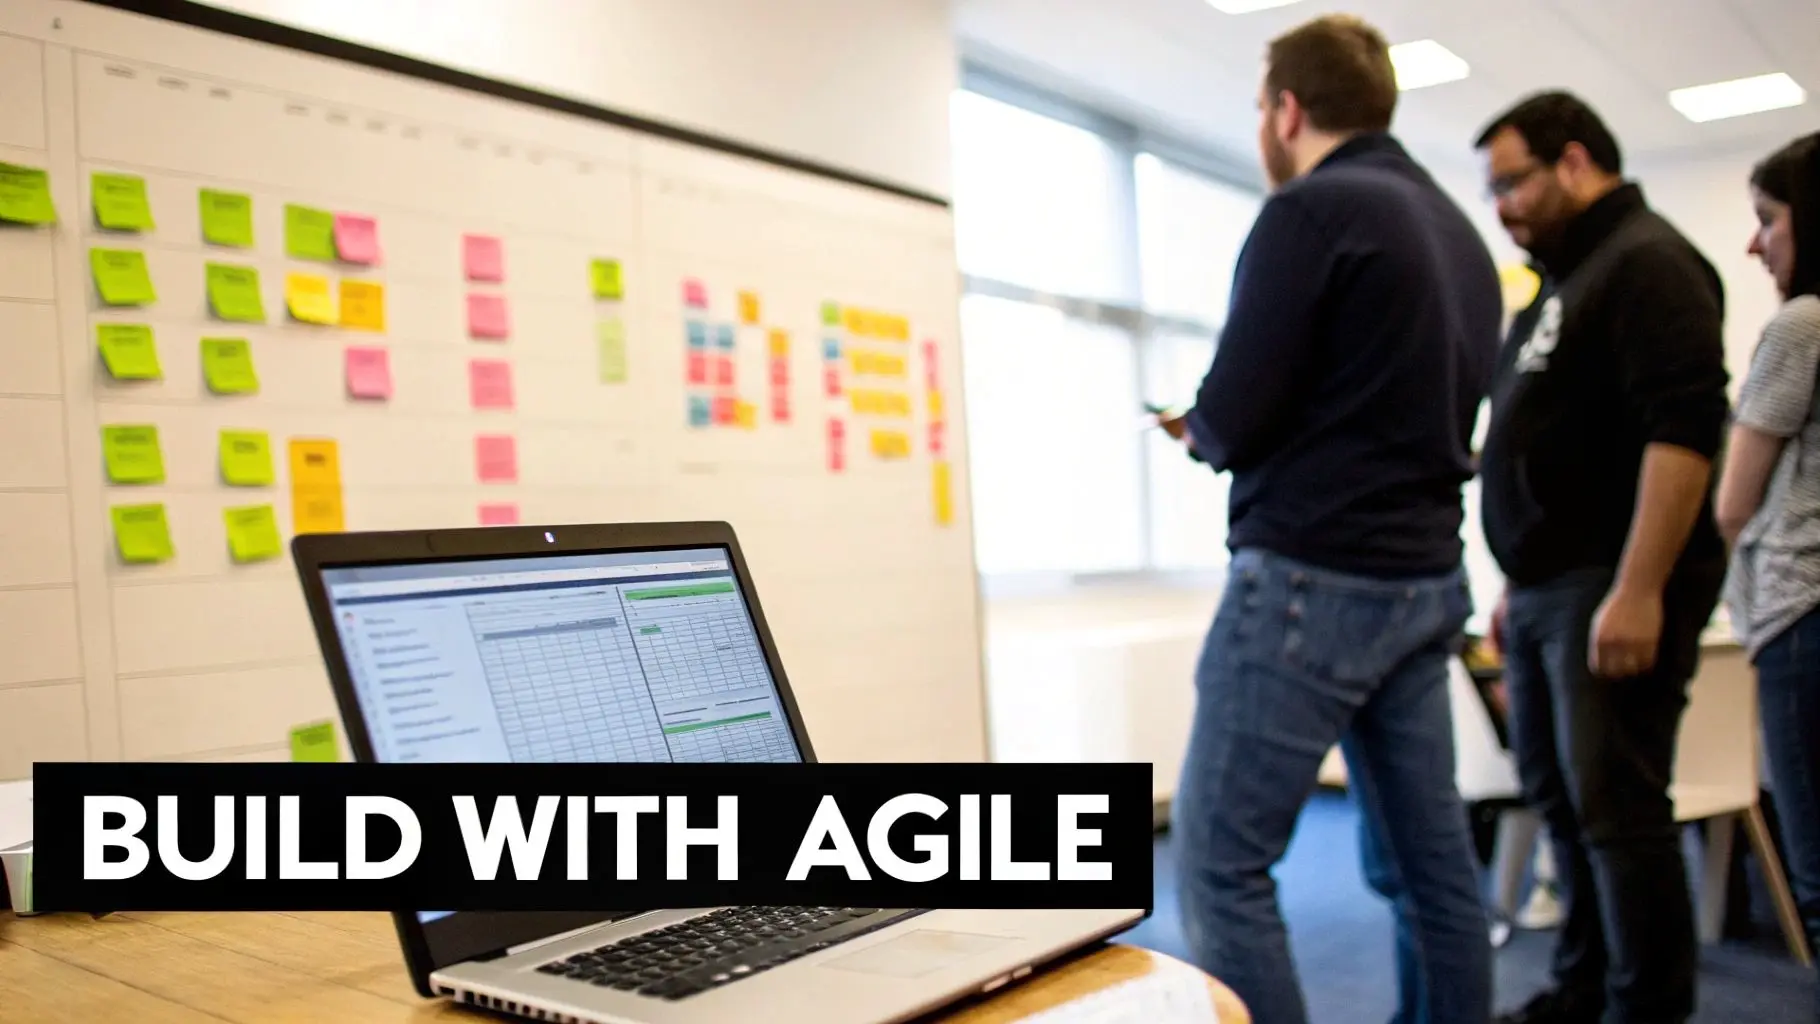
Building Your App with an Agile Mindset
This is where the rubber meets the road, turning your validated ideas and slick designs into a real, functional product. Forget the old-school approach of disappearing for months and coming back with a "finished" app. Modern development is all about staying flexible with an agile mindset, breaking the project into small, manageable cycles known as ‘sprints’. Working in sprints, which usually last from one to four weeks, gives everyone incredible flexibility. At the end of each sprint, the team delivers a tangible, working piece of the app. This means you get constant opportunities to see the progress, give feedback, and tweak things along the way. It’s the best way to ensure the final product is exactly what you need, not just what was on paper months ago.
During this process, the two core parts of your app, the front-end and the back-end, are built in parallel.
Crafting the User-Facing Experience
Front-end development is everything your user sees, touches, and interacts with. It’s the art of taking static designs and prototypes and bringing them to life as a responsive, intuitive interface. Using the tech stack chosen earlier, whether that’s Swift for native iOS, Kotlin for Android, or a framework like React Native, developers build out every screen, button, and animation. The goal here is to create an experience that feels seamless and works perfectly, no matter the device or screen size. This is where visuals meet logic, making sure a button doesn't just look good but actually does what the user expects.
Powering the App from Behind the Scenes
While the front-end gets all the attention, the back-end is the unsung hero, the powerful engine that makes everything run. This is the server-side of your app, handling all the heavy lifting out of sight. The back-end is made up of a few key components:
- •The Server: A powerful computer that fields requests from your app.
- •Application Logic: The core code that defines your business rules and powers the app's functionality.
- •The Database: Where all crucial data, user accounts, content, you name it, is kept safe and organised.
Think about what happens when someone signs up. The front-end sends their details to the back-end, which then checks the info, creates a new user in the database, and pings a confirmation back to the device. This system needs to be secure, efficient, and ready to scale to thousands of users. Even a simple app has this underlying complexity, which is why understanding how a simple MVP app can make you millions is all about starting with a solid foundation.
What’s an API? The front-end and back-end don't just chat directly. They communicate using an Application Programming Interface (API). Think of an API as a tightly controlled messenger service. It follows a strict set of rules to carry requests from the app to the server and deliver the server's responses back again.
The Non-Negotiable Step: Quality Assurance
Building features is one thing, but making sure they work flawlessly is equally critical. Quality Assurance (QA) is the process of methodically hunting down bugs, spotting usability problems, and confirming the app does everything it's supposed to do before it gets into your users' hands. Skipping or rushing QA is the quickest way to kill your app's launch. Nothing sinks an app faster than bad reviews from buggy, unstable software. It damages your reputation and sends your uninstall rate through the roof. A proper QA process is multi-layered and involves different kinds of testing:
- •Functional Testing: Does every feature work as designed? Does tapping "Add to Basket" actually add the item to the basket?
- •Performance Testing: How does the app handle a weak network connection? Does it drain the battery? We test for speed and responsiveness under all sorts of conditions.
- •Usability Testing: We put the app in front of real people to see where they get stuck or confused. It’s the ultimate reality check for your design.
- •Security Testing: Actively probing for weaknesses that could expose user data or allow someone to break in.
- •Compatibility Testing: Making sure the app looks and works great across a whole zoo of different devices, screen sizes, and OS versions.
This cycle of building, testing, and refining happens sprint after sprint. It’s how your project steadily evolves from a collection of designs into a polished, robust, and launch-ready application.
Launching Your App and Planning for Growth
Getting your app through development is a huge win, but it’s the starting line, not the finish. The launch phase is where your product meets the real world, and navigating the app stores is a project in itself, with its own rules and pitfalls. What follows is even more crucial: the work of ensuring your app doesn’t just launch but actually grows. Success here isn’t about luck. It’s about a methodical approach to submission, discovery, and post-launch iteration. A poorly managed launch can lead to costly delays and squander that all-important initial momentum.
Navigating the App Store Submission Process
Both the Apple App Store and Google Play Store have their own specific rulebooks, and failing to tick every box is a common reason for rejection. Getting this right the first time can save you weeks of back-and-forth with reviewers. Before hitting 'submit', you need to have your ducks in a row:
- •App Store Connect & Google Play Console: First, you'll need developer accounts for both platforms. The setup can be a bit of a slog, but it's essential.
- •Comprehensive Metadata: This is everything from your app's name and description to your privacy policy and category. Be precise and completely transparent.
- •High-Quality Visuals: Prepare compelling screenshots and ideally a preview video. These visuals need to clearly show off your app's core features and user interface.
- •Thorough Testing: Ensure your app is free of major bugs and crashes. Both Apple and Google have little patience for unstable applications and will reject them outright.
A frequent stumbling block is an incomplete or unclear app description. Reviewers need to understand exactly what your app does and why it exists. Vague descriptions or functionality hidden behind a login, especially without providing test credentials, will almost certainly lead to a rejection email.
Getting Discovered with App Store Optimisation
Once your app is ready for the stores, your focus shifts to discovery. App Store Optimisation (ASO) is basically SEO for mobile apps. It’s the process of improving your app’s visibility within the app stores to drive more organic downloads. Effective ASO involves optimising several key elements:
- •App Title: Including your most important keyword alongside your brand name can give you a significant visibility boost.
- •Keyword Fields: Apple gives you a specific keyword field to fill out. For Google Play, keywords are pulled from your description. Research what your target audience is actually searching for.
- •Description: This isn’t just a list of features. Craft a compelling story that highlights your app's benefits while naturally weaving in your researched keywords.
- •Icon and Screenshots: Your visual assets are your digital storefront. A professional, eye-catching icon and informative screenshots can dramatically increase your download conversion rate.
Think of ASO as a living process, not a one-and-done setup. You need to monitor your keyword rankings, keep an eye on competitors, and be ready to refine your metadata as you learn what resonates with users.
Building a Strategy for Post-Launch Success
A successful launch is fantastic, but it's just the beginning. The apps that truly succeed are the ones that evolve based on real-world data and user feedback. A solid post-launch plan is non-negotiable for long-term growth and user retention. Your strategy should revolve around three core activities:
- Monitor Analytics: Keep a close eye on key metrics like daily active users, session length, retention rates, and crash reports. These numbers tell the real story of how people are engaging with your app.
- Gather User Feedback: Actively encourage and listen to user reviews. Set up channels for direct feedback, whether through email, social media, or an in-app form. This is your single most valuable source of ideas for improvement.
- Plan for Updates: Regular updates do more than just fix bugs. They show users you're invested in the product and give you opportunities to introduce new features, refine the user experience, and adapt to new operating systems.
A static app is a dying app. The market moves too quickly to launch a product and assume it's "done." Your first version is a starting point; your roadmap for future updates is what will keep your audience engaged and invested.This cycle of monitoring, listening, and updating is what separates hit apps from those that vanish after a few months. It's also where you'll get the real-world data needed to refine your monetisation strategy. For a deeper dive, exploring some proven mobile app monetisation models can provide valuable clarity for your long-term financial planning. This proactive approach ensures your app not only launches effectively but has a real chance to thrive.
Your Questions Answered
When you're diving into app development, a lot of questions come up. Most queries we hear boil down to cost, timing, and the best technical path to take. Let's clear up some of the most common ones.How Much Does It Cost to Build a Mobile App in the UK?
This is the big one, and the honest answer is: it varies hugely. For a straightforward app with a focused set of features, you might be looking at a starting point around £20,000. But for something more ambitious, think complex features, bespoke animations, or heavy back-end work, the investment can easily climb past £150,000. What drives that number up?- •The sheer number and complexity of the features you need.
- •Your chosen tech stack, native, cross-platform, or a game engine like Unity.
- •The level of custom UI/UX design and animation required.
- •Whether you need a new back-end built or complex APIs integrated.
This is why a detailed quote, based on a solid project scope, is non-negotiable. It's the only way to get a realistic figure.
How Long Does the Mobile App Building Process Take?
Patience is a virtue here. A typical app project, from the first spark of an idea to seeing it live in the app stores, generally takes between 4 and 9 months. That window covers everything: initial discovery and planning, design, development, thorough testing, and finally, deployment. Of course, a lean MVP can be turned around quicker, sometimes in as little as 3-4 months. On the flip side, a large-scale enterprise system or a graphically rich XR experience built in Unity or Unreal could take a year or more to get just right.
Do I Need a Separate App for iOS and Android?
Not necessarily, and this is where you can make smart strategic choices. Building natively means creating two separate apps from the ground up, one for iOS and one for Android. It’s intensive but gives you maximum performance. However, modern cross-platform tools like Flutter or React Native are fantastic alternatives. They let us build for both platforms from a single codebase, which can be a game-changer for your timeline and budget.
The right call depends on your app's specific goals. If you need raw power, flawless performance, or deep access to device-specific hardware, native is often the winner. For the vast majority of apps, though, a cross-platform approach hits that sweet spot between cost-efficiency and a brilliant user experience.
What Is an MVP and Why Is It Important?
MVP stands for Minimum Viable Product. Think of it as the leanest, most focused version of your app that solves one core problem for your ideal user. It's not a prototype or a buggy mess; it's a polished, strategic first release. Why launch an MVP instead of waiting for the all-singing, all-dancing version? The benefits are huge. It lets you:
- •Get your product into the hands of real users much faster.
- •Collect genuine feedback to see what people actually do, not what they say they'll do.
- •Prove your core concept works before you pour more resources into it.
- •Use real data to decide what to build next, taking the guesswork out of your roadmap.
In short, an MVP is all about learning as much as possible while risking as little as possible. At Studio Liddell, we take complex app ideas and shape them into beautifully polished, high-performing digital experiences. Whether it's a detailed training simulation or a captivating consumer app, we've got the technical skill and creative flair to make it happen. Book a discovery call to discuss your app concept today.